

To be honest, this article only for the photographer who need Background removal service or they want to do it himself. A photograph is incomplete without a beautiful and perfect background. It is been always said that background is the backbone of a photograph. Photographers sometimes shoot photos in their studios or somewhere outside. At a certain point, the post photography, the photographers or the clients may not get happy seeing the background of the photo. They may demand a re-shoot or a change in the background. It may prove costly and time-consuming at the same time. To save time and money, you should know how to change or remove the background of your photo using Adobe Photoshop. Adobe Photoshop has some amazing tools and techniques by which anyone can easily change or remove the background of the photograph. Photoshop pen tool works best for making the selection and cutting the objects precisely. But let us say that this job is pretty easy if you know how to use the tools and techniques of Photoshop or removing or changing the background. Here we are presenting you a pictorial tutorial and step by step process of changing the background of a photograph by using Adobe Photoshop PS3 and its tools and techniques easily.
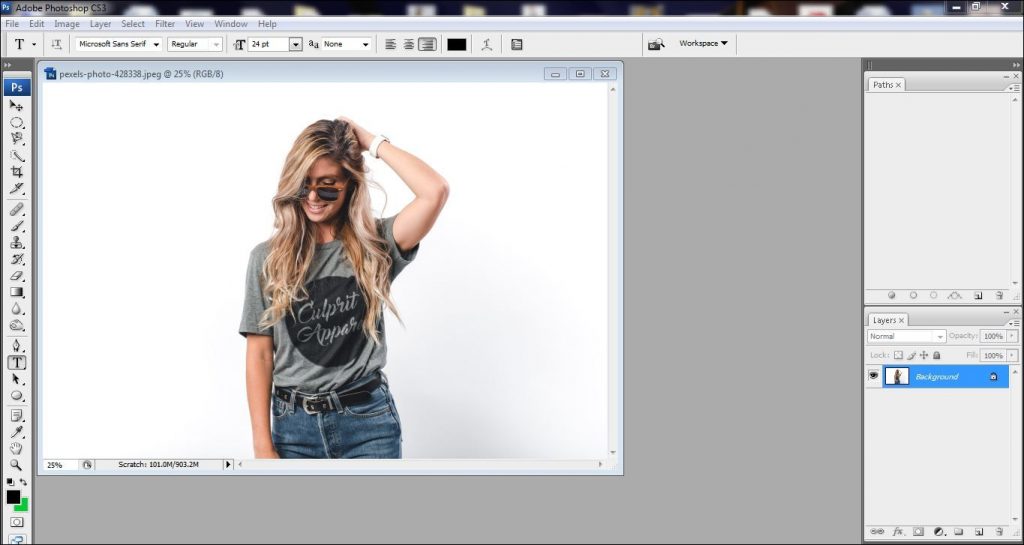
Step 1:
The first step is to open your required photo on Adobe Photoshop. Here, we have selected Adobe Photoshop Cs3 to work in. To start the working process of background changing/removal, we need to have the photo on the Photoshop app. There are 2 ways of opening or bringing the photo in Photoshop. You can just manually go to the menu bar and click on File>Open. Choose your desired photo from the windows and click on select. The photo will appear in Photoshop right after clicking on select. You can also drag the photo from anywhere on your computer to Photoshop. It will just take a few seconds to do.
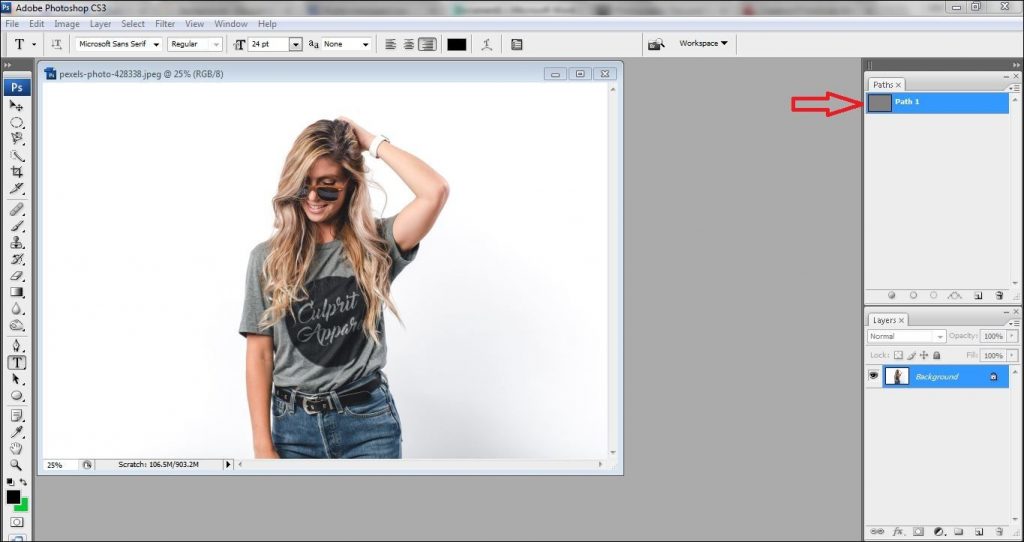
Step 2:
Since we have the photo on Photoshop now, we can start the process of background removal. There are some techniques for selecting the main object to transform it there. The best way is creating a clipping path. So, create a path named path-1 to start clipping path.
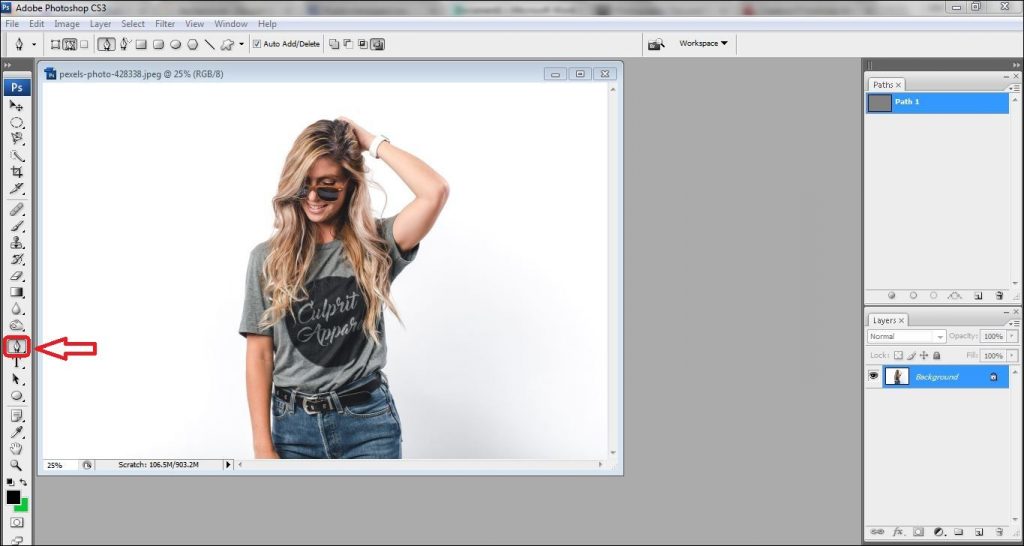
Step 3:
There are some tools in Adobe Photoshop which helps you to make the selection of clipping path. From all the tools, the pen tool is the best for clipping path work. The pen tool helps you to make the clipping path precisely and cut out the object perfectly. So we are selecting a pen tool to work. You can go to the toolbar and click on the “pen” icon to activate the pen tool. You can also activate the pen tool just by pressing ‘p’ on the keyboard.
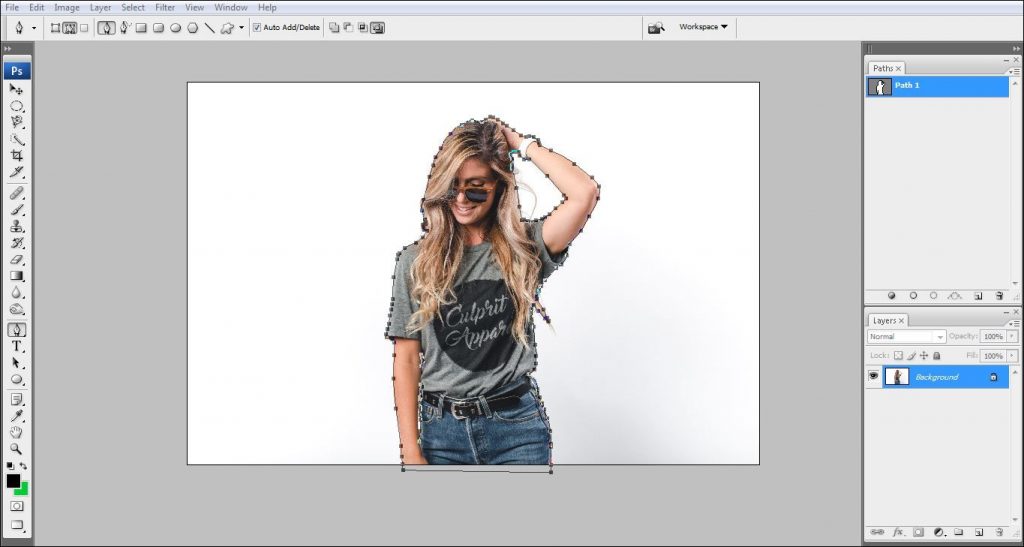
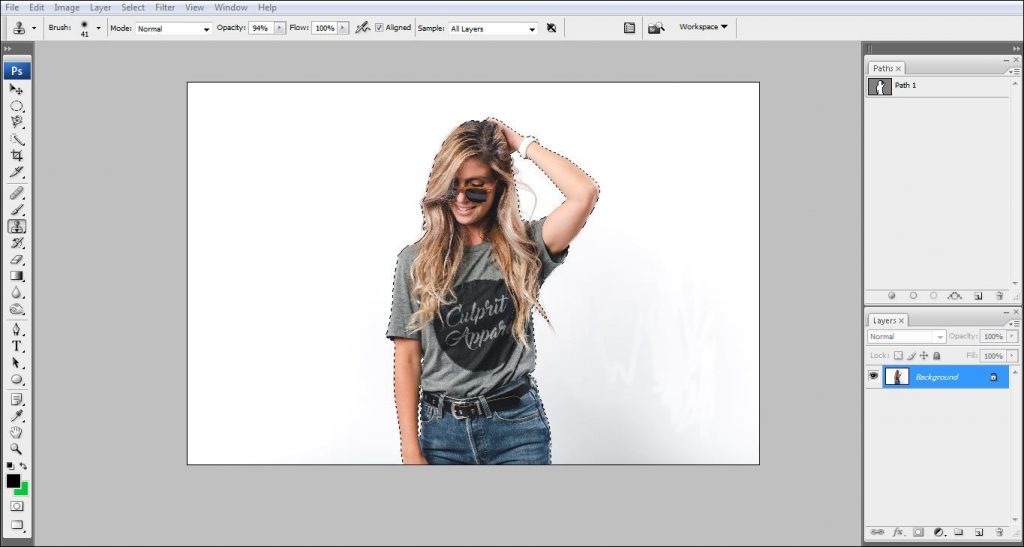
Step 4:
After selecting the pen tool, you are ready to draw the clipping path. We have drawn the clipping mask around the entire object very carefully. Remember, do not go beyond and under the line, make it perfect. Draw both the outline and the loop with pen tool so that you do not leave any of the areas of your subject for cutting out.
Step 5:
When you are done with drawing the clipping mask around the object, select the masked area to cut the object out from the background. To select the mask areas, click on ‘path 1′ and press ‘ctrl+enter’. Doing that, entire masked areas will be selected. Now, the object is ready to be transformed into another photo background.
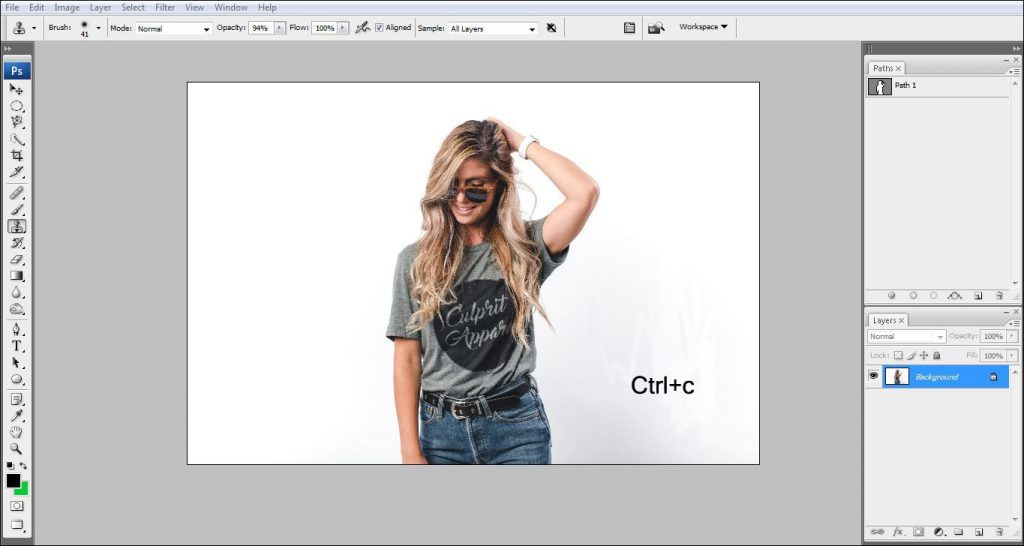
Step 6:
After making the selection of the object (clipping path) copy the masked areas. To do that, click on edit>copy or you can just press ‘ctrl+c’ for copying masked areas.
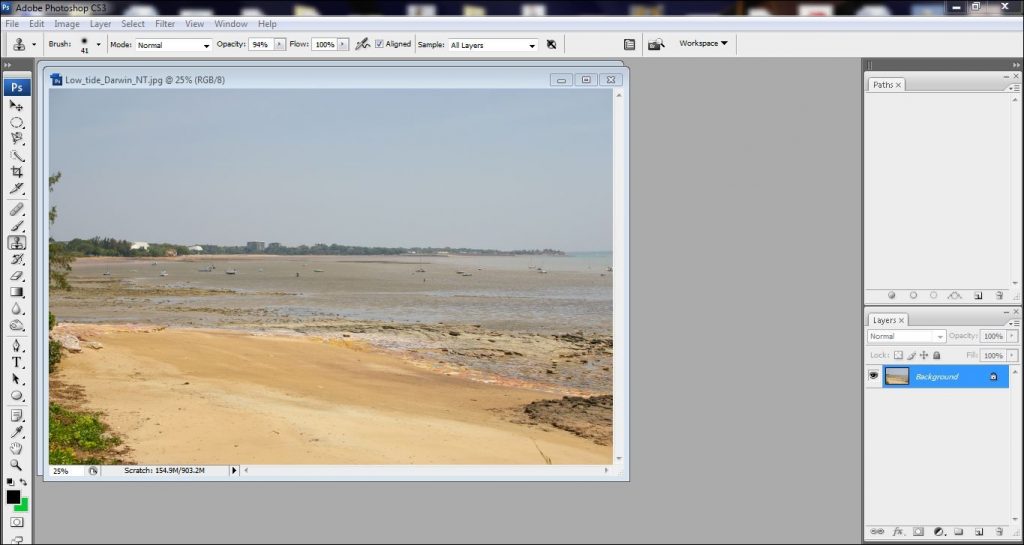
Step 7:
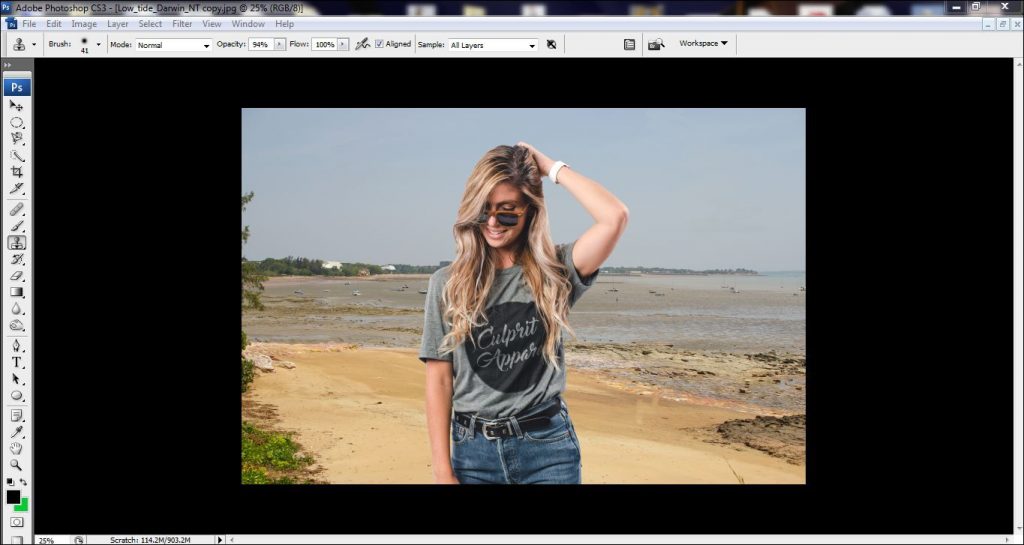
Now open another background photo as per your requirement to transfer the cut out object photo to your desire background photo. Here, we have chosen a beach photo as a background. Open the photo the same way we did on the first photo.
Step 8:
When you have opened the new background photo in Photoshop, we need to bring the cutout photo on this photo. There are 2 ways of bringing the cutout photo. Since we have copied the selected part of our main object, we need to paste that on this new background photo. You can click on ‘Edit>paste’ or press ‘ctrl+v’ to bring the cut out the photo here. The cut out object has appeared when we clicked on paste.

Step 9:
The position of the object is not looking good this way. We need to change the position of the object. To do that, we have to select the move tool from the tool bar. Move tool helps to move the cut out object as per your requirement.
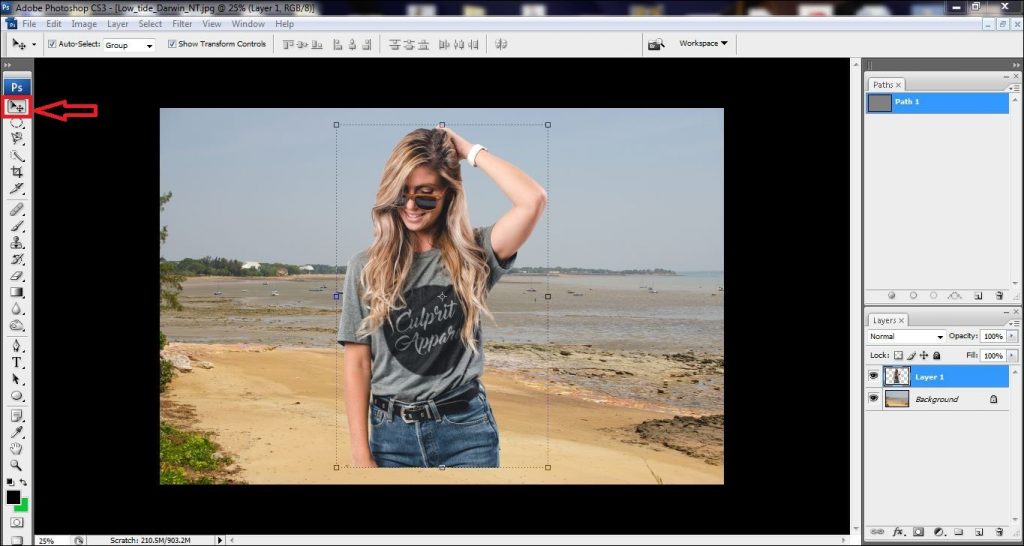
Step 10:
After selecting the move tool, we have moved the object a bit down to match with the photo and make it look perfect. After positioning the object, click enter to complete the work.
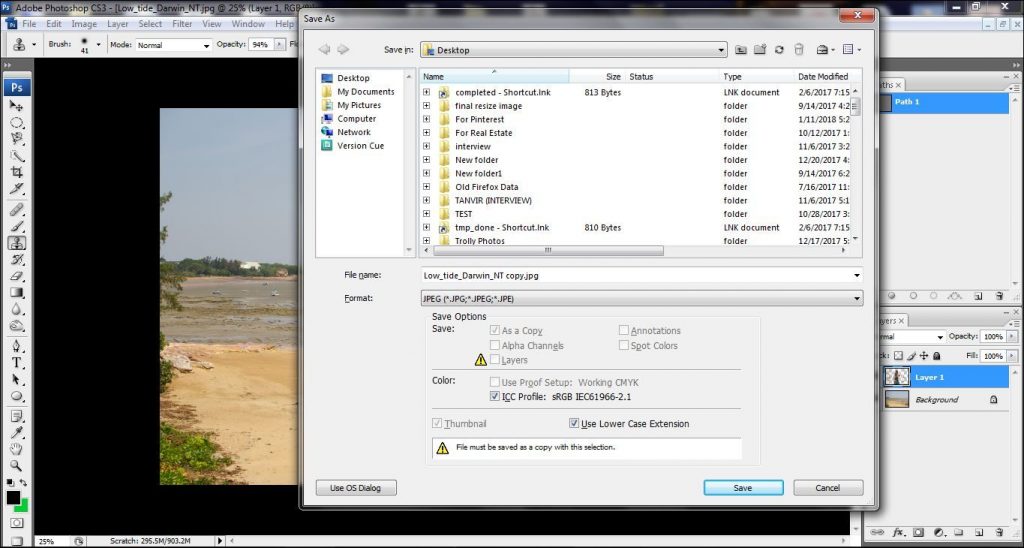
Step 11:
At last, you need to save the photo on your computer. To save the photo, go to File>Save as and select your desired format and click ok.
This is how you can change the background just by following these easy 11 steps and using Adobe Photoshop CS3. This service is wanted by many of the companies such as e-commerce companies, fashion industry, product companies, print media, garment industries, beauty industry, jewelry companies, manufacturing industry, and many others. These 11 steps will save your time and money. You can now change your photo background anytime you want to.