

Drop shadows serve as a popular design technique that adds depth and realism to images. Adobe Photoshop offers a variety of tools that make it easy to implement this effect. This guide presents a detailed, copyright-free walkthrough on how to add a drop shadow to elements in Photoshop.
Import Your Image into Photoshop for Drop Shadow
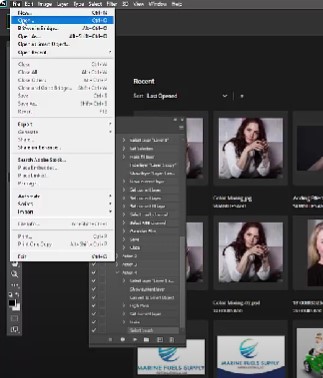
You should open or import your desired image in Adobe Photoshop using:
- Using the Record menu
- Open Photoshop.
- Go to Record > Open.
- Click Open after selecting the image you want to import.
- Utilizing the console alternate route
- Press Order + O (Mac) or Ctrl + O (Windows).
- Open Photoshop.
- Drag the picture record from your PC’s document pilgrim into the Photoshop window.
- The image will be added to a new layer in the Photoshop document after it has been imported. You can then resize, turn, and alter the picture depending on the situation.
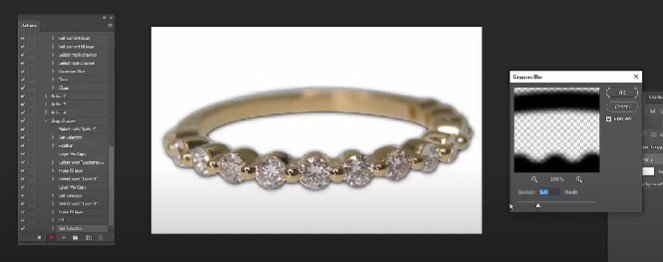
Within the Layers panel, pinpoint the specific layer where you intend to apply the drop shadow effect.
Access Layer Styles
There are two ways to access layer styles in Photoshop:
- From the Layers panel:
- First, you should select the layer for drop shadow.
- In the Layers panel, you should click thefxicon at the bottom of the panel.
- A list of available styles will appear.
- Click on a style to apply it to the layer.
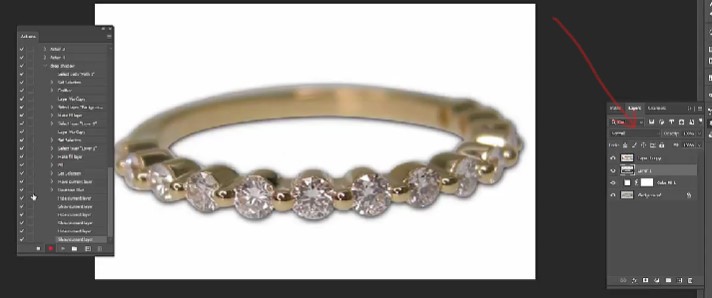
- From the Effects panel:
- First, you should select the layer that you want to apply in your style.
- In the Effects panel, click the Layer Styles category.
- A list of available styles will appear.
- Click on a style to apply it to the layer.
You can also import custom layer styles into Photoshop.
- Download the custom layer style file.
- In Photoshop, open the Layers panel.
- Click thefxicon (Layer Styles) at the bottom of the panel.
- Click the Load Styles button.
- Navigate to the folder where you saved the custom layer style file and select it.
- Click Open.

Here are some of the most common layer styles:
- Shadow: Adds a shadow to the edges of a layer.
- Bevel and Emboss: Adds a three-dimensional effect to a layer.
- Stroke: Adds a border to a layer.
- Inner Glow: Adds a glow inside the edges of a layer.
- Outer Glow: Adds a glow outside the edges of a layer.
- Drop Shadow: Adds a shadow below a layer.
- Satin: Adds a satin-like appearance to a layer.
- Color Overlay: Adds a solid color to a layer.
- Gradient Overlay: Adds a gradient to a layer.
- Pattern Overlay: Adds a pattern to a layer.
You can experiment with different layer styles to create a variety of effects in your Photoshop documents.
Apply the Drop Shadow
Inside the Layer Styles dialog, identify and enable the “Drop Shadow” option.
Customize the Drop Shadow Settings
Fine-tune the following parameters to craft your desired drop shadow:
- Blend Mode: Opt for a blend mode like “Multiply” or “Linear Burn” to match your vision.
- Opacity: Adjust the opacity to control the shadow’s intensity.
- Angle: Set the angle to dictate the shadow’s light source direction.
- Distance: Modify the distance to define the gap between the element and its shadow.
- Spread: Adjust the spread to influence the shadow’s size and softness.
- Size: Determine the overall shadow size to achieve the desired effect.
Preview and Refine
Use the preview to assess the changes and make necessary adjustments until the desired outcome is achieved.
Apply and Save
Click the “OK” button in the Layer Styles dialog to apply the drop shadow to your image.

Conclusion
Integrating drop shadows into your plan utilizing Photoshop is a basic yet successful technique to add visual profundity and allure. By following the means framed in this aide, you can flawlessly coordinate drop shadows into your pictures, upgrading their effect and appeal. Try different things with various settings to find the ideal drop shadow style that supplements your plan stylish.