
Cut Out an Image in Photoshop means separating the main subject from its background. The goal is to keep the subject and remove everything else. This creates a clean image with a transparent or new background. It is one of the most useful editing techniques for designers, photographers and online sellers. Businesses use image cutouts for product photos and marketing materials. Designers use them for banners, social media graphics and advertisements. Photographers use them to improve portraits and creative projects. Photoshop offers several tools for this job, including the Pen Tool, Select Subject, Object Selection Tool, Quick Selection Tool and Select and Mask. The best tool depends on the image and the level of detail you need. With the right technique you can create smooth edges, keep fine details and produce professional quality cutouts that are ready for websites, eCommerce stores, print or digital marketing.
Step by Step Guide to Cut Out an Image in Photoshop 2026
Cut out an image in Photoshop is easier when you follow the correct workflow. Each step helps you create a clean and professional result. Whether you are editing product photos, portraits or graphics . This guide will help you remove the background without damaging the original image. Follow the steps below from start to finish.
A. Open Your Image
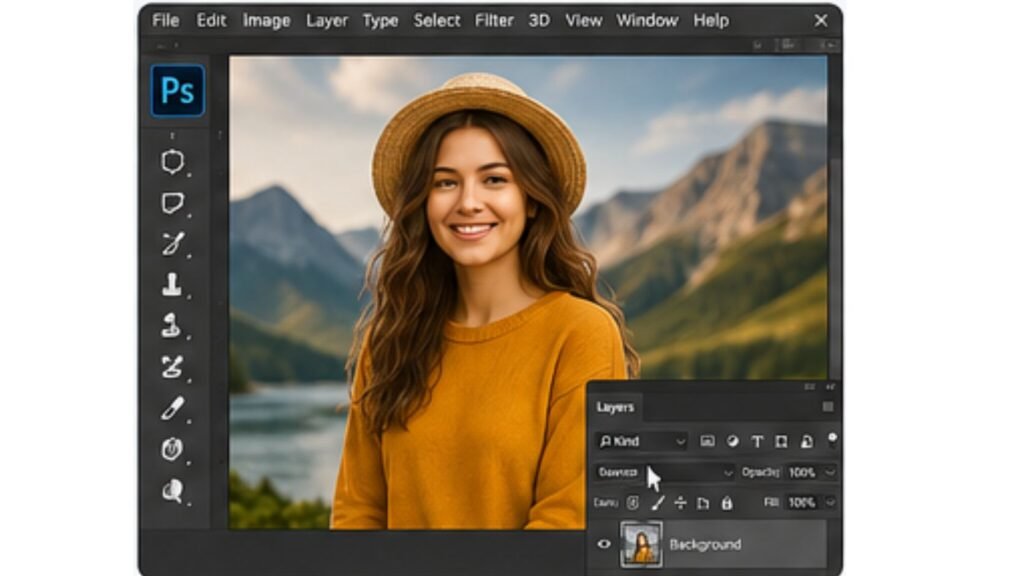
Open the image you want to edit in Photoshop. Always use the highest-quality version for the best results. High-resolution images make it easier to create clean selections and smooth edges. Go to File > Open and choose your photo. Once the image loads, check that it is clear and ready for editing before moving to the next step.
B. Duplicate the Layer
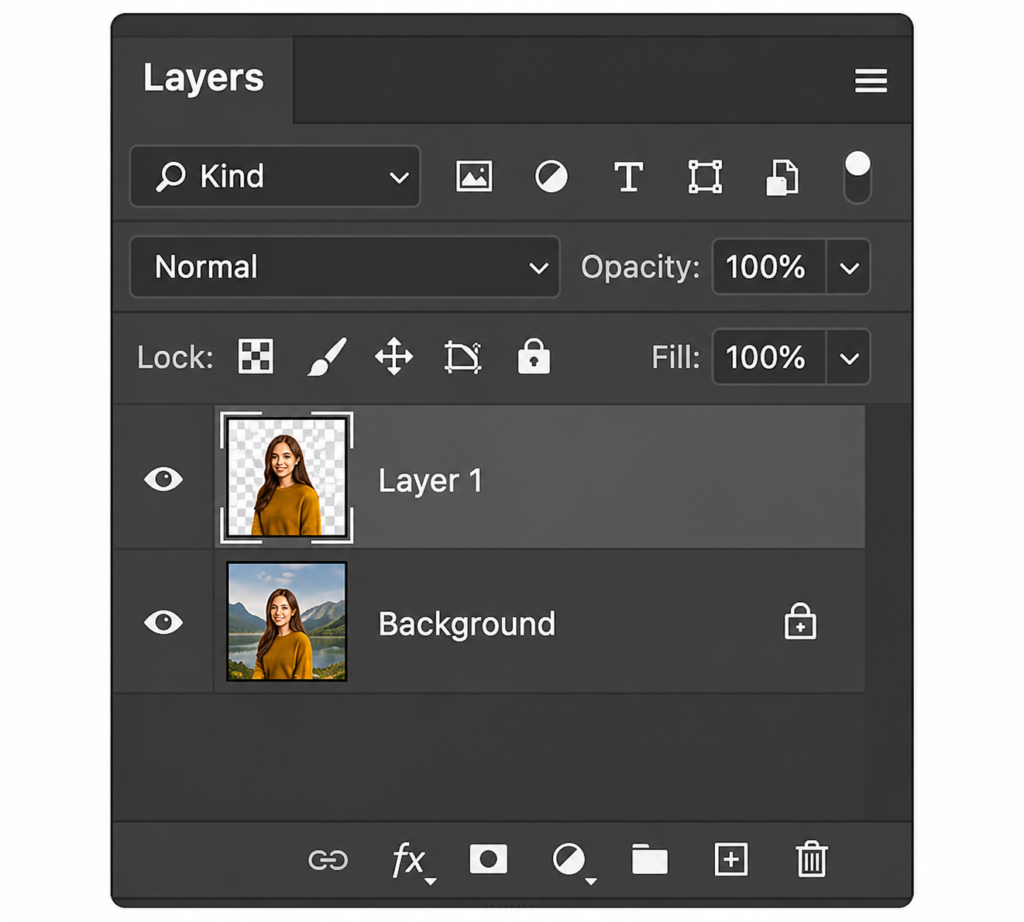
Before making any changes, duplicate the original layer. This keeps your original image safe and allows non-destructive editing. Press Ctrl + J on Windows or Cmd + J on Mac to create a copy. If something goes wrong, you can always return to the original layer without losing any image details.
C. Select Your Subject
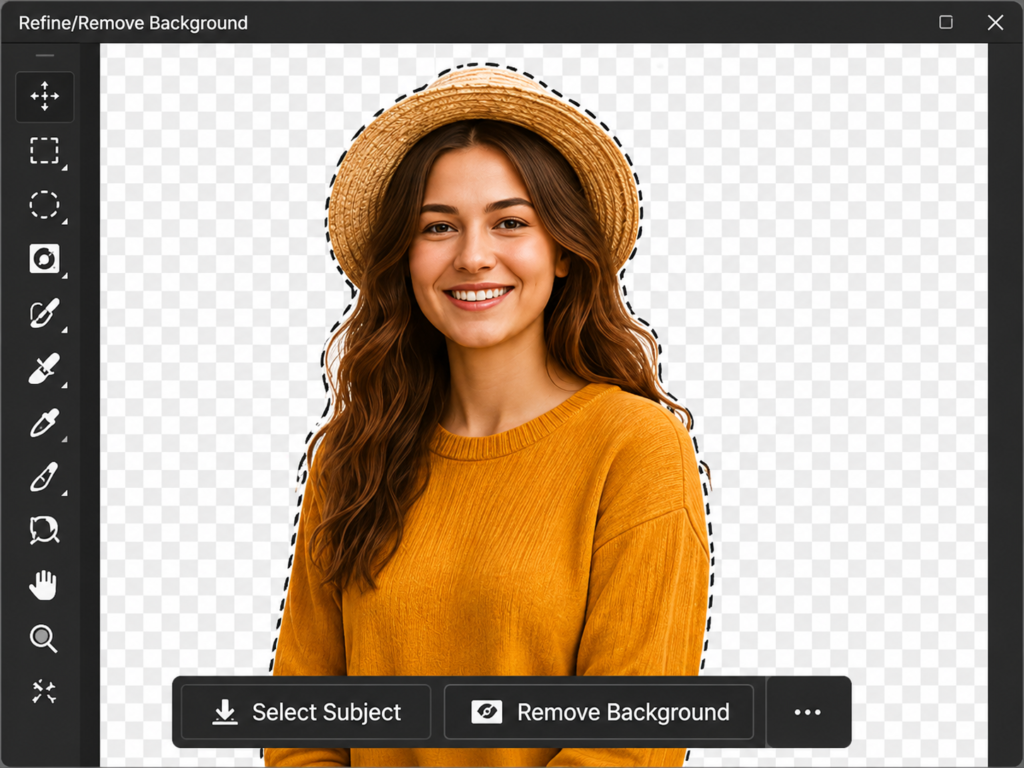
Now select the subject you want to keep. Photoshop offers several selection tools for different image types. You can use Select Subject, Object Selection Tool, Quick Selection Tool or the Pen Tool. Choose the tool that matches your image. A clean selection at this stage makes the remaining steps much easier.
D. Refine the Edges
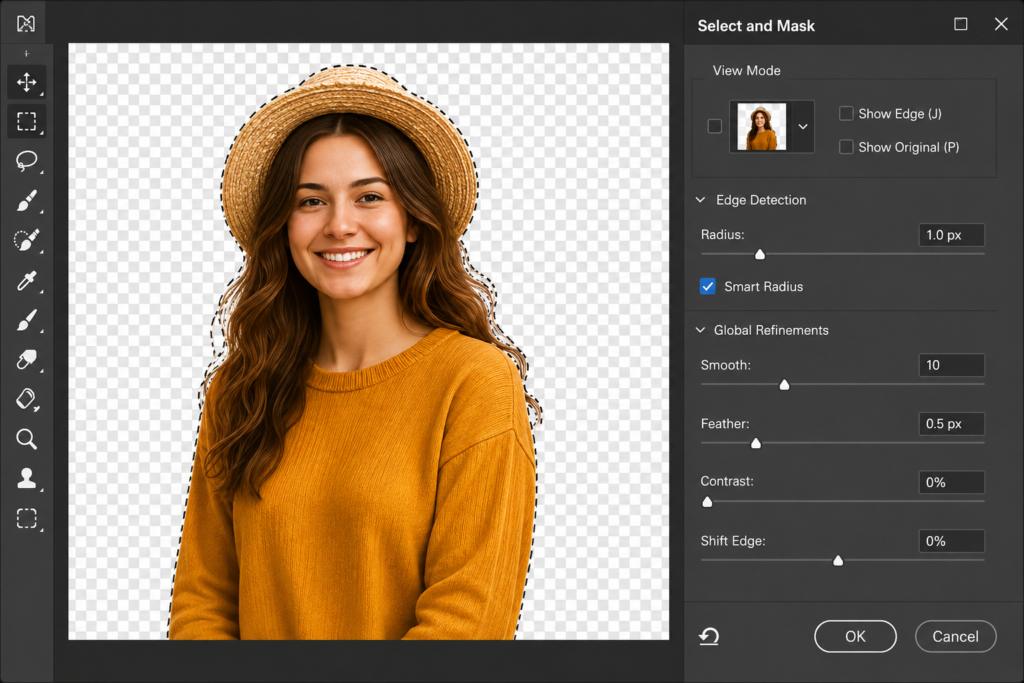
After selecting the subject refine the edges to improve the cutout. Open Select and Mask to smooth rough areas and keep fine details. Adjust settings like Smooth, Feather, Contrast and Shift Edge when needed. This step is especially important for hair, fur, fabric and other soft or detailed edges.
E. Save the Path (Optional for Pen Tool Users)
If you use the Pen Tool save your completed path before continuing. Open the Paths panel and give the path a name. Saving the path prevents accidental loss and lets you edit it later if needed. This step is useful for product photography, clipping paths and other professional editing projects.
F. Convert the Path into a Selection (Optional)
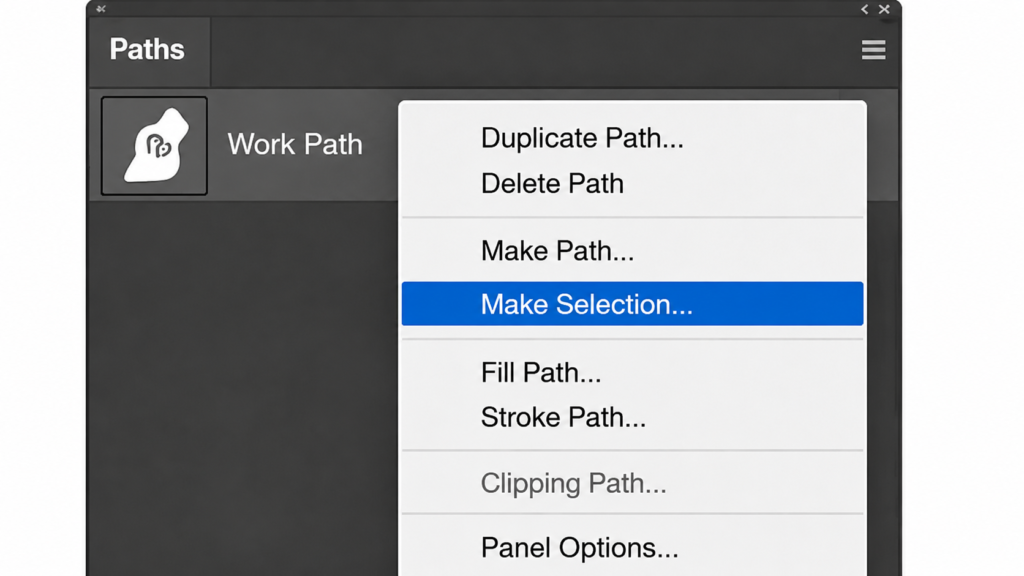
Once your path is complete convert it into a selection. Right-click the path and choose Make Selection. Set a small feather radius if your image needs softer edges. Photoshop will turn the path into an active selection. You can now apply a layer mask without affecting the original image.
G. Apply a Layer Mask
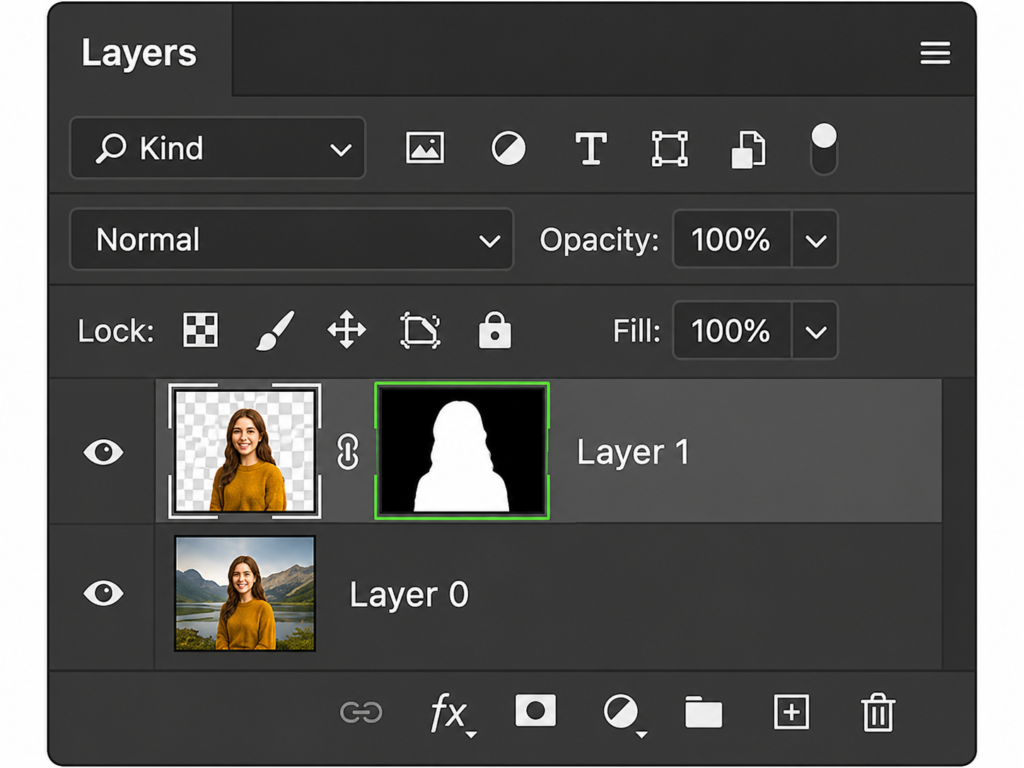
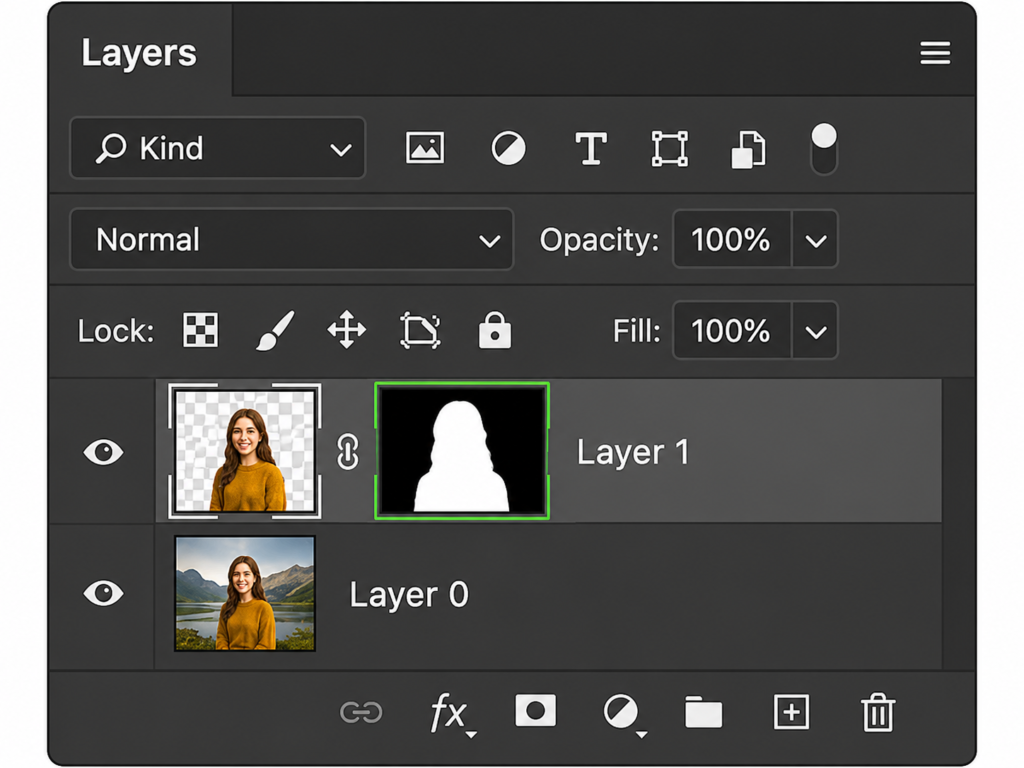
Apply a layer mask to remove the background without deleting any pixels. Click the Add Layer Mask button at the bottom of the Layers panel. Everything outside your selection becomes hidden. If you need more adjustments later, simply edit the mask with a black or white brush instead of starting over.
H. Remove the Remaining Background and Clean Up Edges
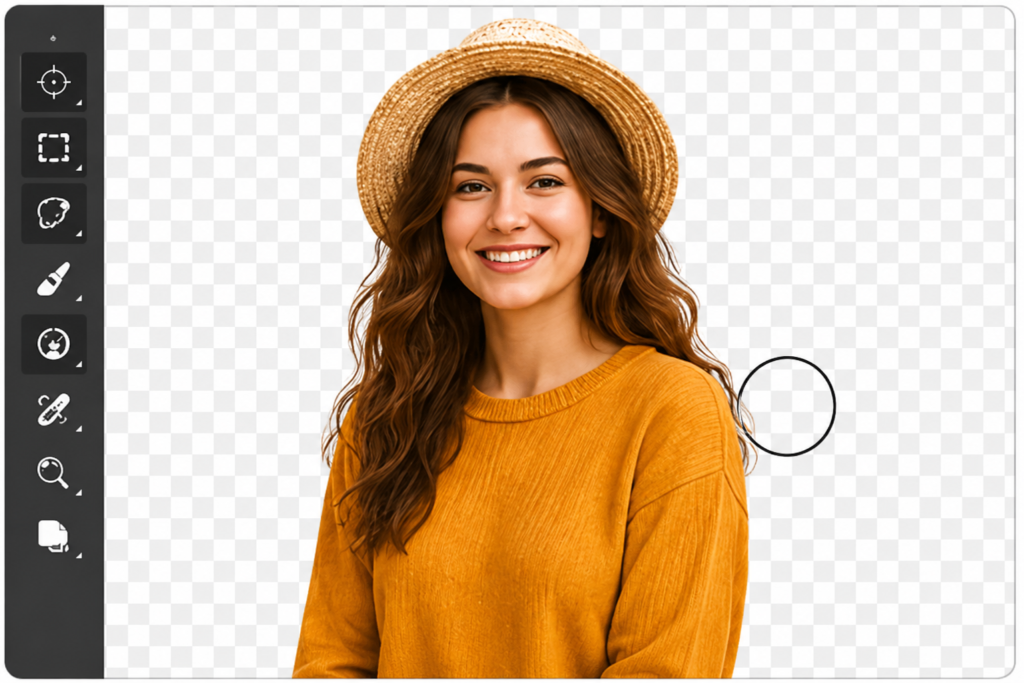
Zoom in and inspect the cutout carefully. Remove any remaining background using the Brush Tool or Layer Mask. Clean rough edges and restore small details where needed. Take extra time around hair, clothing and curved objects. A careful cleanup gives your image a polished and professional appearance.
I. Export the Image (PNG, PSD, JPEG, or WebP)
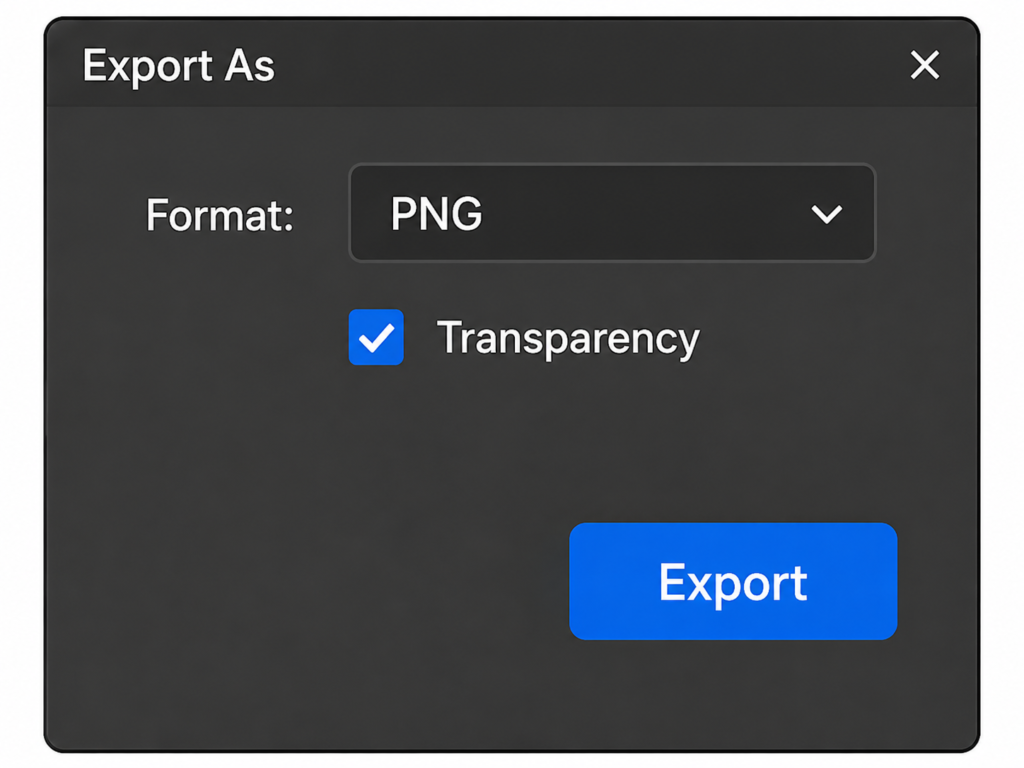
After checking the final result, export the image in the right format. Save as PNG to keep a transparent background. Choose PSD if you want to edit the file later. Use JPEG for images with a solid background and WebP for fast loading websites with excellent image quality.
Which Photoshop Tool Should You Use?
Photoshop offers several tools for cut out an image but no single tool works best for every photo. The right choice depends on the subject, background and level of detail. Some tools are faster for simple selections while others provide the precision needed for professional editing. The table below helps you choose the best Photoshop tool based on the type of image you are working with.
| Image Type | Best Tool |
| Product | Pen Tool |
| Person | Select Subject |
| Hair | Select and Mask |
| Simple Background | Quick Selection |
| Complex Object | Pen Tool |
Tools You Can Use to Cut Out an Image in Photoshop
Photoshop offers several tools for removing backgrounds and creating clean image cutouts. Each tool works best in different situations. Some are fast and powered by AI, while others provide greater precision for detailed editing. Understanding when to use each tool helps you achieve better results and speeds up your workflow.
- Object Selection Tool
- Quick Selection Tool
- Pen Tool
- Magic Wand Tool
- Select Subject
- Select and Mask
Common Mistakes to Avoid
Even with the right Photoshop tools small mistakes can reduce the quality of your cutout. Paying attention to image quality, edge refinement, and export settings helps you achieve a clean and professional result. Avoid the common mistakes below to save time and improve the final appearance of your edited image.
- Low-resolution images
- Jagged edges
- Forgetting feather
- Exporting JPEG instead of PNG
- Not zooming in
- Overusing Magic Wand
- Ignoring shadows
- Poor edge refinement
- Wrong tolerance settings
- Not saving PSD
Photoshop Keyboard Shortcuts That Save Time:
Learning a few Photoshop keyboard shortcuts can make your editing workflow much faster. Instead of searching through menus, you can switch tools, manage selections and save files with a single key combination. These shortcuts are useful for beginners and professionals alike helping you cut out images more efficiently while reducing editing time.
| Shortcut | Function |
| Ctrl + O | Open an image |
| Ctrl + J | Duplicate the selected layer |
| W | Object Selection Tool / Quick Selection Tool |
| P | Pen Tool |
| M | Marquee Tool |
| I | Lasso Tool |
| B | Brush Tool |
| E | Eraser Tool |
| Ctrl + + | Zoom In |
| Ctrl + – | Zoom Out |
| Ctrl + Z | Undo the last action |
| Ctrl + Shift + I | Invert Selection |
| Ctrl + D | Deselect the current selection |
| Ctrl + S | Save the project |
| Ctrl + Shift + S | Save As |
| Ctrl + Alt + Z | Step Backward (Undo multiple actions) |
Photoshop vs Online Background Removers
Choosing the right background removal tool depends on your editing needs. Photoshop offers the highest level of control and precision while online tools focus on speed and simplicity. If you need professional quality cutouts . Photoshop is the better choice. For quick edits or social media content AI powered background removers can save time.
| Feature | Photoshop | Canva | Remove.bg | Adobe Express | AI Background Removers |
| Accuracy | ⭐⭐⭐⭐⭐ | ⭐⭐⭐⭐ | ⭐⭐⭐⭐ | ⭐⭐⭐⭐ | ⭐⭐⭐⭐ |
| Manual Editing | Excellent | Basic | Very Limited | Basic | Limited |
| AI Background Removal | Yes | Yes | Yes | Yes | Yes |
| Hair & Fur Detection | Excellent | Good | Very Good | Good | Good |
| Edge Refinement | Excellent | Limited | Automatic Only | Basic | Limited |
| Transparent PNG Export | Yes | Yes | Yes | Yes | Most Tools |
| Layer Mask Support | Yes | No | No | No | No |
| Clipping Path Support | Yes | No | No | No | No |
| Best For | Professional editing | Social media graphics | Fast background removal | Quick design projects | One-click image cutouts |
| Learning Curve | High | Easy | Very Easy | Easy | Very Easy |
| Cost | Paid subscription | Free & Paid | Free & Paid | Free & Paid | Varies |
FAQs
How do I cut out an image in Photoshop?
Open your image and duplicate the background layer. Select the subject using the Pen Tool, Select Subject or Object Selection Tool. Refine the edges, apply a Layer Mask and remove the background. Finally export the image in PNG format if you need a transparent background.
What is the easiest way to remove a background in Photoshop?
The easiest method is to use Select Subject followed by Remove Background. Photoshop uses AI to detect the main subject automatically. You can then refine the edges with Select and Mask for a cleaner and more natural result.
Which Photoshop tool is best for image cutouts?
The best tool depends on the image. The Pen Tool is ideal for products and objects with clean edges. Select Subject and Object Selection Tool are excellent for portraits and everyday photos. Select and Mask is the best option for refining hair and fine details.
How do I make the background transparent?
Remove the background using a Layer Mask or a selection tool. Once the background is hidden, export the file as a PNG or PSD. JPEG does not support transparency, so avoid using it if you want a transparent background.
How do I cut out hair in Photoshop?
Use Select Subject to create the initial selection. Then open Select and Mask and use the Refine Hair option or Refine Edge Brush Tool. Adjust the edge settings until the hair looks smooth and natural against a transparent background.
Can beginners cut out images in Photoshop?
Yes. Beginners can easily cut out images using AI powered tools like Select Subject Object Selection Tool and Quick Selection Tool. These tools require little experience and produce good results with just a few clicks.
How do I save a transparent PNG?
After removing the background, go to File > Export > Export As. Choose PNG as the file format and confirm that transparency is enabled. Save the file to keep the transparent background.
What is the difference between Layer Mask and Clipping Path?
A Layer Mask hides parts of an image without deleting pixels, making it easy to edit later. A Clipping Path uses vector paths to create precise selections and is commonly used for product images and professional printing.
Why does my cutout have jagged edges?
Jagged edges usually appear because the selection was not refined properly or the image resolution is too low. Use Select and Mask, zoom in while editing, and work with high-resolution images for smoother edges.
How do professionals cut out product images?
Professionals often use the Pen Tool because it creates accurate paths and clean edges. They also use Layer Masks for non-destructive editing and inspect the image at a high zoom level before exporting the final file.
Can I cut out an image without using the Pen Tool?
Yes. Photoshop offers several alternatives, including Select Subject, Object Selection Tool, Quick Selection Tool and Magic Wand Tool. These tools are faster than the Pen Tool and work well for many types of images.
Is Photoshop better than AI background removers?
Photoshop offers greater accuracy, editing control and better edge refinement than most AI background removers. AI tools are faster for simple edits, but Photoshop is the preferred choice for professional-quality results.
Can Photoshop automatically detect subjects?
Yes. Modern versions of Photoshop include the Select Subject feature which uses Adobe AI to identify the main subject automatically. It works well for people, products, pets and many everyday objects.
Which file format is best after cut out an image?
The best format depends on your needs. Use PNG for transparent backgrounds, PSD to keep layers for future editing, JPEG for standard images with solid backgrounds and WebP for optimized web performance.
What Photoshop version is best for background removal?
The latest version of Photoshop is the best choice because it includes improved AI features such as Select Subject, Remove Background, Object Selection Tool and enhanced Select and Mask tools. These features make background removal faster and more accurate.
Conclusion
Cut out an image in Photoshop is an essential skill for designers, photographers, marketers and eCommerce businesses. By choosing the right selection tool and following a proper workflow you can create clean, professional looking cutouts with smooth edges and transparent backgrounds. Whether you use the Pen Tool for precision or AI powered tools like Select Subject for speed, Photoshop gives you complete control over the final result. Practice with different image types save your work as a PSD for future edits and export the finished image in the format that best fits your project. With regular practice you can produce high quality image cutouts for websites, social media, print and professional design work.