
One of the coolest things about Photoshop is that you can many sort of image manipulation using it. An image manipulation is changing the subject or the theme of the image into something different and unreal. You must have seen such photos where the subject is inside a bottle of wine or fish is swimming in the sky. These photos are created through image manipulation. You know you can also do such types of image manipulation using Photoshop. “X ray Photoshop” is one sort of image manipulation technique that you can apply to images and make the photo of that person look like an original X ray photo. Some people use image manipulation services for their promotional uses in the business and some just do it for fun by themselves. If you want to learn the x ray Photoshop effect then this article is something that you should see. In this article I’ll be showing you a very unique and easy way to turn an image into x ray with Photoshop. So without further adieu, let’s start!

Steps to do X ray with Photoshop –
Open image
There are two different ways of opening the photograph in Photoshop. One is manual and other is programmed. To open the photograph, you can go to File>Open, you will get a windows exchange box. Go to the record area and snap on the document. Press alright to open the photograph. The photograph will be opened in Photoshop. You can likewise open the photograph just by hauling the photograph into Photoshop. Go to record area and drag the photograph in Photoshop bar. Doing that, the photograph will be opened in Photoshop inside a second. I have opened the photograph naturally by simply hauling. It is efficient.

Duplicate Background Layer
The magnificence of Photoshop is that we can deal with various altering taking various layers. So the following thing we will do is to take a copy layer of the Background or the Background layer duplicate. To take the copy Background layer, go to the layer board. Looking down, you will get the chance to see a few symbols. Snap on the Background layer and drag the Background layer to the square symbol close to the erase symbol. Doing that, a copy Background layer will be made naturally.

Invert the new layer
Making an x ray of the photograph is very troublesome and imaginative. Some picture taker click the photograph to make the photograph looks imaginative photography as x ray. What we need to do in the wake of making the copy layer is filling the rearrange impact on the photograph. Yet, you need to take a shot at the copy layer. To cause the photograph to modify, go to Image > Adjustment > Inverts. Doing that, the whole photograph will be rearranged. You can likewise cause the photograph to alter by squeezing Ctrl+I on console. Squeezing that, you will see that the photograph has been rearranged naturally.

Use black and white adjustment layer
As should be obvious the photograph in the wake of transforming, got some blue impacts more, it isn’t looking that acceptable and the photograph won’t transform into x ray splendidly if the majority of the blue remains. So we have to desiderate blues from the reversed photograph. To desiderate blues from the photograph, click on modification layer. You will get an exchange enclose including numerous choices the modification layer. Snap on the high contrast from the discourse box. Doing that, you will get another case which will have some shading choices and sliders. Snap on the blue slider and modify the sweep into 120.

Merge and create a new layer
In the wake of adding the Cyan photograph channel to the past layer you will see that the picture looks somewhat better pale blue highly contrasting shaded. At that point you should make another layer making this shading somewhat better and shining. This new layer will assist you with adding different channels to the picture to make it appear as though a unique x-beam. To create this new layer press Ctrl+Alt+Shift+E. This will make another layer of the picture in the layer box on the left.
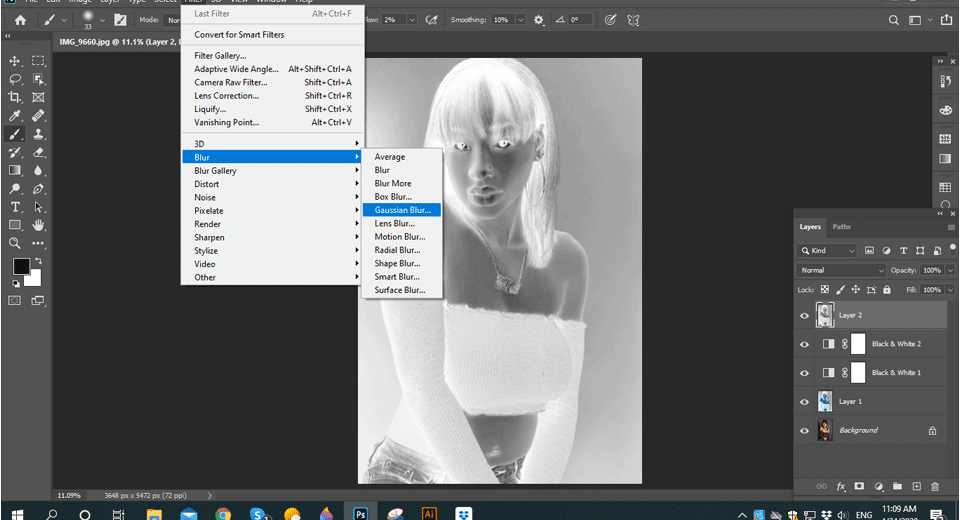
Apply Gaussian blur to it
In the new layer, we made delicateness is required. To make the picture somewhat gentler we will apply a channel known as the Gaussian haze. A Gaussian haze assists with obscuring out the picture equitably. It doesn’t leave any spots and makes the entire layer of the picture smooth. To apply Gaussian haze to this new layer go to the Filter > Blur > Gaussian haze. At that point change the amount of the haze on the layer and hit OK. Presently you should know how much the alteration of the haze ought to be. For making a X ray picture you should take a haze of in any event 50 pixels. It will make the layer equally obscured and afterward you can utilize different layers and changes in accordance with transform it into a totally exact x ray picture.

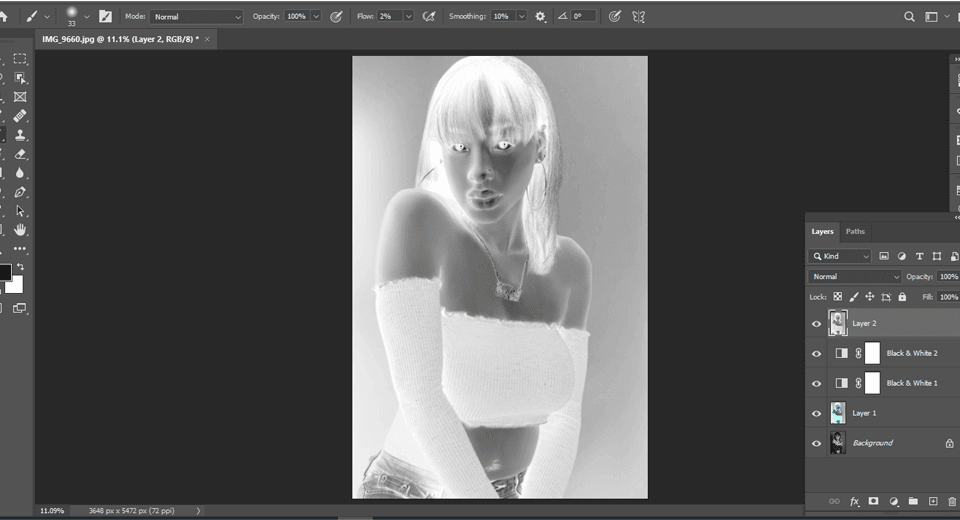
Convert the blending mode to soft light
In the wake of utilizing the Gaussian haze on the layer you won’t be capable the subject of the picture. We should keep the subject obvious while giving it a X ray look. To change these impacts basically change the mixing method of this layer. For this layer and impact change the mixing mode from the highest point of the layer tab. Change the layer mixing to Soft light. Along these lines you will get a layer which is delicate and the subject is obvious.

Increase the contrast
Presently we should fix the difference of the picture. Along these lines the picture will look unique. The inventiveness of the picture will be secure subsequent to applying the splendor and differentiation modification layer. To get this modification layer to go to the base of the layer tab and in the base of the tab, you will see a circle molded symbol. Snap on the circle molded symbol to get the alteration layers. Select the complexity layer and set the difference to 70 and hold the brilliance to 0. At that point you will see that the picture is near a unique x ray picture.

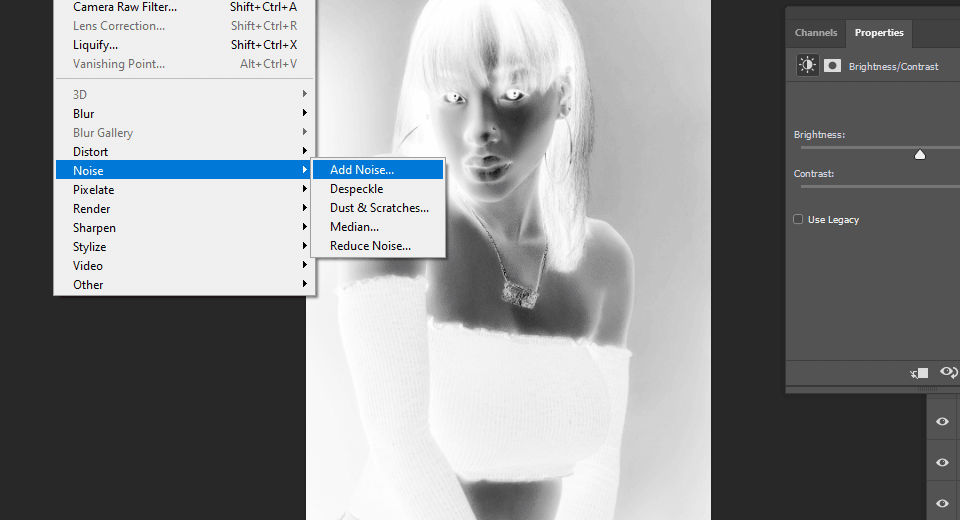
Add some noise to it
Noise will assist this with imaging to look like imprinted on a genuine X-ray paper. So we should include a tad of Noise to the layer. So go to the Filter > Noise > Add Noise. At that point utilize the slider to give it a legitimate commotion.
Decrease the opacity of the layer
In the wake of applying the above impacts to the picture you will see that it is looking somewhat murky and extra boisterous. We won’t need this much commotion on the picture. To make it look impeccably unique decline the obscurity of the layer. Make the haziness positive for you. At that point spare it as a picture.

Conclusion
X ray impact is chiefly utilized for no particular reason as a Photoshop client. You can comprehend the various employments of Photoshop apparatuses utilizing the strategies given previously. These tips and ways will assist you with making a genuine looking X ray channel to the picture you need to. Make Photoshop your ally to become familiar with such stunning picture control procedures.