The latest trend in the marketing of products using Photoshop is to, “Change the background”. Literally, everyone is selling their products online by posting attractive photos of them. They are simply taking photos of their products and changing their backgrounds making the product look more eye-catching. Some people don’t have time and they need background Change Service provider.
Suppose a company that sells Mineral Water, is taking the photo of the water bottle and changing its background to a hot desert. A person who is thirsty will be bound to buy that product anyhow. That photo will surely attract him. Here is another tips how to make background transparent in Photoshop. In this article, I will give some simple tricks on How to how to change background in Photoshop!
Just sit back, take a cup of coffee with you and scroll the page!
Step – 1
The first step is to OPEN the product photo you want to remove the background of on Photoshop. In Adobe Photoshop CS3 you can open the photo by clicking the File menu on the upper Bar. Then select the Open option from the File menu. You can also click [Ctrl+O].

Step- 2
Next step is to choose the file from the Folder on your PC. Choose the file and CLICK open.

Step- 3
Now, Select the Magic Wand tool from the left bar option. Using this magic wand you can select the background you want to remove.
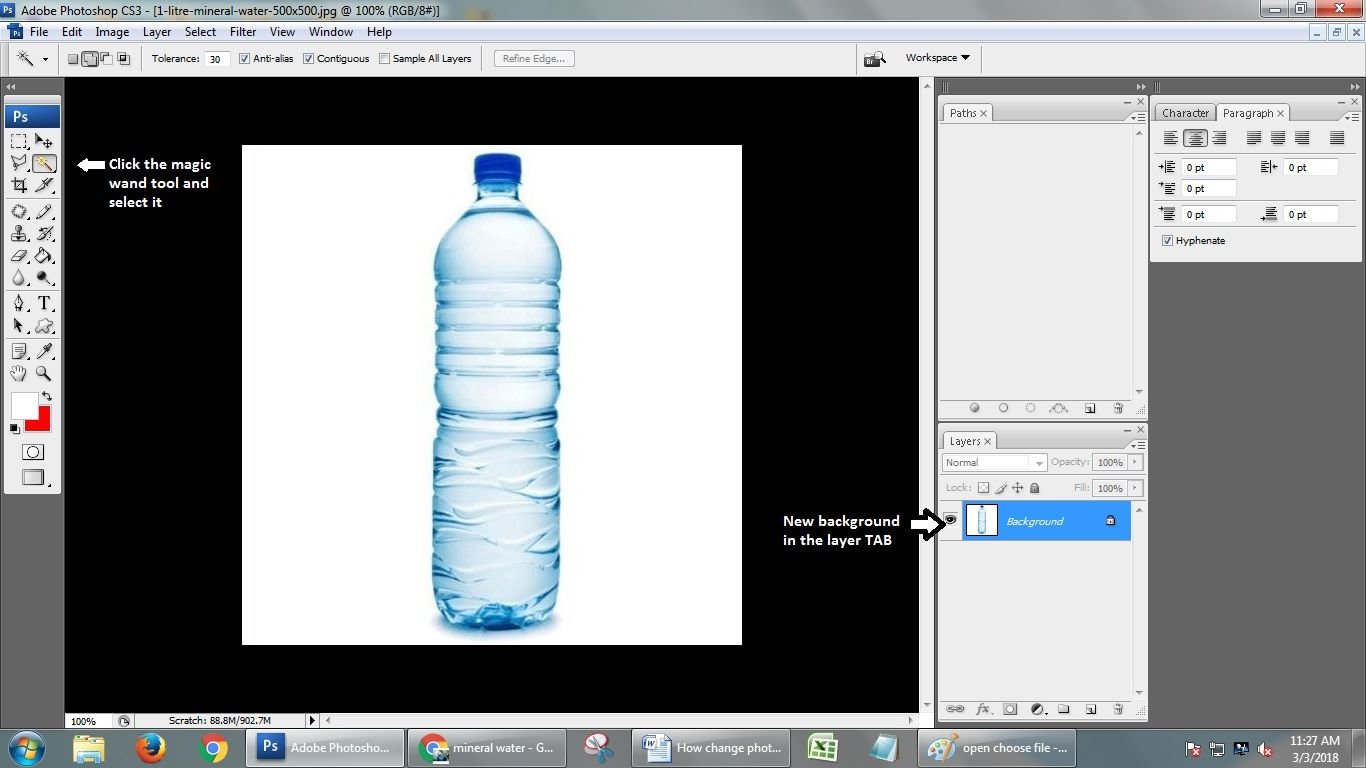
Step- 4
After selecting the magic wand tool, it is time to choose the background. CLICK on the white background to select it.
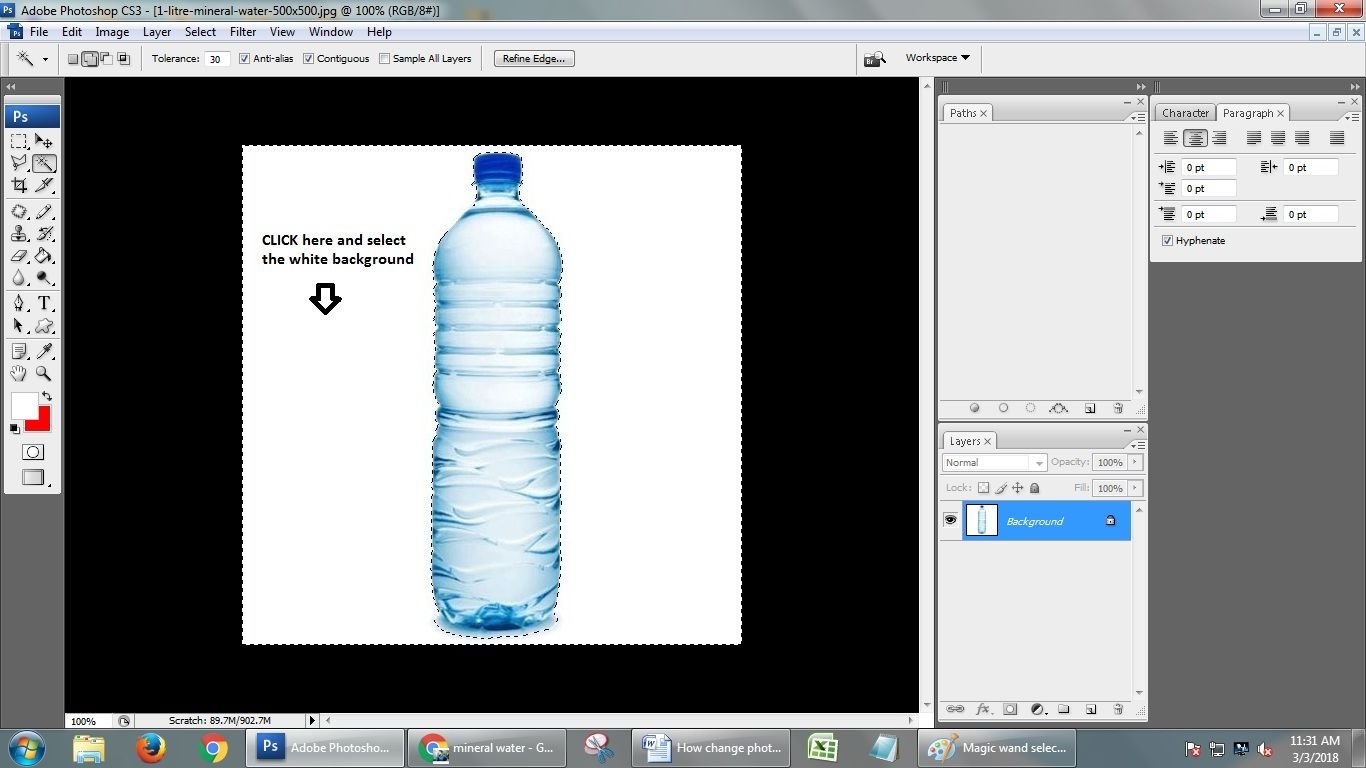
Step- 5
After selecting the background you have to CLICK on the right mouse button and CLICK the SELECT INVERSE option from the menu to select the water bottle.
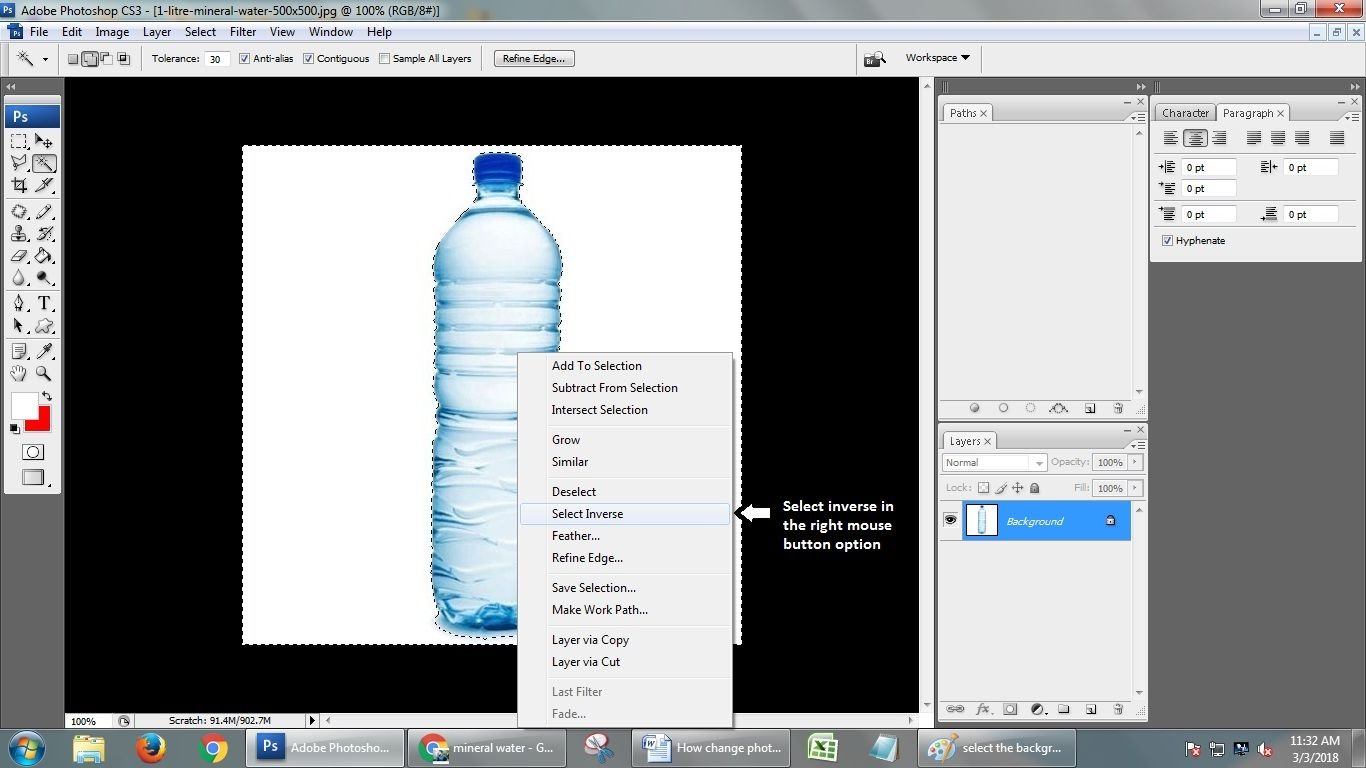
Step- 6
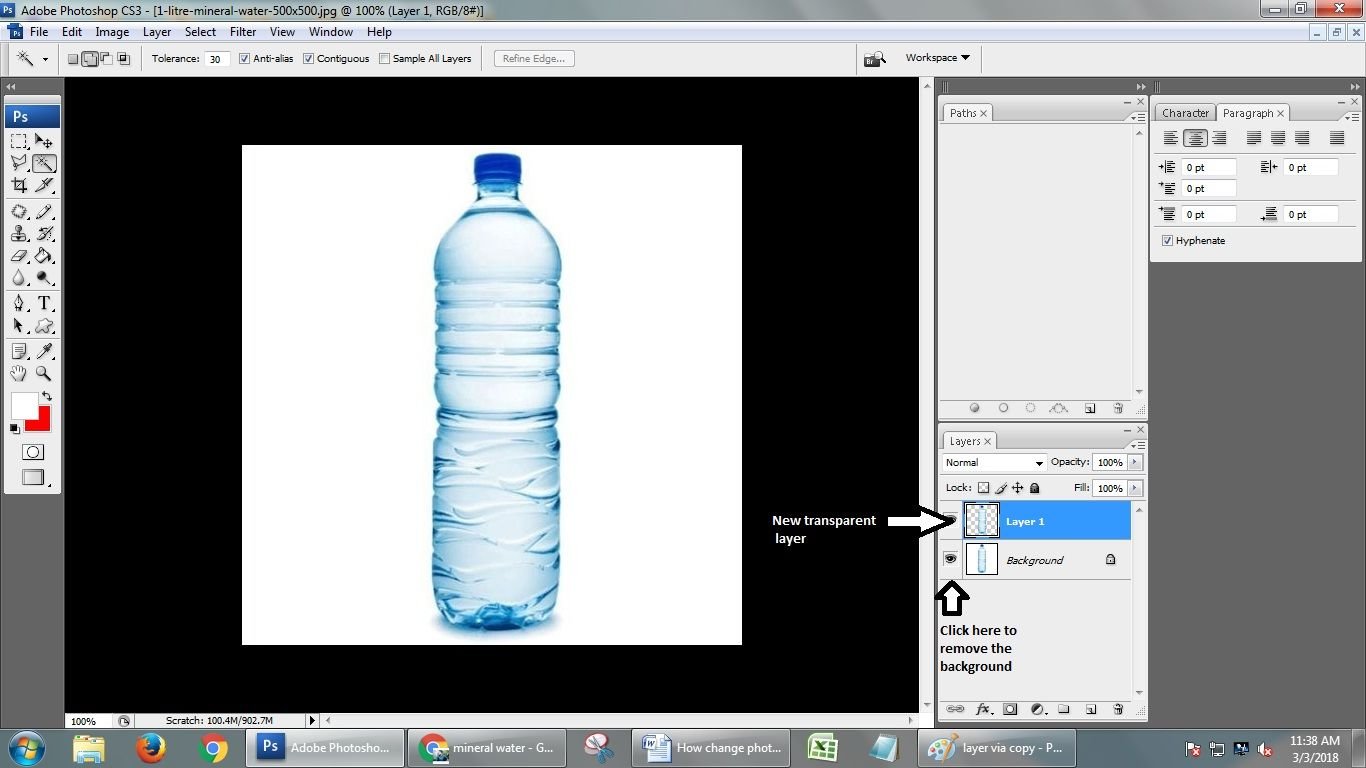
After selecting the inverse option and choosing your photo, you have to make the white background disappear and a transparent background appear behind it. So, CLICK the right mouse button again and choose the layer via copy option to create a new transparent background and CLICK the Layer visibility option in the LAYER TAB to make the white background disappear.
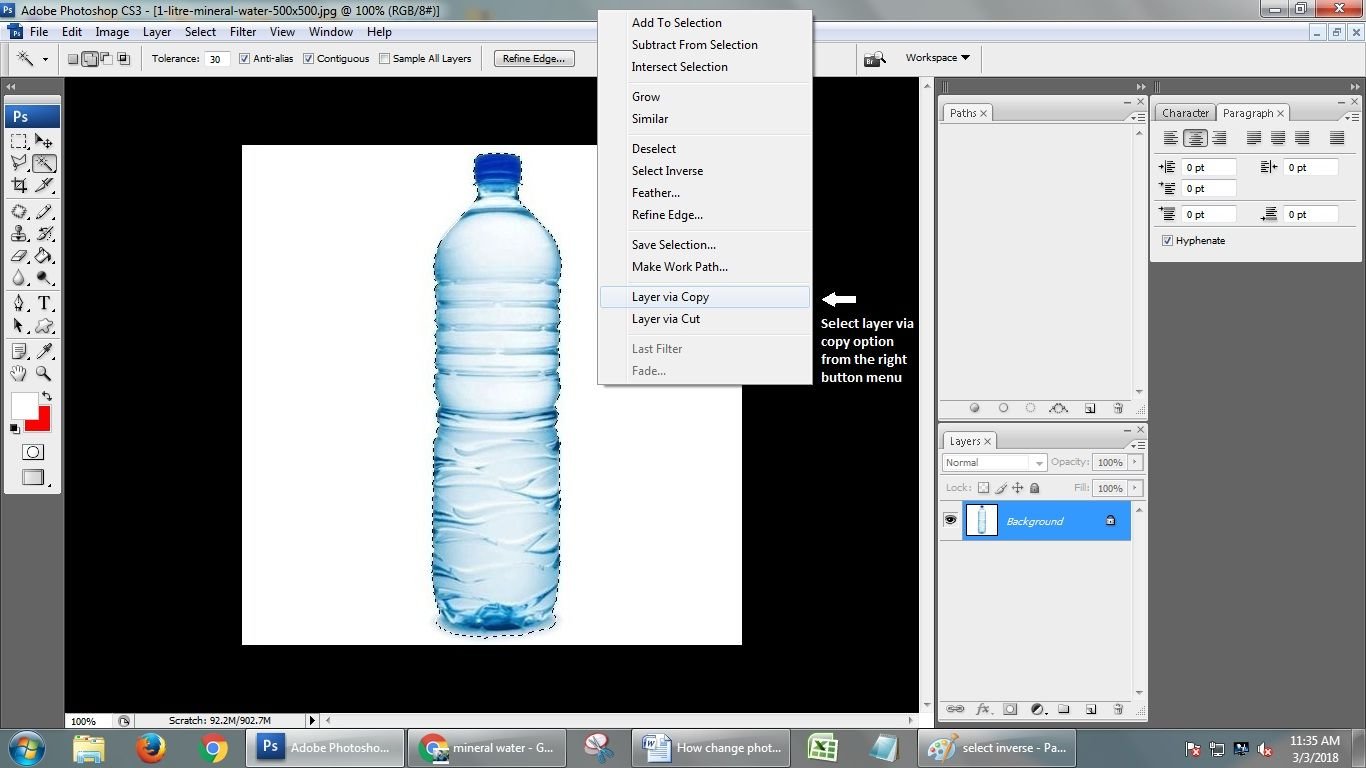
Step- 7
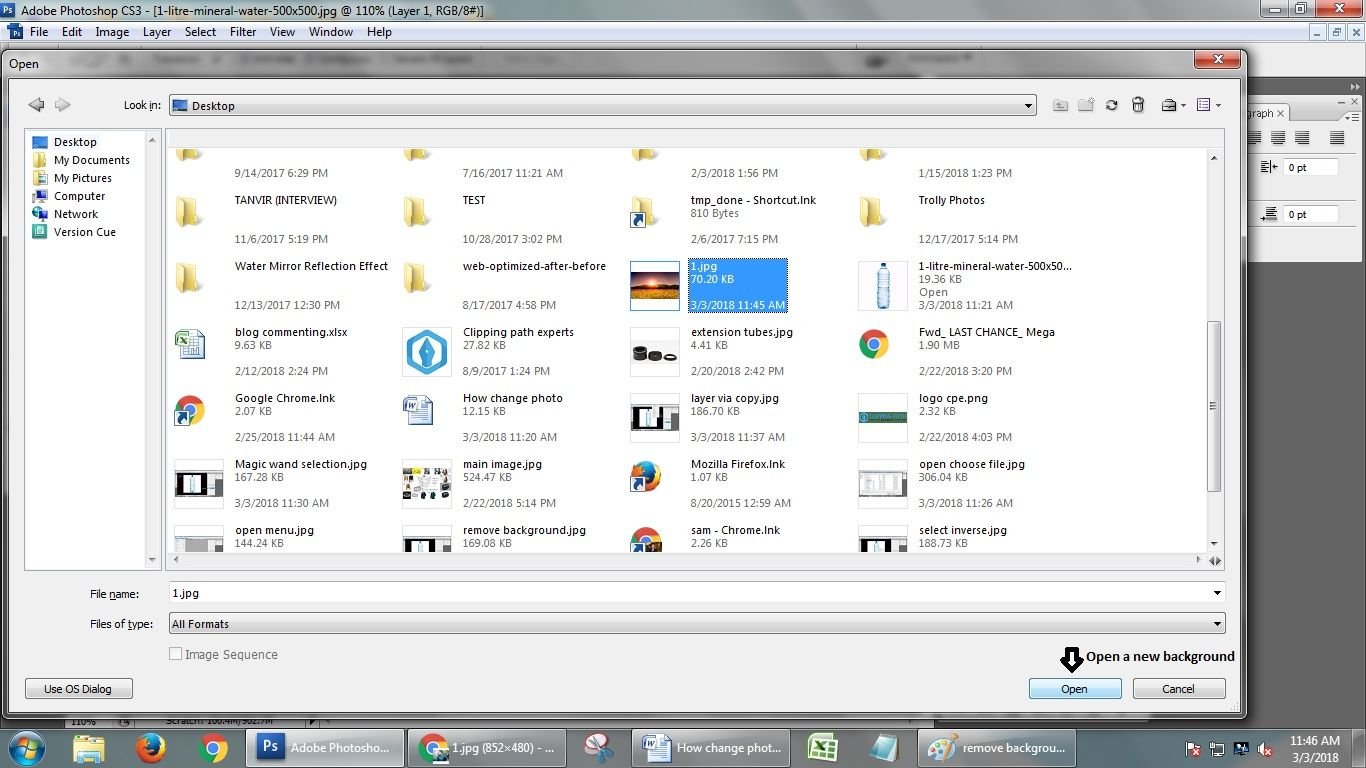
After removing the background of the product, it is time to choose a new background for it. So, again CLICK the File option from the upper bar and choose plus open the new background from your PC.
Step- 8
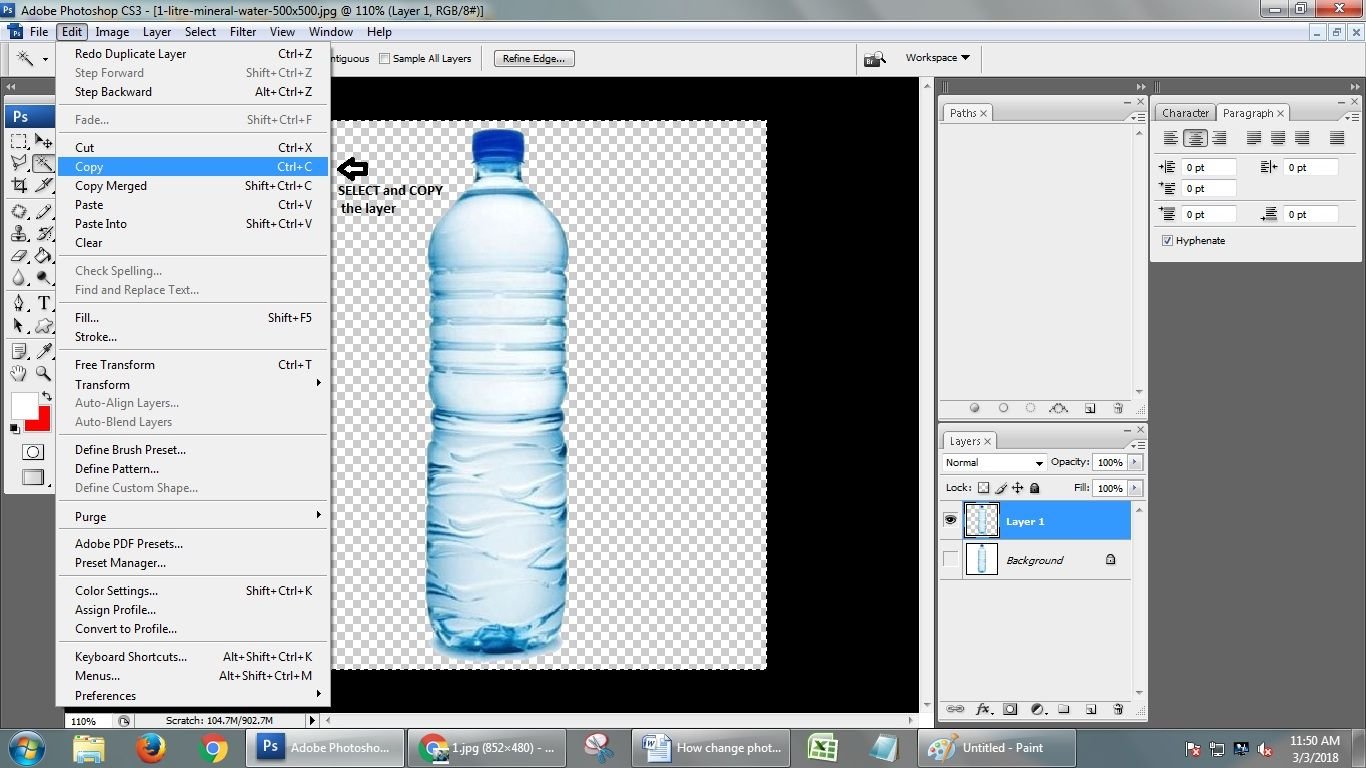
Now, after selecting the new background a new TAB will open in Photoshop. This will be the background tab. So it is time to select the product photo from the old TAB and insert it here. So, Use [Ctrl+Tab] to change the Tab then SELECT the product layer using [Ctrl+A] then Choose the Copy layer option from the Edit menu on the upper bar.

Step- 9
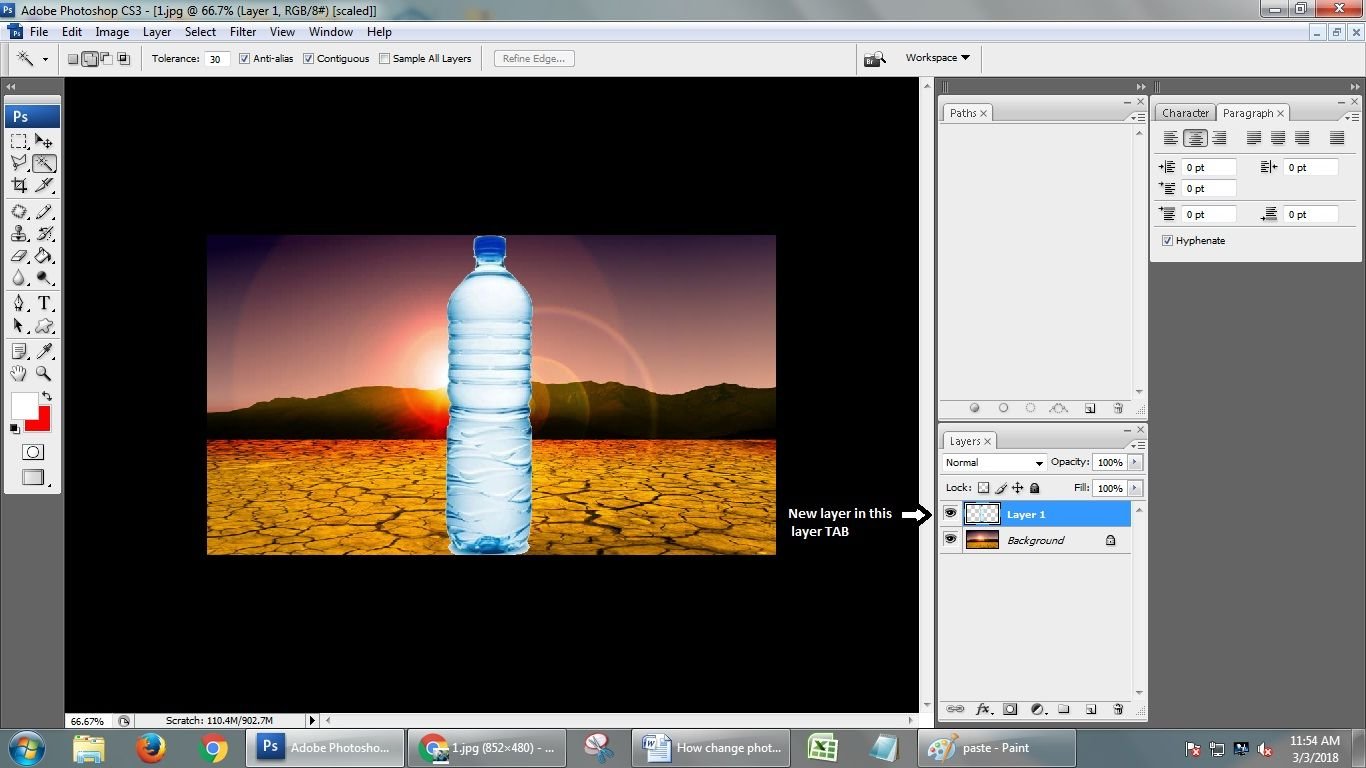
After copying the product layer, paste it to the new background layer in the new background Tab. So, CLICK the [Ctrl+Tab] then CLICK the Edit menu on the upper bar and choose the Paste option from there. Your product layer will be pasted in the new background layer.

Step- 10
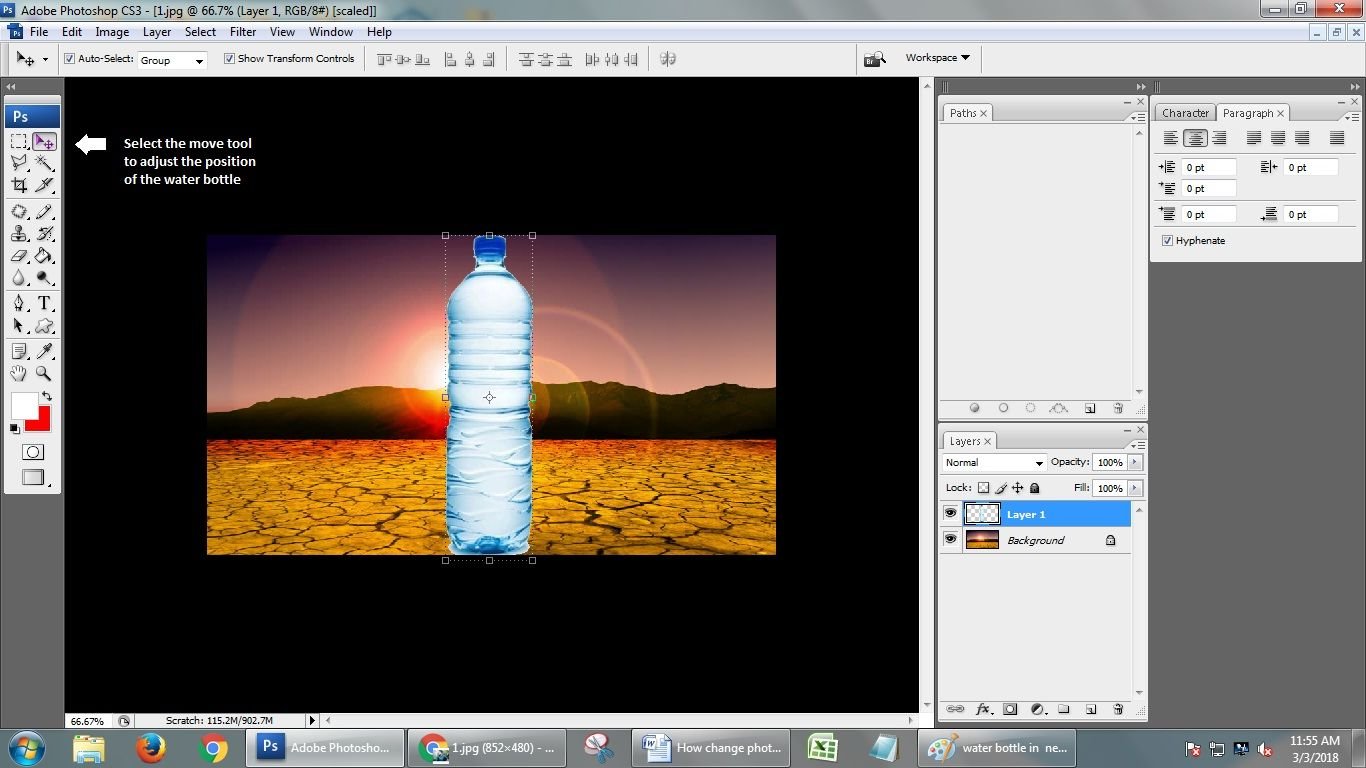
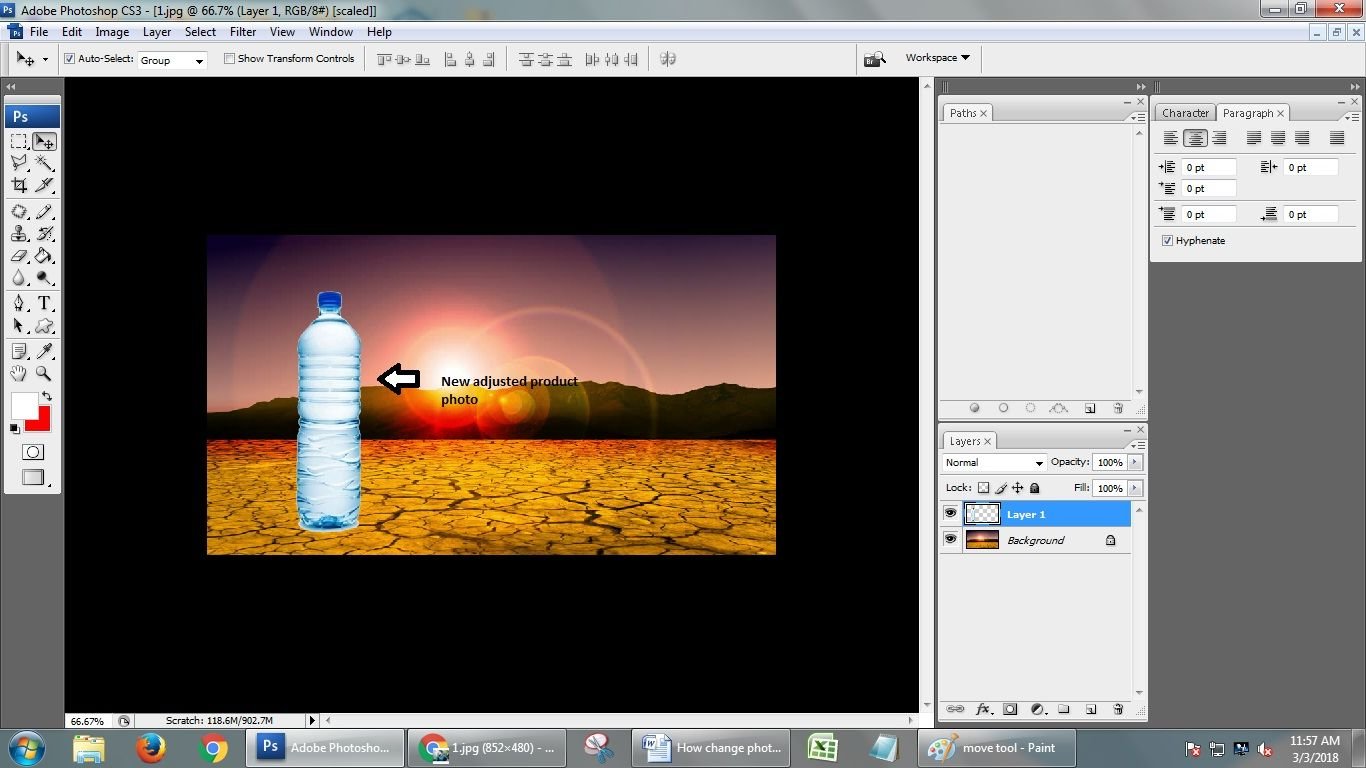
Now after pasting the product layer in the background, it is time to adjust the layer in the background properly. To do so use the move tool from the left bar and position the product layer properly using the mouse. This should be placed in an attractive way to catch the viewer’s attention.
Step- 11
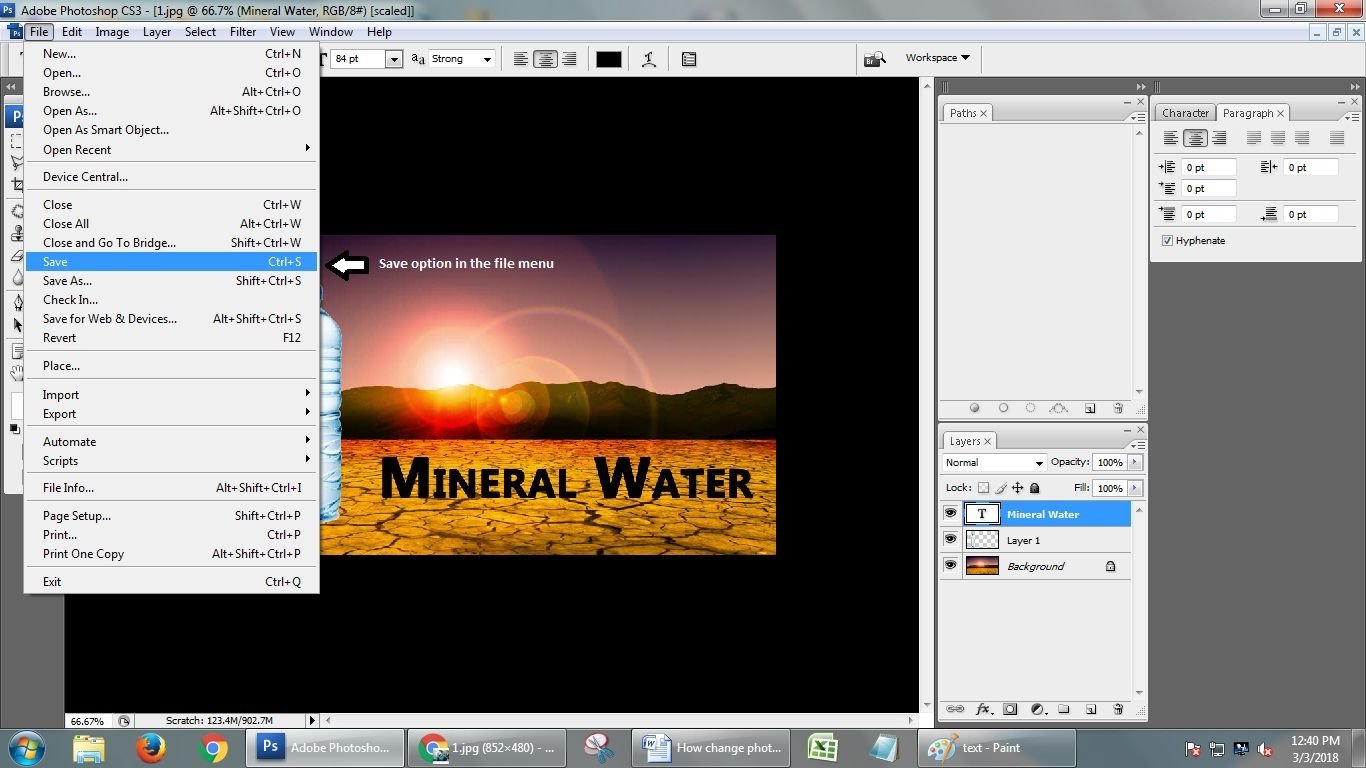
The final step is to add a Text to it so that it describes the product and the viewers can understand what it is about. Use the Text option from the left bar to add text.

And finally, save the image in your PC from the file option.
So, using these simple 11- steps you can change the background of your product photo and can make it more eye-catching. It will attract lots of customers for your product and will definitely increase your sales.

