

Full body photography requires a balance of composition, lighting, posing and technical control to capture a body in their best . This guide breaks down everything you need to know from understanding what a full body shot is choosing the right orientation, depth of field and background for your scene. You will learn essential techniques for both indoor and outdoor lighting, discover how natural and artificial light impact your results and explore ways to add movement for more dynamic portraits. The article also covers posing tips, location ideas and camera settings that help maintain sharpness and proportion. Whether you are a beginner or improving your portrait workflow . This guide offers practical steps to shoot clean, flattering and professional full body photos.
Credit: vinesoftheyarravalley.com.au
What Is a Full Body Shot in Photography?
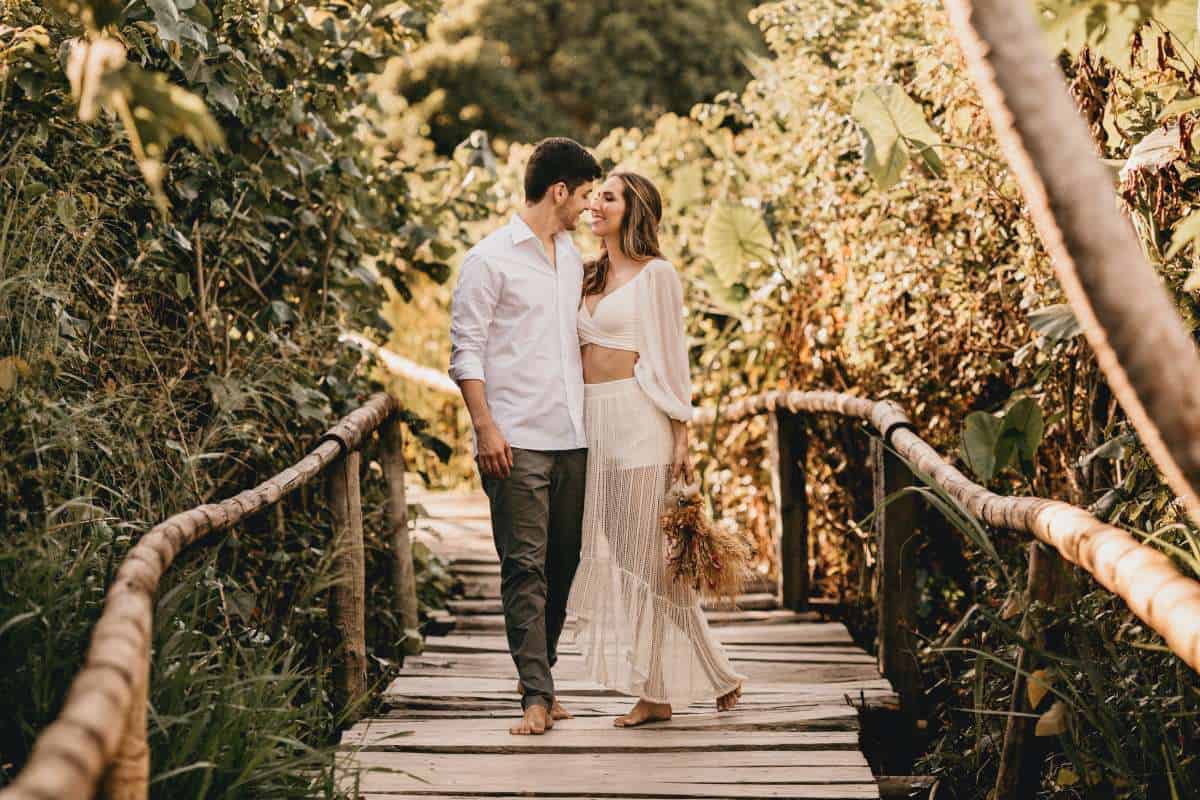
Full body shot in photography is a portrait style where the subject is capture from head to toe within the frame. This type of shot is used to highlight posture, outfit, body language and overall presence . which is make it popular in fashion, modeling, lifestyle and commercial photography. Unlike close ups or mid shots . Full body shot focuses on proportion, balance and composition to keep the subject looking natural and distortion free. Photographers typically maintain more distance, choose lenses that preserve accurate body shape and pay attention to background lines and lighting. Full body portraits work best when posing, framing and depth of field are carefully planned to create a clean, flattering and visually appealing image.
Essential Tips for Shooting Full Body Photography
full body photography requires a combination of technical control, good lighting and thoughtful composition to Shoot your subject from head to toe without distortion. This guide shares essential tips to help you frame the body naturally, maintain correct proportions and choose the right lens and camera distance. You will learn how to position the subject, balance the background and use natural or artificial light for clean and flattering results. The goal is to create full body portraits that look sharp and visually appealing. These tips also cover posing techniques, angle adjustments and depth of field choices . so you can achieve professional-quality full body shots in both indoor and outdoor environments.
- Keep enough distance to avoid distortion
- Position the subject with comfortable, natural poses
- Use leading lines to guide viewer focus
- Choose uncluttered backgrounds
- Shoot at eye or waist level for balanced results
- Use soft light (natural or diffused)
- Maintain consistent head-to-toe sharpness
- Allow space above and below the subject
- Guide the subjects posture and body angles
Deciding on the Orientation for Your Full Body Portrait
Choose the right orientation is essential for creating a strong full body portrait. Vertical portrait mode is the most common choice because it naturally matches the shape of the human body and allows you to frame the subject from head to toe with minimal empty space. However landscape mode works well when you want to include scenery, environmental details or create a cinematic feel. Both styles can be effective depending on the mood and composition you want. Landscape mode helps balance subjects within wide backgrounds while portrait mode keeps attention centered on the person. Understanding when to use each orientation helps you create more intentional, visually appealing full-body portraits that suit the story and setting.
- Use vertical orientation to emphasize height and body shape
- Use horizontal orientation to include environment or context
- Portrait mode keeps the subject as the main focus
- Landscape mode works well for lifestyle or outdoor storytelling
- Match orientation to the subjects pose and movement
- Check headroom and footroom before finalizing the frame
- Use horizontal when shooting groups or wide props
- Vertical is ideal for fashion, modeling and eCommerce shots
Thinking About the Composition
Composition is one of the most important elements in full-body photography as it determines how balanced and visually appealing the image appears. Following the rule of thirds helps position the subject naturally . while headroom ensures there is enough space above the head without cropping awkwardly. Leading lines can guide the viewers eye directly to the subject, enhancing focus and depth. Clean framing avoids distractions and ensures the entire body is captured proportionally make the portrait more professional. Here is attention to these basic composition principles, photographers can create full body shots that feel balanced, intentional and visually engaging whether in indoor studios or outdoor environments.
Rule of Thirds, Headroom, Leading Lines, Clean Framing
Strong composition in full-body photography relies on balanced framing. Use the rule of thirds, proper headroom, leading lines and clean edges helps keep the subject natural, clear and visually engaging.
- Rule of Thirds:
- Divide your frame into a 3×3 grid.
- Place the subject along the vertical or horizontal lines for natural balance.
- Not every shot must strictly follow it, but it prevents awkward central placement.
- Headroom:
- Leave small space above the subjects head neither too tight nor excessive.
- Ensures the subject fits fully and avoids “floating” appearance.
- Around 5–10% of the frame height as empty space usually works well.
- Leading Lines:
- Use lines from walls, roads, or architecture that draw attention to the subject.
- Helps guide viewer’s eyes naturally and creates depth.
- Subtle lines work better than overpowering ones.
- Clean Framing:
- Avoid cropping hands, feet, or head.
- Remove background clutter before shooting or adjust framing.
- Keep edges tidy so subject stands out
Camera Settings for Full Body Photography
Full body photography requires capturing the entire subject from head to toe while maintaining proper focus, correct exposure and natural proportions. Camera settings play a crucial role in achieving professional looking images.
| Setting | Recommended Range | Notes |
| Aperture (f) | f/4 – f/8 | Keep full body in focus |
| Shutter Speed | 1/125 – 1/250 | Faster if subject moves |
| ISO | 100 – 400 | Increase only if necessary |
| Focus Mode | AF-S (still) / AF-C (moving) | Focus on eyes/upper body |
Finding The Correct Depth of Field
Depth of field is a critical factor in full-body photography, determining how much of the subject and background appears sharp. A properly controlled DOF ensures that the subjects entire body, from head to feet, is in focus while the background can remain soft for a professional look. Photographers can adjust DOF using aperture, focal length, subject distance and camera sensor size. Choosing a moderately small aperture, keeping enough distance from the subject, and using the right lens ensures balanced focus across the full body. Understanding and applying these techniques helps produce sharp, natural-looking full-body portraits while maintaining separation between the subject and background for a visually appealing image.
- Use f/5.6–f/8 for full-body shots
- Keep medium distance between subject and camera
- Maintain 3–5 feet between subject and background
- Step back slightly to include entire body in focus
- Use 35–50mm lens for natural perspective
- Avoid ultra-wide lenses for full body
- Adjust aperture depending on background blur requirement
Factors Affecting Depth of Field
Depth of field (DOF) determines how much of the image appears sharp from front to back. In full-body photography, controlling DOF is essential to keep the subject’s entire body in focus while optionally blurring the background for a professional look. Several key factors influence DOF, including the aperture setting, lens focal length, distance between the camera and subject, and the distance between the subject and the background. Understanding these factors allows photographers to balance sharpness and background separation. Proper control ensures a crisp subject, visually appealing composition, and a professional, natural-looking portrait.
| Factor | Problem if Not Set Properly | Benefit of Correct Setting | Practical Setting / How to Solve |
| Aperture (f-stop) | Too wide (f/1.8) → parts of body blurry; too narrow (f/16) → background too sharp/distraction | Keeps full body sharp & background visually soft | f/5.6–f/8 for full-body shots; adjust slightly depending on distance and background |
| Focal Length | Wide lenses → distortion, legs/head out of proportion; long lenses → shallow DOF, parts blur | Maintains natural body proportion & control over background blur | Use 35–50mm; step back if needed |
| Subject Distance | Too close → shallow DOF, feet/head may blur; too far → subject too small in frame | Maintains focus from head to toe & proper subject size | Moderate distance (6–10 feet); adjust based on lens |
| Background Distance | Subject too close → background sharp & distracting; too far → framing issues | Creates depth & separates subject from background | Keep 3–5 feet between subject & background for natural blur and depth |
Techniques for Achieving the Ideal Depth of Field
Achieving the ideal depth of field (DOF) is essential for full-body photography to ensure the subject remains sharp from head to toe while maintaining a pleasing background blur. This depends on aperture (f-stop), lens selection and camera-subject distance. Proper control of these settings helps create balanced, professional-looking images without unwanted blur or distractions.
| Technique / Factor | Problem if Not Applied Correctly | Benefit of Correct Application | Practical Setting / How to Solve |
| Recommended f-stop | Too wide (f/2.8) → parts of body out of focus; too narrow (f/16) → background too sharp | Keeps full body sharp while creating natural background separation | Use f/5.6–f/8 for full-body shots; adjust slightly based on subject distance and background |
| Lens Selection | Wrong lens → distortion or shallow DOF, body parts may blur | Maintains correct body proportion & balanced DOF | Use 35–50mm lens; step back if needed |
| Distance Control | Too close → shallow DOF, feet/head may blur; too far → subject too small | Ensures head-to-toe focus & proper subject size | Keep moderate distance (6–10 feet from camera); adjust subject-background distance as needed |
Choosing the Right Lens for Full Body Shots
Choosing the right lens is critical in full-body photography because it affects perspective, proportion, and background compression. The wrong lens can distort body parts, make the subject appear unnatural, or introduce unwanted background distractions. Medium focal lengths such as 35mm and 50mm are ideal because they provide a natural perspective, maintain accurate body proportions, and allow the photographer to work at a comfortable distance. Lens choice also impacts depth of field and background blur. Selecting the correct lens ensures that the subject looks realistic, full-body shots are sharp from head to toe, and the background complements the composition.
| Factor / Lens Choice | Problem if Not Applied Correctly | Benefit of Correct Lens Choice | Practical Tips / How to Use |
| 35mm Lens | Too wide → distortion, body parts appear stretched | Maintains natural perspective for full-body shots | Step back to fit full body in frame; avoid extreme edges |
| 50mm Lens | Subject may appear slightly compressed if too close | Balanced proportions, subtle background separation | Use for studio or outdoor portraits; keep moderate distance (6–10 feet) |
| Longer Lenses (85mm+) | Shallow DOF → parts of body out of focus; may require more space | Smooth background blur, flattering compression | Use when photographing with controlled background; increase camera-subject distance |
| Shorter Lenses (<35mm) | Distortion → legs or head look unnatural | Wide environmental context | Use cautiously; step further back to minimize distortion |
Lighting Setups for Indoor Full-Body Portraits
Lighting is one of the most important factors in indoor full-body photography. Proper lighting ensures the subject is evenly illuminated from head to toe, avoids harsh shadows and highlights natural body proportions. Indoor setups require a balance of key light, fill light, and background light to create a professional look. Photographers can use natural window light, soft boxes or continuous LED lights. The correct placement, angle and intensity of lights help control shadows, add depth and make the subject stand out from the background. Understanding indoor lighting principles ensures full-body portraits are clean, well lit and visually appealing.
Natural Light Techniques
Natural light is one of the easiest and most flattering options for full-body photography. The best times to shoot are morning or evening, when the sunlight is soft and warm, avoiding harsh midday shadows. Position the subject so that they face towards the light source—for example, a large window—ensuring even illumination from head to toe. If the light is too strong, use sheer curtains or a diffuser to soften it, which prevents blown-out highlights and harsh shadows. Slightly adjusting the subject’s angle to the light can also create depth and dimension, highlighting body proportions naturally. Natural light works especially well for lifestyle, fashion, and casual indoor portraits.
Artificial Light Indoor or Studio
Artificial lighting gives full control over exposure, shadows, and background separation. A common setup includes a key light as the main source of illumination and a fill light to reduce shadows. Softboxes or diffused LED panels create soft, even light across the subject’s body, preventing harsh contrasts. Position the key light at a 45-degree angle to the subject and the fill light opposite it to balance shadows. Proper shadow control ensures no part of the subject’s body is lost in darkness, maintaining clear proportions. Adjusting the intensity and distance of the lights allows for consistent full-body illumination, making studio or indoor portraits look polished and professional.
Understanding the Importance of Background Selection
In full-body photography the background is just as important as the subject. A cluttered or distracting background can take attention away from the person, making the photo look unprofessional. Choosing a minimal, clean, and non-distracting background ensures the viewer’s focus stays on the subject and highlights their posture, clothing, and overall presence.
- A clean background makes the subject stand out.
- Avoids visual confusion that distracts the eye.
- Enhances the sense of depth in full-body portraits.
- Provides flexibility for editing and retouching later.
How to Solve Backgrounds Common Problems
A clean and well-chosen background is essential in full-body photography. Addressing common issues like clutter, blending, or harsh shadows ensures the subject stands out and the portrait looks professional.
- Step back or change angle if background is busy.
- Use contrasting colors to separate subject from background.
- Add key or rim light to create separation.
- Soften shadows with diffused light or reflectors.
- Reposition subject or background for balanced composition
Experimenting With Different Shooting Locations
Choosing the right location can make or break a full-body portrait. Indoor studios give you full control over lighting and a clean, distraction-free background, while outdoor locations offer natural light, textures, and variety. Moving around and trying different spots—like walls, parks, streets, or open fields—helps you find what complements the subject’s pose, outfit, and style. Experimentation also helps you discover interesting angles, leading lines, and natural framing, which add depth and dimension to your photos. The goal is to make the subject stand out while keeping the composition balanced and visually appealing.
- Choose locations with minimal distractions.
- Use natural elements (walls, stairs, pathways) for leading lines.
- Adjust camera angle and distance to fit the full body.
- Balance lighting with reflectors or diffused artificial lights if needed.
- Step back or use wider lens if space is limited.
- Pick locations that contrast with the subject for emphasis.
Finding the Correct Camera Height for Full Body Photography
Camera height plays a critical role in maintaining natural proportions in full-body photography. Placing the camera too high or too low can distort the subject, making legs look shorter or the upper body appear larger. The most accurate and flattering position is waist-level, as it keeps body lines straight and preserves true proportions from head to toe. Shooting from this height ensures that the viewer sees the subject without distortion and with balanced perspective. Whether outdoors or in a studio, keeping the camera at waist-level helps create a clean, realistic, and professional full-body portrait every time.
| Camera Height Level | Result / Effect | Why It Matters | Quick Tip |
| Waist-Level (Ideal) | Natural body proportions | Balanced perspective | Align camera with subject’s waist |
| Too High | Legs look shorter, upper body dominates | Creates unbalanced proportions | Lower camera until mid-body level |
| Too Low | Legs look longer, face appears smaller | Causes distortion if extreme | Raise camera slightly to waist height |
| Eye-Level | Slightly top-heavy look | Not ideal for full-body accuracy | Only use for stylized portraits |
Incorporating Movement for Dynamic Shots
Adding movement to full-body photography instantly makes images feel more natural and engaging. Small gestures, walking, turning, or even a subtle tilt can create a sense of life and depth. Movement also helps show personality, clothing flow and natural posture, especially in fashion or lifestyle photography. To capture motion effectively, adjust camera settings like shutter speed, keep the subject framed fully, and anticipate the best moments for action. Motion lines or blurred background (if desired) can add drama and style while keeping the subject sharp.
- Ask the subject to walk slowly or turn naturally.
- Capture small gestures: adjusting hair, hands, or posture.
- Use shutter speed 1/125–1/250 for slight motion, faster if subject moves quickly.
- Frame the subject fully and maintain consistent focus.
- Experiment with motion blur for creative effect.
- Encourage natural movement to show personality and flow of clothing.
Incorporating Movement For Dynamic Shots
In the world of full body photography incorporating movement can add a unique and dynamic dimension to your shots. Whether you’re capturing a fashion shoot or a dance performance, using movement effectively can elevate your photographs and create visually captivating images.
So, how can you integrate movement into your full body photography? Let’s explore some key techniques:
- Freeze action moments: Freeze the action at the perfect moment to capture the subject in mid-air or mid-motion. This technique can create a sense of energy and excitement in your photographs.
- Panning: Panning involves following the subject with your camera as they move. This motion blur technique can add a sense of speed and dynamism to your photos.
- Jumping and leaping: Encourage your models to jump or leap in front of the camera. This can create a sense of weightlessness and gracefulness in your images.
- Dancing and twirling: Incorporate dance movements into your full body shots to capture fluidity and grace. Experiment with twirling movements or ballet-inspired poses to add a touch of elegance.
- Walking and running: Have your subjects walk or run towards the camera or away from it. This can add a sense of movement and dynamism, especially when combined with a shallow depth of field.
- Utilize props: In addition to incorporating movement through the subject, you can also use props to add an element of motion. Consider using flowing fabrics, wind machines, or even confetti to create visually appealing movement in your shots.
Top 10 Key Posing Tips For Full Body Portraits
When it comes to full body photography, capturing the perfect pose can make all the difference in creating stunning portraits. Whether you’re photographing a client or even just taking a selfie, these 10 key posing tips will help you highlight the best features and create visually appealing images.
- Posture: Encourage your subject to stand tall with their shoulders back and their spine straight. Good posture not only portrays confidence but also elongates the body, resulting in a more flattering image.
- Weight distribution: Advise your subject to shift their weight onto their back leg, creating a natural asymmetry that adds depth and interest to the photograph.
- Placement of arms: Experiment with different arm positions to avoid stiffness. Instead of letting arms hang limply by the sides, suggest placing hands on hips, crossing arms, or gently touching the face or hair.
- Legs and feet: To create a dynamic pose, encourage your subject to bend one knee slightly, creating an “s-curve” shape with their body. Experiment with bringing one foot forward while the other remains behind, adding movement and dimension to the image.
- Angles: Experiment with shooting from different angles to find the most flattering perspective. A higher camera angle can elongate the body, while a lower angle can add drama.
- Body language: Capture natural movements and expressions to bring life to your full-body portraits. Encourage your subject to laugh, walk, or perform simple actions to capture authentic emotions.
- Focus on the eyes: The eyes are the window to the soul, and they play a vital role in conveying emotion. Make sure to direct your subject to look directly at the camera or towards a point to create a connection with the viewer.
- Utilize props: Incorporate props that complement the subject’s personality or add visual interest to the photograph. Props such as hats, umbrellas, or even chairs can enhance the composition and narrative of the image.
- Symmetry and line: Pay attention to the lines and shapes created by the subject’s body. Utilize leading lines or symmetrical poses to add visual impact and draw the viewer’s eye towards the subject.
- Expression: Lastly, encourage your subject to express themselves and let their personality shine through their facial expressions. A genuine smile or a thoughtful look can greatly enhance the overall appeal of the photograph.
Experimenting With Different Levels Of Poses (Sitting, Standing, Leaning)
Capturing the human body in photography is an art that requires careful consideration of various factors – one of which is experimenting with different levels of poses. By exploring poses that involve sitting, standing, and leaning, photographers can create unique and visually appealing compositions.
Whether you’re a professional photographer looking to enhance your skills or a novice enthusiast seeking inspiration, here are some key points to consider:
- Sitting poses: Sitting poses can convey a sense of relaxation, informality, and intimacy. Experiment with different seated positions, such as cross-legged, on a chair, or on the ground, to evoke different emotions and moods in your photographs.
- Standing poses: Standing poses exude confidence, presence, and dynamism. Explore variations like straight standing, hand-on-hips, or one leg slightly forward to add visual interest to your shots. Consider the subject’s body orientation, the positioning of their limbs, and the interaction with the surroundings to create compelling compositions.
- Leaning poses: Leaning poses offer a more relaxed and casual look to photographs. Whether leaning against a wall, a railing, or even another person, this type of pose can bring a sense of ease and playfulness to the image. Experiment with different angles and levels of leaning to emphasize the subject’s personality and create visually captivating shots.
Frequently Asked Questions
What Is Full Body Photography?
Full body photography is a specialized genre of photography where the subject’s entire body, from their head to their feet, is captured within the frame. This style of photography is often used in fashion, portraiture, and commercial photography to provide a comprehensive view of the subject.
How Can Full Body Photography Enhance My Images?
By incorporating full body photography into your repertoire, you can add depth and context to your images. It allows you to showcase the subject’s fashion choices, body language, and the environment around them, providing a complete visual narrative of the subject.
What Should I Wear For A Full Body Photoshoot?
When preparing for a full body photoshoot, it’s important to select outfits that not only reflect your personal style but also flatter your body shape. The attire should align with the theme or purpose of the photoshoot, whether it’s casual, formal, or thematic, to ensure a cohesive visual story.
Can Full Body Photography Be Used For Commercial Purposes?
Absolutely, full body photography is a valuable tool in the commercial sector. It’s extensively used in advertising, fashion campaigns, and promotional materials as it allows businesses to showcase their products or services in a comprehensive manner, often using models to demonstrate product usage or wear.
Conclusion
Mastering full-body photography requires a combination of technical skills, creative composition, and practical guidance. From choosing the right lens and camera settings, controlling depth of field, to experimenting with lighting, backgrounds, and locations, every element contributes to a professional-looking portrait. Adding movement, guiding natural poses, and ensuring the subject stands out from the background makes images feel dynamic, engaging, and visually appealing. By applying these techniques, photographers can consistently capture balanced, sharp, and aesthetically pleasing full-body shots. Whether shooting indoors or outdoors, understanding and controlling these factors allows anyone to elevate their full-body photography, highlighting the subject’s personality, posture, and presence effectively