
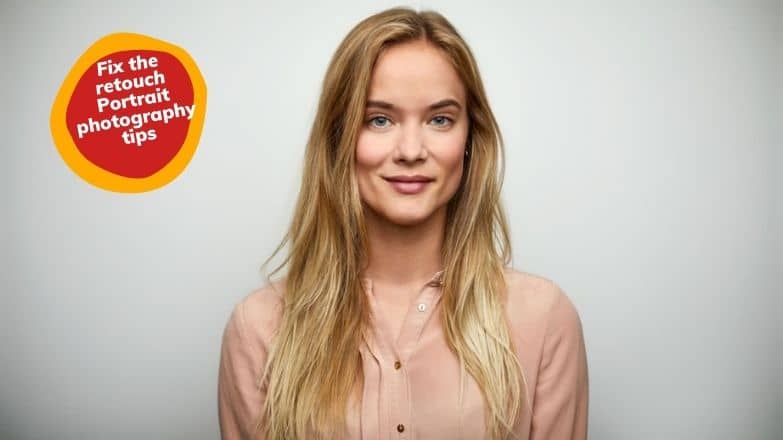
Portrait photography is one of the most rewarding photography styles because it helps you capture genuine emotions, personalities and memorable moments. Whether you are using a DSLR a mirrorless camera or even a smartphone . Learning the right techniques can dramatically improve the quality of your portraits. From understanding camera settings and lighting to choosing the best lenses and posing your subject naturally . Every detail plays an important role in creating eye catching images. The good news is that you do not need expensive equipment or years of experience to get started. With consistent practice and a few proven techniques anyone can take professional-looking portraits.
In this complete beginners guide you will learn essential portrait photography tips camera settings, lighting methods, composition techniques, editing advice and common mistakes to avoid giving you the confidence to capture stunning portraits in any situation.
Why Portrait Photography Is Worth Learning
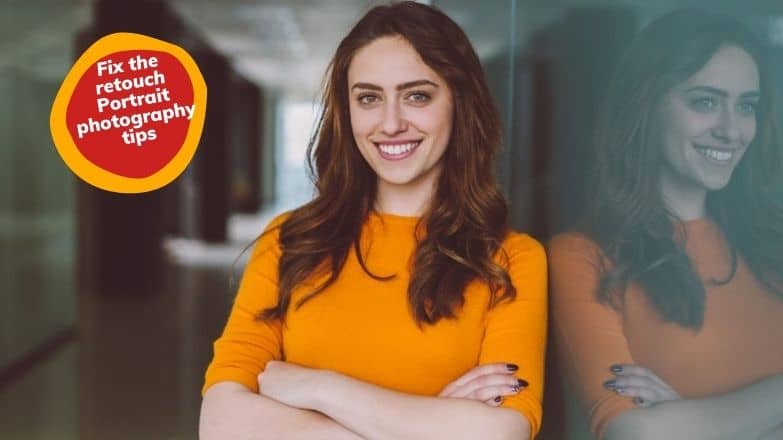
Portrait photography is more than just taking pictures of people. It is a creative skill that allows you to tell stories, capture emotions and preserve meaningful moments. Whether you want to pursue photography as a hobby or a profession, learning portrait photography can open many opportunities while helping you develop valuable technical and artistic skills.
- Personal memories
- Professional opportunities
- Social media and business use
Essential Camera Gear for Portrait Photography
You do not need the most expensive camera to take beautiful portraits. What matters most is understanding your equipment and using it effectively. Modern DSLR cameras , mirrorless systems and even smartphones can produce impressive portrait photos when paired with good lighting and the right settings. As a beginner focus on choosing gear that fits your budget and skill level instead of chasing the latest technology. Starting with reliable equipment allows you to learn essential photography techniques while building confidence behind the camera. As your skills grow you can upgrade your gear to match your creative goals and shooting style.
- DSLR vs Mirrorless
- Entry-level cameras
- Smartphone cameras
Best Portrait Lenses for Beginners
The lens you choose has a major impact on the look and quality of your portraits. While camera bodies offer useful features, lenses play a bigger role in creating sharp details, soft background blur and natural looking images. Beginners do not need a large collection of lenses to get started. A few affordable options can cover most portrait photography situations whether you are shooting indoors, outdoors or in a studio. Understanding the strengths of each lens will help you choose the right one for your style and capture more professional looking portraits.
- 50mm
- 85mm
- 35mm
- Zoom lenses
Must Have Photography Accessories
The right accessories can make portrait photography easier, more efficient and more professional. While a good camera and lens are essential a few affordable tools can improve image quality, simplify your workflow and help you shoot in different lighting conditions. Whether you are photographing indoors or outdoors these accessories provide greater stability, better lighting control and extra reliability during long photo sessions. Investing in a few key items from the start will help you create consistent, high quality portraits and prepare you for a wide range of shooting situations.
- Tripod
- Reflector
- External flash
- Memory cards
- Extra batteries
- Lens hood
Understand Exposure Before Taking Portraits
Understanding exposure is one of the most important skills in portrait photography. Proper exposure ensures your subject is neither too dark nor too bright while preserving natural skin tones and fine details. Exposure is controlled by three key camera settings: aperture, shutter speed and ISO. These settings work together to determine how much light reaches the camera sensor. Once you understand how they affect your photos you will be able to shoot confidently in different lighting conditions and consistently capture well balanced, professional looking portraits.
- Aperture
- Shutter speed
- ISO
- Exposure triangle
Best Camera Settings for Portrait Photography
Using the right camera settings is essential for capturing sharp, well exposed and professional looking portraits. While there is no single setting that works for every situation, understanding how to adjust your camera based on the lighting, subject and location will help you achieve consistently better results. For most portraits, a wide aperture creates a soft, blurred background that keeps attention on your subject . While a fast enough shutter speed prevents motion blur. Keeping the ISO as low as possible reduces image noise and preserves fine details. You should also choose the appropriate focus mode and white balance to ensure accurate colors and crisp eye focus. As you gain experience . You will learn to fine tune these settings for indoor, outdoor, natural light and studio portraits giving you greater creative control over every shot.
How to Get Sharp Focus on the Eyes
The eyes are the most important part of a portrait because they naturally draw the viewers attention. Even if the rest of the image is perfectly exposed a portrait can look less professional if the eyes are soft or out of focus. To achieve sharp eye focus, use single point autofocus or eye detection autofocus if your camera supports it. Focus on the eye closest to the camera . Especially when shooting with a wide aperture such as f/1.8 or f/2.8 where the depth of field is very shallow. Ask your subject to stay still while you gently press the shutter and use a fast enough shutter speed to avoid camera shake or motion blur. Zoom in to review your images and confirm the eyes are crisp before moving to the next shot.
Use Natural Light Like a Professional
Natural light is one of the best tools for creating beautiful and flattering portraits. It produces soft, realistic tones and helps capture natural skin colors without requiring expensive lighting equipment. Learning how to work with available light can dramatically improve your portrait photography whether you are shooting indoors or outdoors. Position your subject near a large window for soft indoor light or use open shade outside to avoid harsh shadows and squinting. During golden hour, the warm, low angle sunlight creates a pleasing glow and adds depth to your portraits. You can also experiment with front, side and backlighting to achieve different moods and effects. A simple reflector can bounce light onto your subjects face, reducing shadows and creating a brighter more balanced portrait.
When to Shoot: Best Time of Day for Portraits
The time of day has a significant impact on the quality, mood and overall appearance of your portraits. Natural light changes throughout the day, affecting brightness, color and the direction of shadows. Choosing the right time to shoot can help you capture soft skin tones, balanced exposure and more flattering facial features without relying on heavy editing. While every lighting condition has its advantages understanding when and how to use each one will improve your results. Golden hour offers warm soft light while blue hour creates a calm and cinematic atmosphere. Overcast days provide even lighting that is ideal for portraits and midday sunlight can still produce great images when used carefully with shade or a reflector. Learning to adapt to different lighting conditions will help you create beautiful portraits at any time of day.
- Golden Hour
- Blue Hour
- Overcast days
- Midday sunlight
Beginners Guide to Artificial Lighting
Artificial lighting gives you complete control over how your portraits look making it easier to achieve consistent results in any environment. Unlike natural light it allows you to shoot at any time of day and create the exact mood or style you want. As a beginner you do not need an expensive studio setup to get started. A few basic lighting tools can dramatically improve image quality and help you learn how light shapes your subjects face. Understanding the purpose of different lighting equipment will make it easier to choose the right setup for indoor portraits, studio sessions or creative photography projects. With a little practice, artificial lighting can help you produce sharp, well lit and professional looking portraits regardless of the location or weather conditions.
- Continuous lights
- Speedlights
- Softboxes
- Ring lights
- LED panels
Choose the Right Background
The background is just as important as your subject because it influences the overall look and feel of a portrait. A clean well chosen background helps direct the viewers attention to the person instead of distracting them with unnecessary details. Whether you are shooting indoors, outdoors or in a studio . The right background should complement your subject without competing for attention. You can create a professional look by using simple walls, natural scenery or softly blurred backgrounds that add depth to the image. Pay attention to colors, patterns and objects behind your subject as these can affect the final composition. Changing your shooting angle or moving your subject a few steps can often make a significant difference. By selecting the right background you will create portraits that look cleaner, more polished and visually appealing.
- Indoor
- Outdoor
- Blurred backgrounds
- Simple colors
Learn Portrait Composition Techniques
Composition is the art of arranging elements within your frame to create a balanced and visually appealing portrait. Even with excellent lighting and camera settings, a poorly composed image can feel awkward or distracting. Good composition helps guide the viewers eyes directly to your subject while adding depth, emotion and storytelling to the photograph. As a beginner you do not need to memorize complex rules. Instead start with a few simple techniques that professional photographers use every day. Small adjustments to your framing, camera position and subject placement can dramatically improve the impact of your portraits. As you gain experience you will naturally learn when to follow these composition guidelines and when to break them for creative effect. Mastering these fundamental techniques will help you capture portraits that are more engaging, balanced and memorable.
- Rule of Thirds
- Leading Lines
- Negative Space
- Framing
- Symmetry
Find the Most Flattering Camera Angles
The angle you choose can completely change how your subject looks in a portrait. A flattering camera angle highlights facial features, creates a natural sense of depth and helps your subject appear more confident and comfortable. Rather than always shooting at eye level, experiment with slightly higher or lower angles to see which perspective works best for different face shapes and body types. Encourage your subject to turn their shoulders slightly instead of facing the camera straight on, as this often creates a more natural and slimming appearance. Moving around your subject instead of staying in one position also allows you to discover more interesting compositions. There is no single perfect angle for every person, so take multiple shots from different perspectives and compare the results. Small changes in camera position can make a noticeable difference in the final portrait.
Simple Posing Tips for Beginners
Posing is one of the easiest ways to improve your portraits, even if you’re just starting out. Many people feel awkward in front of a camera, so your job as a photographer is to guide them into natural and comfortable positions. Instead of asking your subject to stand stiffly, encourage relaxed movements, gentle body angles, and genuine expressions. Small adjustments, such as shifting weight onto one leg, turning the shoulders slightly, or tilting the head, can make a portrait look more flattering and engaging. Keep your directions simple and demonstrate poses when needed to help your subject feel confident. Take multiple photos while they move naturally rather than expecting them to hold a single pose. With regular practice, you’ll learn which poses work best for different people, creating portraits that feel authentic, balanced, and full of personality.
How to Make Your Subject Feel Comfortable
A relaxed subject is more likely to show genuine emotions, resulting in portraits that feel natural and engaging. Many beginners focus only on camera settings and lighting, but creating a comfortable atmosphere is just as important. Start by greeting your subject with a friendly conversation to break the ice and reduce nervousness. Offer simple compliments and reassurance to build their confidence throughout the session. Instead of giving complicated posing instructions use clear and easy directions that anyone can follow. Encourage natural movement, laughter and conversation rather than asking them to stay completely still. Be patient and avoid rushing the session allowing your subject time to settle into the experience. When people feel comfortable their expressions become more authentic, their posture looks more relaxed and your portraits will capture genuine personality instead of forced smiles or awkward poses.
- Build confidence
- Start with conversation
- Give easy directions
- Encourage natural expressions
Capture Natural Facial Expressions
Natural facial expressions can make a portrait feel genuine, emotional and memorable. A forced smile or stiff expression often looks unnatural and reduces the impact of the photo. Instead of asking your subject to smile on command, create a relaxed environment where real emotions can appear naturally. Talk with them throughout the session, ask simple questions, or encourage them to think about a happy memory to bring out authentic reactions. Capture multiple shots while they are laughing, talking, or looking away between poses, as these candid moments often produce the best portraits. Be patient and avoid rushing, giving your subject enough time to feel comfortable in front of the camera. Genuine expressions help reveal personality, build an emotional connection with the viewer and make every portrait look more professional and engaging.
Where Should Your Subject Look?
The direction of your subject’s eyes can change the mood, emotion and storytelling of a portrait. Looking directly into the camera creates a strong connection with the viewer and often conveys confidence, honesty or intensity. Looking slightly away from the camera can produce a thoughtful, relaxed or cinematic feel . While focusing on an object in the distance adds a sense of curiosity and depth. Encourage your subject to keep their eyes relaxed rather than staring as this helps create a more natural expression. You can also ask them to glance down or toward a nearby light source for softer, more candid portraits. Experiment with different eye directions throughout the session and review the results. Small changes in where your subject looks can dramatically improve the emotion and visual impact of your portrait.
Use Hands Correctly in Portrait Photography
Hand placement can make a portrait look either natural or awkward . So it is important to pay attention to how your subject uses their hands. Stiff or lifeless hands often distract from an otherwise great photo . While relaxed hand positions add balance and emotion to the composition. Encourage your subject to keep their fingers slightly bent instead of fully stretched or tightly clenched. They can gently touch their face, adjust their hair, hold a jacket, place a hand in a pocket or lightly rest their hands on their lap to create a more natural pose. Avoid pressing the hands flat against the body as this can make them appear larger than they are. Keep checking hand placement throughout the session, since small adjustments can significantly improve the overall look of the portrait and create a more polished, professional result.
Dress and Color Tips for Better Portraits
Choosing the right clothing and colors can have a big impact on the quality of a portrait. Outfits should complement the subject without drawing attention away from their face. Solid colors, neutral tones, and simple patterns usually work best because they create a clean, timeless look. Avoid clothing with large logos, bold graphics, or busy patterns, as these can become distracting in photos. It’s also a good idea to coordinate colors with the background and location to create a balanced composition. Comfortable clothing helps subjects feel more relaxed, leading to natural poses and expressions. Accessories should be kept simple unless they are part of the intended style or story. Encouraging your subject to wear outfits that reflect their personality while maintaining a cohesive color palette will help create portraits that look polished, flattering, and visually appealing.
Indoor Portrait Photography Tips
Indoor portrait photography offers complete control over your environment . Making it an excellent choice for beginners who want to practice consistently. Even without a professional studio you can capture beautiful portraits by making the most of available light and choosing a clean shooting space. Position your subject near a large window to take advantage of soft natural light or use simple artificial lighting to create balanced exposure. Keep the background uncluttered so the focus remains on your subject and use a wide aperture to create a pleasing background blur. Pay attention to white balance to ensure accurate skin tones under different indoor light sources. If space is limited, try different camera angles and focal lengths to avoid distortion. With thoughtful lighting, careful composition and the right camera settings . You can create sharp, professional-looking indoor portraits in almost any location.
Outdoor Portrait Photography Tips
Outdoor portrait photography gives you access to beautiful natural light, scenic backgrounds and endless creative possibilities. However changing weather and lighting conditions can also present challenges. To achieve the best results, choose locations with soft, even lighting such as parks, gardens or shaded streets. Shooting during the golden hour often produces warm tones and flattering light, while overcast days provide soft, shadow-free illumination. Avoid placing your subject in direct midday sunlight, as it can create harsh shadows and cause squinting. Use trees, buildings, or reflectors to control the light and improve facial illumination. Pay attention to the background, making sure it enhances rather than distracts from your subject. By adapting to outdoor conditions and using natural light effectively, you can capture vibrant, professional-looking portraits in almost any environment.
Portrait Photography Ideas You Can Try Today
The best way to improve your portrait photography is through regular practice and creative experimentation. Trying different portrait styles helps you understand posing, composition, lighting and camera angles while building your confidence behind the camera. You do not need a professional studio or expensive equipment to create eye catching portraits. A simple outdoor location, a clean indoor space or even your backyard can provide excellent opportunities to practice. Encourage your subject to move naturally, change poses and interact with their surroundings instead of staying in one position. Capture a variety of shots from different distances and perspectives to add diversity to your portfolio. Exploring different portrait ideas not only keeps your photo sessions interesting but also helps you discover your own photography style and develop the skills needed to create more engaging and professional-looking portraits.
- Sitting poses
- Standing poses
- Walking portraits
- Environmental portraits
- Lifestyle portraits
- Close-up portraits
Common Portrait Photography Mistakes Beginners Make
Every photographer makes mistakes when learning portrait photography but recognizing them early can help you improve much faster. Many beginners focus on expensive gear while overlooking the basics such as lighting, composition and communication with their subject. Small mistakes like incorrect focus, poor exposure or distracting backgrounds can reduce the quality of an otherwise great portrait. Fortunately most of these issues are easy to fix with practice and attention to detail. Review your photos after each session, identify what worked well and make adjustments for the next shoot. Learning from your mistakes is one of the fastest ways to develop your skills and build confidence behind the camera.
- Focusing on the nose instead of the eyes
- Using harsh midday sunlight without shade
- Choosing a distracting or cluttered background
- Using the wrong aperture for the desired effect
- Ignoring the direction and quality of light
- Cutting off hands, feet or joints awkwardly
- Keeping the subject in stiff or uncomfortable poses
- Using ISO that is too high, creating unnecessary noise
- Not checking white balance, resulting in unnatural skin tones
- Standing in one position instead of trying different angles
- Giving unclear posing instructions to the subject
- Taking too few photos instead of capturing multiple variations
- Over-editing skin and removing natural texture
- Forgetting to clean the lens before shooting
- Relying on camera auto mode for every portrait
How to Edit Portrait Photos
Photo editing is the final step in creating professional looking portraits. Even a well captured image can benefit from small adjustments that improve color, exposure and overall appearance. The goal is to enhance the portrait while keeping it natural and realistic. Start with basic corrections before moving on to detailed retouching and avoid over editing that removes natural skin texture or facial features. With the right editing workflow you can produce polished portraits that look clean, balanced and ready for print or online sharing.
- White Balance
- Color Correction
- Skin Retouching
- Blemish Removal
- Teeth Whitening
- Eye Enhancement
- Crop & Straighten
Best Portrait Photography Editing Software
Choosing the right editing software can make your portrait workflow faster and more efficient. Whether you need basic color adjustments or advanced skin retouching, there is a tool for every skill level and budget. Some programs are ideal for beginners because they offer simple editing features . While others provide professional tools for detailed retouching and creative enhancements. Start with software that matches your experience and editing needs .Then explore more advanced features as your skills improve and your photography style develops.
- Adobe Lightroom
- Adobe Photoshop
- Capture One
- Luminar Neo
- ON1 Photo RAW
Tips for Taking Better Portraits with a Smartphone
You do not need a professional camera to capture impressive portraits. Modern smartphones feature advanced cameras, portrait modes and AI powered enhancements that can produce excellent results in the right conditions. The key is to make the most of good lighting, thoughtful composition and proper camera settings. Keep your lens clean, tap to focus on the subjects eyes and use portrait mode to create a natural background blur. With a few simple techniques and regular practice, you can take sharp attractive portraits using only your smartphone.
Portrait Photography Practice Exercises
The best way to improve your portrait photography is through consistent practice. Every photo session helps you develop better skills in lighting, composition, posing and camera control. You don’t need professional models or expensive locations to gain experience. Practicing with friends, family or even yourself allows you to experiment with different techniques and build confidence behind the camera. Regular exercises also help you identify your strengths, learn from mistakes and develop a unique photography style over time.
- Daily challenges
- Family portraits
- Self-portraits
- Street portraits
Professional Portrait Photography Checklist
A simple checklist can help you stay organized and avoid common mistakes before every portrait session. Whether you are photographing a client, a friend or a family member . Taking a few minutes to review your equipment and camera settings can save time and improve the final results. Following a consistent routine also helps you focus more on creativity and connecting with your subject instead of fixing preventable problems during the shoot.
- Clean your camera lens and sensor if needed
- Charge all camera batteries and pack extras
- Format and carry additional memory cards
- Select the right lens for your portrait style
- Set the correct aperture, shutter speed, and ISO
- Check white balance and image quality settings
- Focus on the subjects eyes
- Choose a clean, distraction-free background
- Test natural or artificial lighting before shooting
- Bring essential accessories like a reflector or flash
- Guide your subject into relaxed, natural poses
- Capture multiple angles and expressions
- Review images regularly for sharpness and exposure
- Back up your photos immediately after the session
Final Tips to Improve Your Portrait Photography Skills
Becoming a skilled portrait photographer takes time, patience and regular practice. Every photo session is an opportunity to learn something new . Whether it is improving your lighting, refining your composition or helping your subject feel more comfortable. Study the work of experienced photographers, experiment with different techniques and review your images to identify areas for improvement. Most importantly keep shooting consistently and don’t be afraid to make mistakes. With dedication and a willingness to learn you will continue developing your skills and create portraits that are more natural, creative, and professional.
FAQ
What is portrait photography?
Portrait photography is the art of capturing a persons personality, emotions and expressions through photographs. The goal is to highlight the subject while using lighting, composition and background to create visually appealing and meaningful images.
Which camera is best for beginner portrait photography?
Both DSLR and mirrorless cameras are excellent for beginners. Entry-level models from Canon, Nikon, Sony and Fujifilm offer great image quality and manual controls. If you are just starting, choose a camera that fits your budget and pair it with a quality portrait lens.
What lens is best for portrait photography?
A 50mm f/1.8 lens is the best choice for most beginners because it is affordable, sharp and creates beautiful background blur. An 85mm lens is ideal for headshots while a 35mm lens works well for environmental and lifestyle portraits.
What aperture is best for portraits?
For single-person portraits an aperture between f/1.8 and f/2.8 creates a soft, blurred background while keeping the subject sharp. For group portraits use f/4 to f/8 to ensure everyone stays in focus.
How do you make portrait backgrounds blurry?
Use a wide aperture such as f/1.8 or f/2.8 position your subject farther from the background and use a longer focal length like 50mm or 85mm. These techniques create a natural bokeh effect that makes the subject stand out.
Should beginners use Auto or Manual mode?
Auto mode is helpful when you’re learning, but Manual mode gives you complete control over exposure and creativity. Many beginners also start with Aperture Priority mode before switching to full Manual mode.
What is the best lighting for portrait photography?
Soft natural light is one of the best lighting options for portraits. Shooting during the golden hour or near a large window produces flattering skin tones and gentle shadows. Softboxes and reflectors are excellent choices for indoor portraits.
How do I make someone look natural in photos?
Talk to your subject throughout the session, give simple posing instructions and encourage natural movement instead of stiff poses. Genuine conversations and laughter often lead to authentic expressions and more relaxed portraits.
What ISO should I use for portrait photography?
Use the lowest ISO possible while maintaining proper exposure. ISO 100–200 is ideal for bright outdoor conditions while 400–800 works well indoors when additional lighting is limited.
What is Eye AF in portrait photography?
Eye AF (Eye Autofocus) is a camera feature that automatically detects and focuses on your subjects eyes. It helps produce consistently sharp portraits especially when using wide apertures or photographing moving subjects.
Can I take professional portraits with a smartphone?
Yes. Modern smartphones with Portrait Mode, good lighting and proper composition can capture impressive portraits. Clean your camera lens, tap to focus on the eyes and shoot in natural light for the best results.
How do professionals edit portrait photos?
Professional photographers typically adjust exposure, white balance, and color before performing light skin retouching, blemish removal, eye enhancement and cropping. The goal is to improve the image while maintaining a natural appearance.
What should a person wear for a portrait session?
Solid colors, neutral tones and simple clothing usually produce the best portraits. Avoid busy patterns, large logos and overly bright colors that may distract from the subject’s face.
How can I improve portrait photography quickly?
Practice regularly experiment with different lighting and poses, learn your camera settings, study professional photographers work and review your photos after every session to identify areas for improvement.
What are the most common portrait photography mistakes?
Common mistakes include focusing away from the eyes, using harsh lighting, choosing distracting backgrounds, over-editing photos, poor posing, incorrect exposure and relying entirely on automatic camera settings instead of learning manual controls.
Conclusion
Portrait photography is a skill that combines creativity, technical knowledge and consistent practice. You do not need expensive equipment or years of experience to create beautiful portraits. By understanding your camera settings, using the right lighting, choosing suitable lenses, composing your shots carefully and helping your subject feel comfortable . You can capture images that are both natural and professional. Remember that every portrait session is an opportunity to learn and improve. Keep experimenting with different techniques, review your work and do not be afraid to make mistakes along the way. As your confidence grows so will the quality of your portraits. With patience, practice and the tips shared in this guide . You will be well on your way to creating stunning portrait photographs that leave a lasting impression.