Tag: best photo editing software

Best Photo Editing Software To Remove Background

Best Photo Editing Software To Remove Background

Any type of photographer needs a good photo editing software to enhance the beauty of the raw photograph. There are lots of photo editing software out there available online to choose from. But the constant question every photographer ask is that what is the best photo editing software? Well to answer this question I have collected a list of few of the best photo editing software for you in this article. Here is another article how to make background transparent in Photoshop

With the tools present in this photo editing software you can easily remove background, do color correction, apply filters and many other photo editing stuffs. Not only photographers but a person of any profession can use these software to edit their photos and enhance them. So, go ahead and keep reading to see which photo editing software is best for you. If you read this article you will able Change the Background in Photoshop  within 2 minutes. If you are not able to do it yourself Background removal company could be best choose for you.

Can photo editing software remove background?
Yes, the photo editing software I have provided in the list below can remove background of an image smoothly. You can use them easily as they are very much easier to use and hassle-free photo editing software. The set of tools these software have are just perfect to remove background from any sort of image with perfect accuracy.

Will I get Transparent background using this photo editing software?
Yes, you can create a transparent background using the photo editing software I have given in the lost below. They all have same sort of tools to remove the background of an image and make it transparent. You won’t need any extra experience to do it. Just go through the small tutorials and you’re good to go.

Is this photo editing software free?
All of the software except Adobe Photoshop is free. But Adobe is actually used by professionals that is why it isn’t free and you can subscribe to use it. It is not that much expensive though and anyone can afford it. It is actually one of the best photo editing software to remove background from images.

These following ones are the best photo editing software –
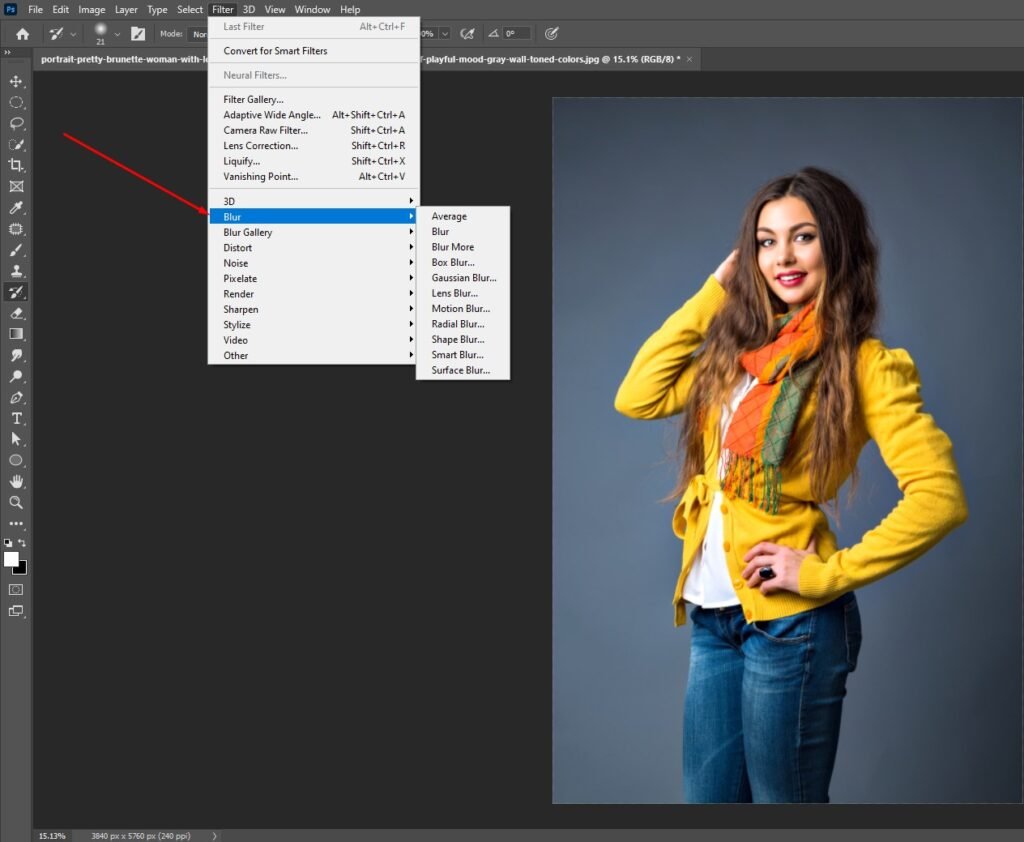
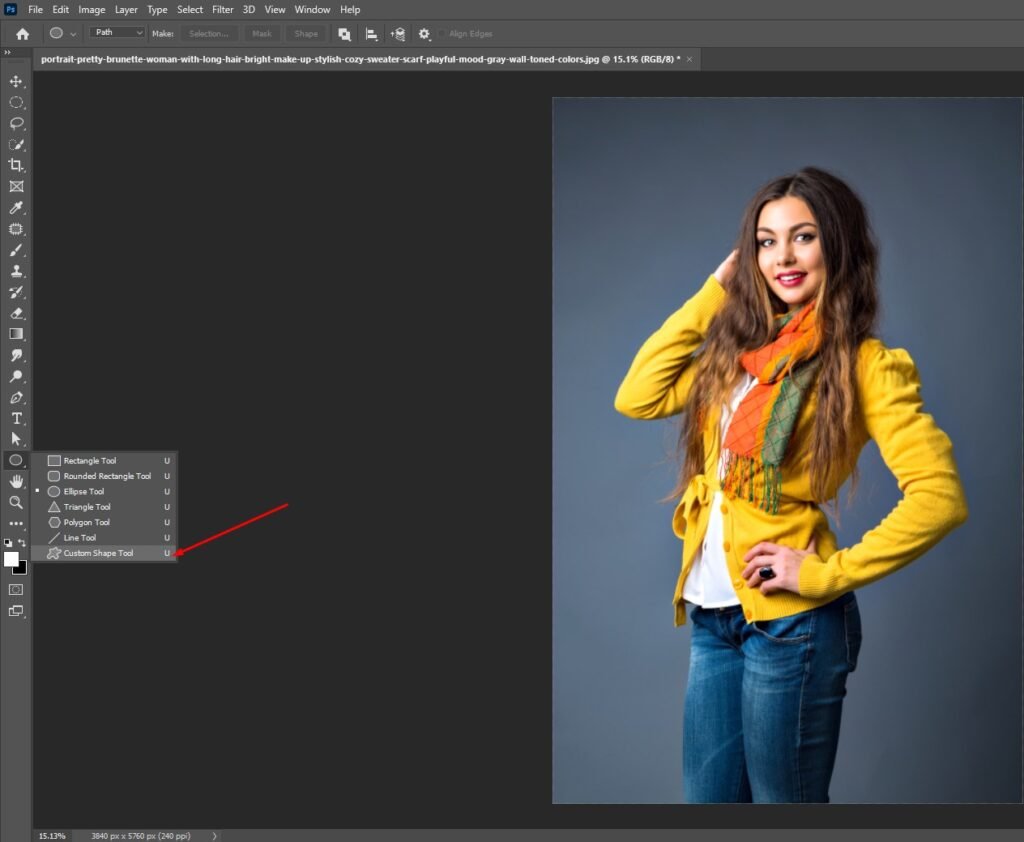
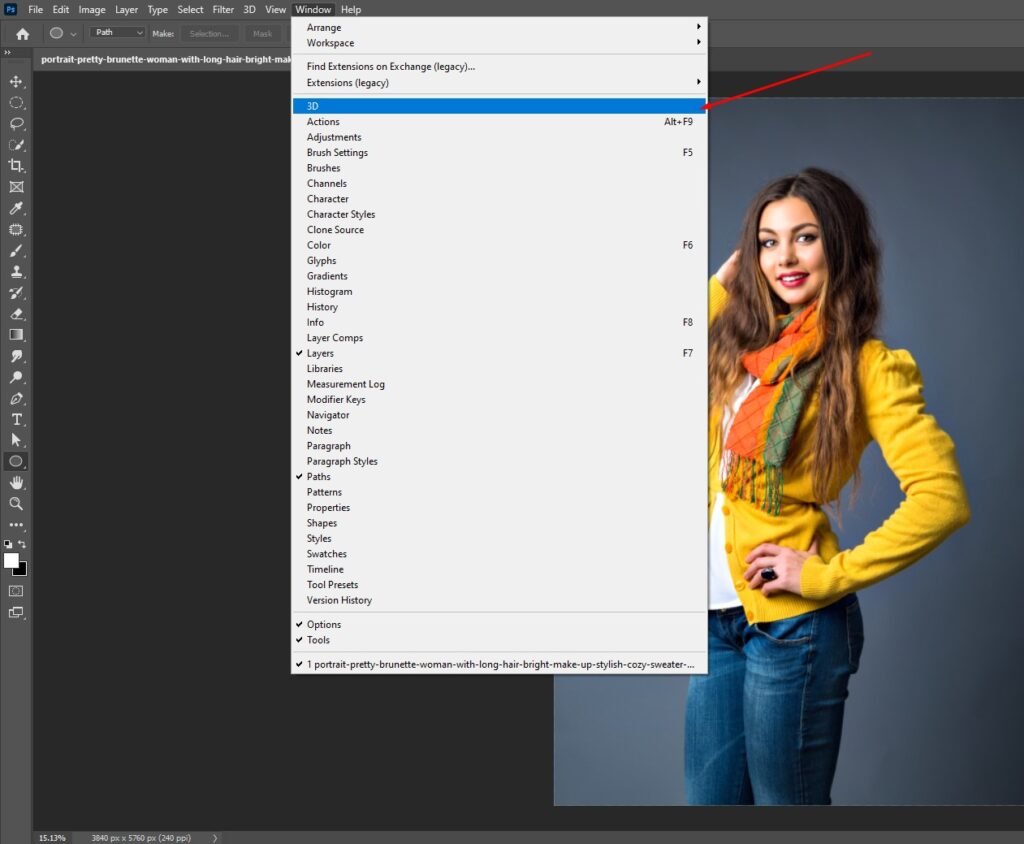
Photoshop

Without a doubt Photoshop is the best photo editing software for anyone. You can easily remove background with it. You can also improve the color and contrast of the photos. You can make digital art perfectly using Photoshop. You may have to become a subscriber and have to pay monthly to use its feature but it is all worth it.

Gimp

Another Great photo editing software is GIMP. It is also a software that lets you remove background and make it transparent. It is absolutely free and anyone can easily use it without experience. The quality of the final image is very good. If you are a product photographer and you want to remove background of the product photos then this tool is perfect for you.

Teorex PhotoScissors

PhotoScissors is an online photo editing software made for people who want to remove background from image without any kind of hassle. It is easy to use and anyone can use it. It is free of cost and you don’t need to pay anything to use the tool. Anyone with a little bit experience can use this tool to edit the images and make them more attractive than before.

Remove.bg

One of the most used online photo editing software to remove background is this tool. Remove.bg is one of the finest online tools to cut out the background of your images. With the set of tools, it offers clipping has become quite easy. You also get this online tool for free.

Clipping Magic

Clipping magic is actually a magical background removing tool. You can remove the background of any kind of image in seconds using this online photo editing software. All you need to do is to upload the image on the site and it will automatically remove the background of the image in less than a minute.

Fotor

Fotor is a all in one Photo editing software. You can do various types of photo editing using it. You can add filters, remove background, adjust colors, adjust light and many other stuffs. The quality of its tool is professional and the end image quality is exceptional. This tool is available free online.

Malabi

Malabi is a photo editing software mainly used to remove white background from an image. You can find it online and it is free of cost. All you have to do is to upload the image on the page of the site. It will automatically remove the background of the image with its AI tools. You can also use their touch up function to further edit the image.

Auto Clipping

Auto Clipping is both a free and paid photo editing software. You can use this tool to do bulk image background removal. Their free service doesn’t let you remove background of bulk images. You can only remove background of a single image that too it has to be less than 0.4 MP in size. But this software removes the background with proper accuracy.

Background Burner

It is also a free photo editing software to remove background of an image. It is free of cost and it also automatically removes the background of the image properly with complete accuracy. You can also use its touch up function to further edit the image.

Edit Photos for Free

Edit photos for free is a great photo editing software that can be used to remove background, create graphics and Make typography. It has a great interface and the AI it has inside it helps to properly remove the background of the image. It also is free of cost and anyone with or without experience can use this tool to edit their photos like a professional.

Best Background Removal Software Compared

Choose the right photo editing software can be confuse with so many options available. Some tools offer quick AI-powered background removal while others provide details manual editing for precision. Photoshop is the go-to choice for professionals but free tools like Remove.bg and GIMP also provide great results. Online tools such as Clipping Magic and PhotoScissors simplify the process without the need for downloads. Understanding the strengths of each software helps in select the best one for your needs. Whether you need bulk editing high-quality results or free alternatives, comparing these tools ensures you get the best background removal software.

How to Choose the Right Photo Editing Software

Select a photo editing software depends on your needs. If you require professional editing with multiple features Photoshop is a great option. If you want quick and automatic background removal tools like Remove.bg and PhotoScissors work well. GIMP is ideal for those look for a free alternative with manual control. The best choice depends on ease of use, accuracy and cost. Consider whether you need AI-powered automation or manual editing tools. Some software is browser-based while others require installation. By understanding your editing goals you can pick the right software for background removal and general image enhancement.

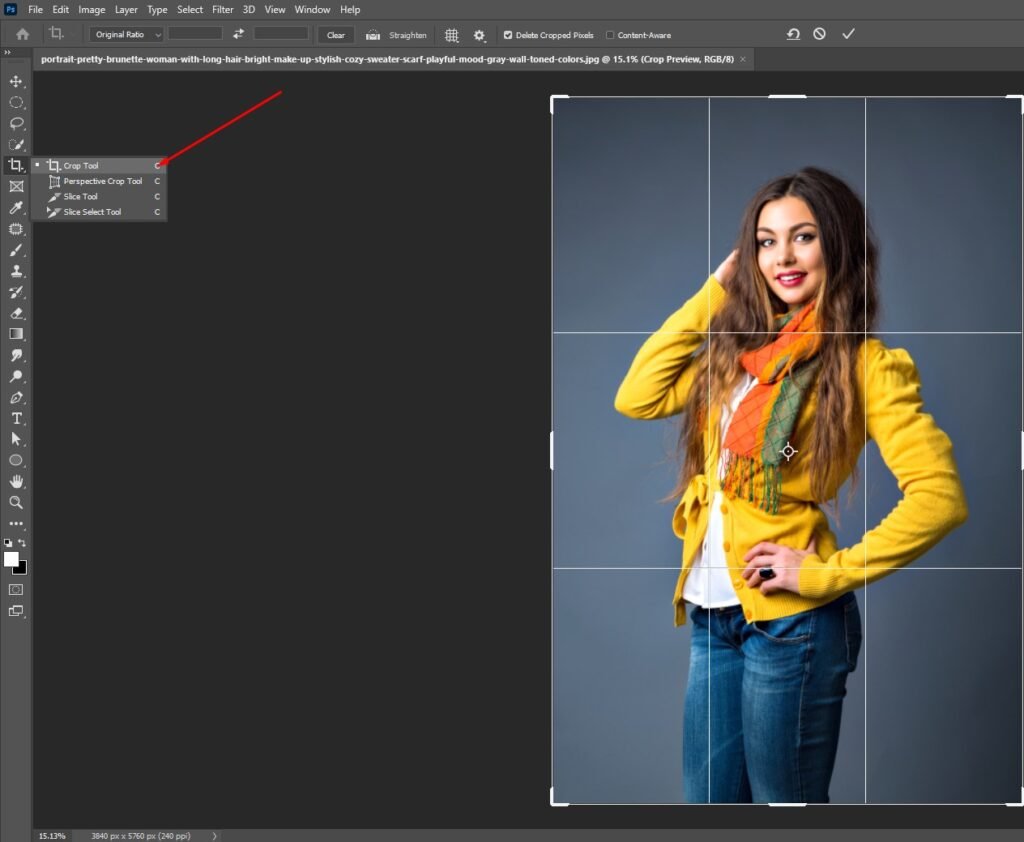
Simple Steps to Remove a Background from an Image

Removing a background can be easy with the right software. First upload your image to an editing tool like Photoshop, Remove.bg or PhotoScissors. If using AI-based tools the background is remove automatically. For manual editing, select the subject using a selection tool and delete the background. Fine-tune edges for a cleaner cutout. Most tools allow exporting the image with a transparent background in PNG format. If needed touch up with smoothing and color correction. Following these simple steps helps you achieve a clean and professional background removal without needing advanced skills or expensive software.

Which is Better Manual Editing or AI Tools

Both manual and AI-based background removal tools have advantages. AI-powered tools like Remove.bg are fast and require no experience make them perfect for quick edits. However they may struggle with complex backgrounds or detailed edges like hair and fur. Manual editing with software like Photoshop allows full control over the selection process ensuring high accuracy. While AI tools save time they might not always be precise. Manual editing is best for high-quality professional work. Choosing between AI and manual editing depends on the complexity of the image and how much time and effort you are willing to invest.

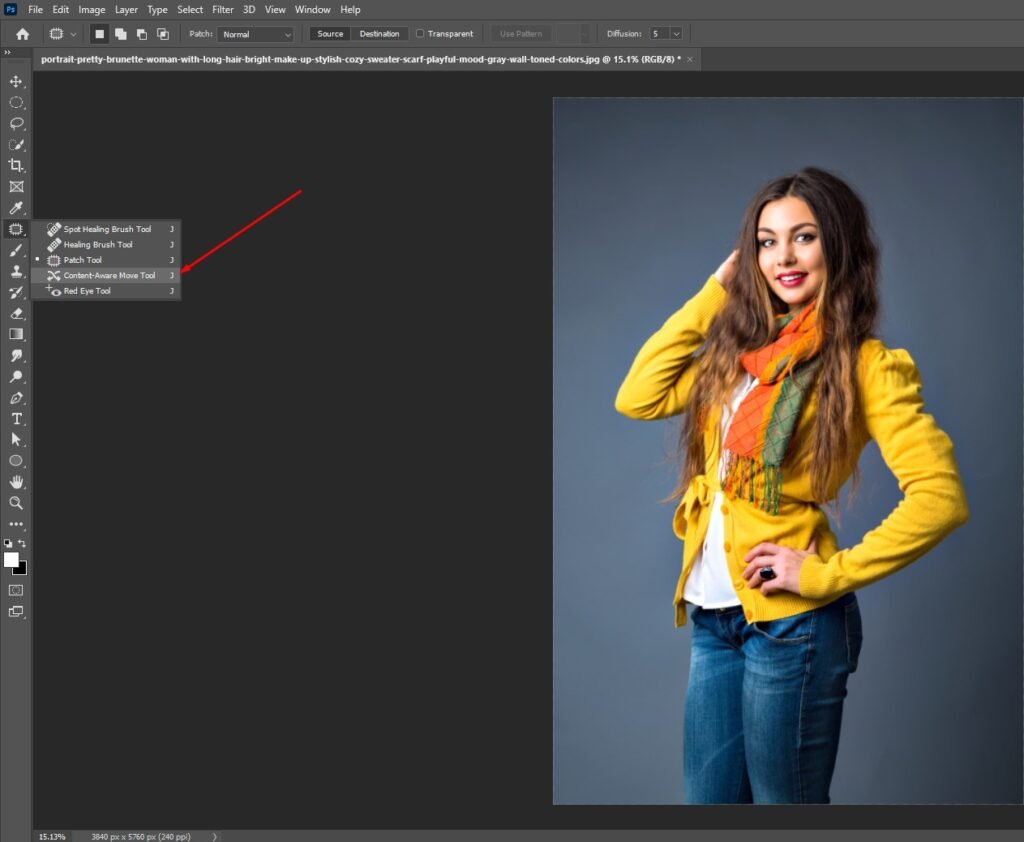
Test Background Removal on Complex Images

Background removal can be challenging when dealing with complex images like hair, fur or transparent objects. AI-based tools often struggle with these details producing rough edges or missing fine elements. Photoshop and GIMP offer tools like layer masks and refine edge features for better precision. When testing software use images with various background types to see how well they handle tricky areas. High-contrast images are easier to edit while low-contrast backgrounds may require manual touch-ups. Comparing results across different tools helps determine which one delivers the best quality for professional use.

Advantages and Disadvantages of Popular Editing Tools

Each photo editing software has strengths and weaknesses. Photoshop provides the highest level of control but requires a subscription and learning curve. Remove.bg and Clipping Magic offer quick AI-based background removal but may lack fine-tuning options. GIMP is free and powerful but requires manual effort for precise edits. Online tools are convenient but might not handle high-resolution images well. Free software often has limitations while paid tools offer advanced features.

Free and Paid Software for Background Removal

There are many free and paid options for removing backgrounds. Free tools like Remove.bg, PhotoScissors and Clipping Magic allow quick edits with AI-based automation. GIMP is a powerful free alternative with manual editing options. Photoshop, a paid tool, offers professional-grade editing with high precision. Some online tools provide free trials but require a subscription for full access. While free tools are great for basic use, paid options offer advanced features like batch processing, better edge detection, and higher resolution support. Choosing between free and paid software depends on your editing needs and the level of accuracy required.

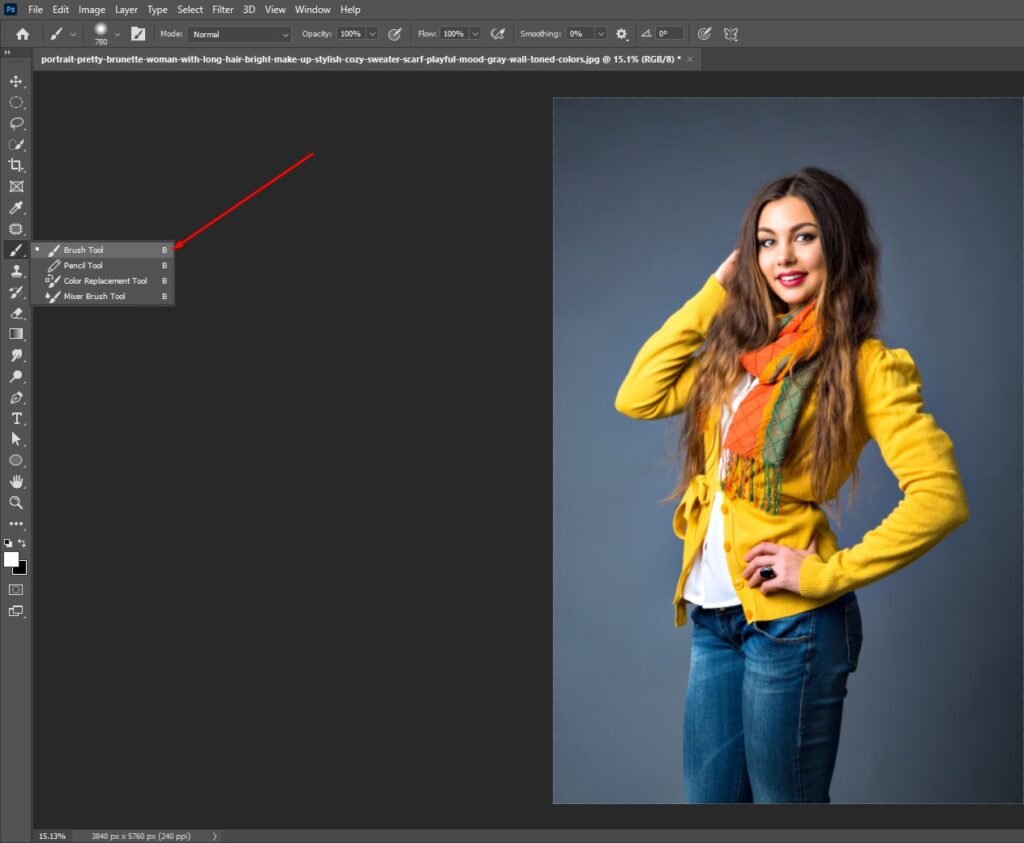
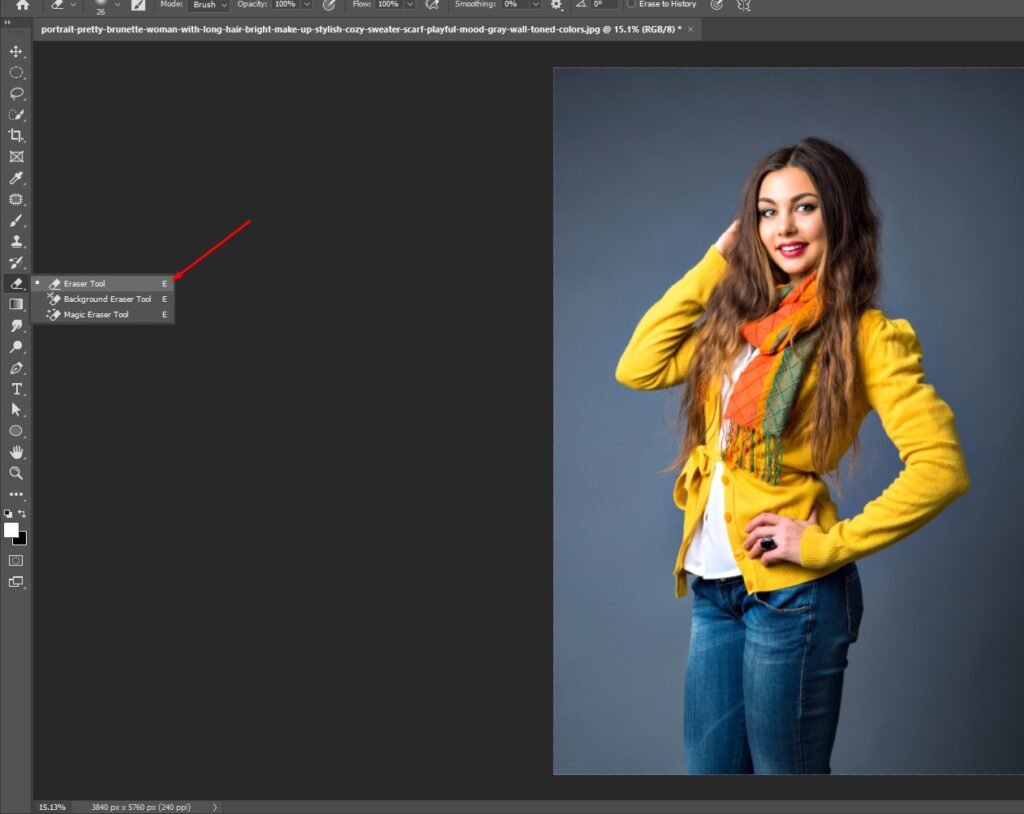
Common Mistakes in Background Removal and How to Fix Them

Even with advanced tools, background removal can lead to mistakes. One common issue is rough or jagged edges which can be fixed using feathering or smoothing options. AI tools sometimes miss fine details like hair so manual touch-ups with an eraser tool may be needed. Low-resolution images can cause blurry cutouts so using high-quality photos is best. Another mistake is leaving unwanted shadows or reflections, which should be adjusted using brightness and contrast settings. Understanding these common errors and how to fix them ensures better results when removing backgrounds from images.

Conclusion

So if you want to remove background from an image, Enhance the colors and contrast of it or edit you images properly then the photo editing software I have given above in this article is what you really need. These software will help you take care of the post processing stuffs of the amazing photos you capture.

How to enlarge body parts in photoshop

How to enlarge body parts in photoshop

Adobe Photoshop is an integral asset for picture editing, offering a variety of elements that permit you to improve and control your photographs in various ways. One normal use of Photoshop is to carefully change body parts in pictures, for example, causing somebody to seem slimmer, expanding the size of muscles, or augmenting specific body parts. Whenever it comes the body enlarging, Body Retouching is the common basic fact while done the work. While it’s vital for use Photoshop capably and morally, this guide will give a step-by-step guide on the most proficient method to securely and successfully extend body parts in Photoshop.

Step-By-Step Guide: How to enlarge body parts in photoshop

  1. Open Image
  2. Copy the layer
  3. Select the Body Part to enlarge
  4. Make Another Layer
  5. Use the Change Tool
  6. Refine Edges and wrinkles
  7. Change Brightness and Contrast
  8. Final Touch
  9. Save Your Work

Before

After

Open Your Picture

  1. Open Adobe Photoshop.
  2. Open the picture you need to alter by choosing “Record” > “Open” and picking your document.

Copy the Layer

Prior to rolling out any improvements to your picture, making a copy layer is fundamental. This will permit you to analyse the altered and unique adaptations and make changes depending on the situation.

  1. In the Layers board, right-click on the Foundation layer.
  2. Pick “Duplicate Layer” and name it as needs be.

Make Another Layer

To keep up with non-horrendous editing, put your progressions on another layer.

  1. With your choice dynamic, click the “New Layer” button in the Layers board.
  2. Name the new layer suitably.

Select the Body Part to Enlarge

  1. Select the “Lasso Tool” or “Pen Tool” from the toolbar.
  2. Cautiously frame the body part you need to extend.

Use the Change Tool

The Change instrument permits you to resize and reshape the chose body part.

  1. Select the “Edit” and pick “Free Change.”
  2. A jumping box will show up around your choice. Snap and drag the handles to resize the body part. To keep up with extents, hold down the “Shift” key while hauling.
  3. Click the mark of approval symbol in the choices bar to apply the change.

Refine Edges and wrinkles

To make the growth look regular, you might have to refine the edges of the altered body part.

  1. Select the “Eraser Tool” or “Mask” the layer, and cautiously eradicate any undesirable edges or regions.
  2. Use the “Blur” tool “Smudge” tool with a delicate brush to consistently mix the edges.

Change Brightness and Contrast

Once in a while, developing a body part can influence the general picture’s lighting and difference. To keep a decent look, change the brilliance and difference.

  1. Select the layer containing the broadened body part.
  2. Go to “Image” > “Adjustments” and pick “Brightness/Contrast.”
  3. Explore different avenues regarding the settings to coordinate the altered part with the remainder of the picture.

Final Touch

Now that you’ve effectively developed the ideal body part, now is the right time to make a few last acclimations to improve the general appearance of your picture.

  1. Use the “Clone Stamp Tool” to remove any defects or interruptions that might have come about because of the development.
  2. Apply any channels, variety changes, or impacts to make the picture look cleaned and rational.

Save Your Work

Whenever you’re happy with the changes, save your editing picture in a fitting record design. It’s a decent practice to save both the first and altered renditions for future reference.

Frequently asked questions (FAQs): enlarge body parts in Photoshop

1. Is it ethical to digitally enlarge body parts in photos?

Answer: The ethics of digitally enlarging body parts in photos can be subjective. It’s important to obtain proper consent and consider the implications of your edits. Generally, responsible and subtle adjustments for personal use or creative expression may be acceptable, but promoting unrealistic beauty standards or altering someone’s image without their permission is generally considered unethical.

2. How can I ensure that my edits look natural and not obviously retouched?

Answer: To make your edits appear natural, focus on refining edges, maintaining proportions, and matching lighting and contrast. Carefully blend the edited body part into the image using tools like the Eraser, Clone Stamp, and Blur tools. Subtlety is key, as overdoing the enlargement can make the edits appear obvious and unrealistic.

3. Can I use Photoshop to enlarge body parts in images for professional purposes, such as in the fashion industry or photography portfolio?

Answer: Using Photoshop to enhance images for professional purposes is common, but it should be done with care. Make sure that any edits are consistent with the industry’s standards and the client’s preferences. Always maintain open communication with clients to ensure their satisfaction.

4. Are there alternatives to Photoshop for editing body parts in images?

Answer: Indeed, there are options in contrast to Photoshop, like Adobe Lightroom, GIMP (GNU Picture Control Program), and different web-based photograph editors. Each device has its own highlights and expectation to learn and adapt, so pick the one that best suits your necessities and expertise level. The standards of moral altering and normal outcomes apply to these options also.

Conclusion

Adobe Photoshop is a flexible device that can be utilized for different photograph altering undertakings, including securely and morally extending body parts in pictures. In any case, it’s essential to utilize this ability capably, regarding individual assent and advancing reasonable body guidelines. Recollect that Photoshop is an expert grade programming, and to whom much is given, much will be expected. As you explore and refine your abilities, forever be aware of the moral and moral ramifications of your alters, and endeavour to make pictures that reflect positive and practical depictions of individuals.

A Comprehensive Guide to Creating Water Drops in Photoshop-Fix The Retouch

A Comprehensive Guide to Creating Water Drops in Photoshop-Fix The Retouch

Crafting lifelike water droplets in Photoshop can add authenticity and depth to your digital designs. Whether you’re working on nature scenes, still-life compositions, or product advertisements, the ability to depict water droplets convincingly is a valuable skill. In this tutorial, we’ll walk you through the process of creating water drops in Photoshop, from understanding droplet anatomy to applying lighting and texture effects.

Create water drop in Photoshop

Collecting Resources

Before you start, guarantee you have a top-notch reference picture of water beads. See how light communicates with the drops and note their shape, straightforwardness, and reflections. You will be guided through the process by this reference.

Setting Up the Canvas

Open Photoshop and make a new canvas of the size you want. Decide on a goal that suits your undertaking’s requirements. A higher resolution is preferable for detailed work.

Sketching the Basic Shape

Using the Ellipse Tool (U), draw the initial shape of your water droplet. Start with a medium gray color to represent the droplet’s base. Remember that water droplets typically have slightly elongated ellipsoidal forms with rounded bottoms.

Highlight and Shadow Addition

Create a new layer and set its blending mode to “Overlay” or “Soft Light.” With a soft white brush, add a highlight on the top section of the droplet to mimic light reflection. On another layer, apply a soft, dark gray shadow on the opposite side to create a sense of depth.

Refining the Shape

Use the Transform tool (Ctrl/Cmd + T) to adjust the water droplet’s shape. Slightly stretch or skew the droplet to mimic its natural form. Feel free to experiment until you achieve a convincing shape.

Introducing Transparency

Reduce the opacity of the base layer of the droplet to introduce transparency. Water droplets are not completely opaque, so decreasing the opacity will enhance the authenticity of the droplet.

Adding Surface Tension and Highlights

Add a new layer above the base layer. Using a small, soft brush, create a slightly brighter line along the droplet’s top edge to simulate surface tension. Adjust the layer’s opacity as needed.

Enhancing Highlights and Shadows

Fine-tune the highlights and shadows on the water droplet by adding more detail. Generate new layers when necessary and experiment with different brush sizes and opacities to achieve a realistic appearance.

Incorporating Reflections and Environment

Consider the environment around the water droplet. If it’s situated on a surface, paint a subtle reflection beneath it. Additionally, introduces subtle color reflections from the environment onto the droplet’s surface.

Final Touches and Details

Zoom in to inspect the water droplet closely. Perfect the details, adjust layer opacities, and apply any additional effects to achieve your desired level of realism.

Saving and Exporting

Once satisfied, save your work in a format that retains layers, such as PSD. If the droplet will be part of a larger composition, export it as a transparent PNG for seamless integration.

Conclusion

Mastery of creating water droplets in Photoshop demands attention to detail and a grasp of how light interacts with surfaces. By following this guide and practicing with diverse reference images, you’ll be able to produce remarkably authentic water droplets that elevate the quality of your digital designs. Remember that patience and experimentation are key to achieving exceptional results.

All important tools of Adobe Photoshop-Fix The Retouch

All important tools of Adobe Photoshop-Fix The Retouch

The tools in Adobe Photoshop are powerful and versatile, and they can be used to create a wide variety of images. With a little practice, you can learn how to use these tools to create stunning images that will impress your friends and colleagues. The following are some of the most important tools of Adobe Photoshop:

All important tools in Adobe Photoshop

Selection tools

These tools allow you to select specific areas of an image.

  • Rectangular Marquee Tool: Craft rectangular selections effortlessly.
  • Elliptical Marquee Tool: Forge circular or elliptical selections.
  • Lasso Tool: Freehand selection for custom outlines.
  • Magic Wand Tool: Selects alike pixels based on color.
  • Quick Selection Tool: Swiftly marks similar tones and textures.

Crop tool

This tool allows you to crop an image to a specific size or shape.

Drawing and Painting Tools

  • Brush Tool: Emulates painting with diverse brushes and settings.
  • Pencil Tool: Creates sharp-edged lines.
  • Eraser Tool: Eliminates portions of an image.
  • Paint Bucket Tool: Flood areas with colors or patterns.
  • Clone Stamp Tool: Replicates parts of an image to another area.

Retouching and Healing Tools

  • Spot Healing Brush: Speedily eradicates minor imperfections.
  • Healing Brush: Blends pixels from one area to another.
  • Patch Tool: Rectifies larger areas by seamless blending.
  • Content-Aware Move Tool: Shifts elements while intelligently filling gaps.

Filters

Filters can be used to add special effects to images.

  • Filter Gallery: Applies diverse artistic and distortion filters.
  • Blur and Sharpen Tools: Alters image sharpness and blur aspects.
  • Dodge, Burn, and Sponge Tools: Tweaks exposure, highlights, and saturation.

Text Tools

  • Horizontal Type Tool: Embeds horizontal text.
  • Vertical Type Tool: Inserts vertical text.
  • Horizontal and Vertical Type Mask Tools: Forms selections in the text’s shape.

Pen Tool and Vector Tools

  • Pen Tool: Constructs precise paths and shapes.
  • Path Selection and Direct Selection Tools: Modifies paths and anchor points.
  • Shape Tools: Produces predefined shapes (rectangle, ellipse, etc.).
  • Custom Shape Tool: Forge’s personalized vector shapes.

3D Tools (Extended Version)

  • 3D Panel: Establishes, manipulates, and renders 3D objects.
  • 3D Material Drop Tool: Assigns materials to 3D objects.
  • 3D Camera Tools: Adjusts the perspective of 3D scenes.

Navigation and Zoom Tools

  • Hand Tool: Navigate the view within the window.
  • Zoom Tool: Amplifies or reduces magnification.

Eyedropper and Color Sampler Tools

  • Eyedropper Tool: Samples colors from the image.
  • Color Sampler Tool: Samples multiple points to display color information.

Others Important Tools

Notwithstanding the devices referenced above, there are a couple of different instruments that are worth focusing on. These include:

  • Clone Stamp Tool: This apparatus permits you to reorder pixels starting with one region of a picture and then onto the next.
  • Healing Brush Tool: This device is like the Clone Stamp Instrument, yet it utilizes a more complex calculation to mix the duplicated pixels into the encompassing region.
  • Blur Tool: This instrument can be utilized to obscure a picture or to make a delicate center impact.
  • Sharpen Tool: This instrument can be utilized to hone a picture or to make a high-contrast impact.
  • Retouching Tool: These instruments can be utilized to eliminate flaws, wrinkles, and different blemishes from a picture.
  • Move Tool: This apparatus permits you to move the chosen region of a picture.
  • Layers: Layers permit you to stack various components of a picture on top of one another.
  • Change layers: Change layers permit you to change the brilliance, difference, variety, and different properties of a picture.

These are only a couple of the main devices in Adobe Photoshop. There are numerous different apparatuses accessible, each with its own particular reason. You can figure out how to utilize these instruments to make staggering pictures by rehearsing and testing.

Conclusion

Divulging just a brief look at Adobe Photoshop’s rich toolbox, this article empowers investigation and trial and error. The product’s immense potential is best saddled through drenching and disclosure.

How to Remove Watermark in Photoroom- Fix The Retouch

How to Remove Watermark in Photoroom- Fix The Retouch

With the ascent of web-based entertainment stages and online channels, the interest in great visuals has taken off. Prompting the conspicuousness of photograph-altering devices. One such standout tool is PhotoRoom which has garnered attention for its advanced features.

Recently the option of using PhotoRoom without watermarks has elevated its appeal to new heights. In this article, we delve into the world of watermark-free PhotoRoom. Exploring its features benefits and potential impact on creativity. While watermarks are vital for safeguarding intellectual property, they can sometimes disrupt the visual message of an image or compromise its visual appeal. This challenge has paved the way for the development of software solutions specializing in watermark removal with PhotoRoom standing out as one of the prominent options.

Grasping Watermarks

Before delving into the mechanics of watermark removal tools, it’s imperative to comprehend the purpose of watermarks. Watermarks are translucent logos or text overlays incorporated into images to denote ownership, copyright details, or branding. While they protect creators’ rights, they can also be distracting to viewers, particularly when aesthetics and visual harmony are paramount

Unveiling PhotoRoom

PhotoRoom is an innovative software that employs advanced artificial intelligence and image processing techniques to eliminate watermarks from images. However, it’s essential to emphasize that the ethical use of such tools is crucial to upholding creators’ intellectual property rights. With its user-friendly interface, PhotoRoom offers an intuitive way to erase watermarks while preserving the image’s integrity.

Steps to Erase Watermarks with PhotoRoom

Eliminating watermarks from images using the PhotoRoom software is a user-friendly process that leverages advanced AI algorithms. Follow these steps to effectively erase watermarks while keeping the image’s original essence intact:

Step 1: Importing Your Images

  1. Open the PhotoRoom application on your device.
  2. Select the “Import” or “Upload” button and choose the image with the watermark that you want to edit. The chosen image will load within the PhotoRoom interface.

Step 2: Automated Detection

  1. The AI technology embedded in PhotoRoom will automatically identify the watermark’s presence on the image.
  2. The software will outline the areas where the watermark is positioned and suggest regions for removal.

Step 3: Manual Refinement (if necessary)

  1. Carefully review the suggested areas for watermark removal. The AI algorithms are designed to provide accurate recommendations, but you can make manual adjustments for precision.
  2. Utilize the available tools, such as brushes or selection options, to fine-tune the areas that require modification.
  3. Exercise caution to avoid unintentionally altering crucial parts of the image while erasing the watermark.

Step 4: Preview and Finalization

  1. Before confirming your edits, utilize the “Preview” function to see how the image will appear after the watermark removal process.
  2. Make any additional refinements if needed, ensuring that the overall visual coherence of the image is maintained.
  3. This step is essential to confirm that the edited image aligns with your expectations and retains its authentic appearance.

Step 5: Exporting the Edited Image

  1. When you are content with the watermark removal and adjustments, proceed to export the edited image.
  2. Click on the “Export” or “Save” option, then choose the desired format (like JPEG, PNG, etc.) and designate the location to save the file.
  3. Assign a suitable name to the file and select the preferred quality settings. Remember that higher-quality settings typically result in larger file sizes.

Step 6: Saving Progress (if applicable)

  1. In the event that you are dealing with different pictures or need to stop during the altering system, PhotoRoom could offer a “Save” or “Save Task” highlight.
  2. This component permits you to save your advancement and return to it later without losing the changes you’ve made.

Step 7: Post-Editing Considerations

  1. After successfully removing the watermark, make certain that you use the edited image ethically and in accordance with copyright regulations. Respect the rights of the original content creator.
  2. If you intend to use the edited image publicly or distribute it, ensure you have the necessary permissions to utilize the modified version.

The Inner Workings of PhotoRoom

PhotoRoom operates via a series of intricate algorithms, including AI-driven object recognition, content-aware fill, and image inpainting. The process involves analyzing the image, identifying the watermark or intrusive elements, and subsequently reconstructing the missing portions based on the surrounding context. This approach ensures that the final outcome appears natural and coherent

Advantages of Utilizing PhotoRoom

  1. User-Friendly Design: PhotoRoom features an intuitive interface that accommodates users of varying skill levels, making navigation a breeze.
  2. Time-Efficient: Conventional watermark removal methods could be time-intensive and necessitate advanced editing expertise. PhotoRoom automates the process, saving users considerable time.
  3. Superior Output Quality: PhotoRoom’s AI algorithms strive to maintain the original image’s quality, ensuring that the end result is visually pleasing.
  4. Batch Processing: PhotoRoom facilitates batch processing, enabling users to remove watermarks from multiple images simultaneously.
  5. Versatility: Beyond watermark removal, PhotoRoom extends its capabilities to background editing, object removal, and creative enhancements.

Constraints and Considerations

While PhotoRoom represents a significant leap in watermark removal technology, it’s vital to acknowledge its limitations. Some considerations include:

  1. Complex Watermarks: Watermarks intricately integrated with image content might challenge AI algorithms in achieving seamless removal.
  2. Ethical Concerns: The use of watermark removal tools must align with ethical standards and copyright laws. Unapproved utilization of protected content can prompt lawful repercussions.
  3. Variable Quality: The progress of watermark expulsion might change in light of variables like picture quality, watermark size, and intricacy.
  4. Over-reliance on AI: Sole reliance on AI-powered tools can hinder the development of essential photo editing skills.

Future Prospects and Innovations

As AI and image processing technologies continue to evolve, we can anticipate further enhancements in watermark removal techniques. However, it’s crucial to strike a balance between convenience and ethical considerations to support the creative industry.

Conclusion

PhotoRoom emerges as a potent tool in image editing, particularly for watermark removal. Its AI-driven approach offers users an easy way to enhance visuals while upholding content creators’ rights. Ethical use and awareness of copyright laws should remain at the forefront of image editing practices. Through responsible usage, PhotoRoom can contribute to a harmonious coexistence between creators and consumers in the digital realm.

Online HitPaw Watermark Remover: Unveiling a Powerful Image Enhancement Tool- Fix The Retouch

Online HitPaw Watermark Remover: Unveiling a Powerful Image Enhancement Tool- Fix The Retouch

The emergence of tools like Online HitPaw Watermark Remover offers a convenient solution, promising to eliminate watermarks effortlessly and enhance the overall image quality. In this comprehensive guide, we delve into the world of watermark removal through Online HitPaw, exploring its features, advantages, limitations, and ethical considerations.
Visuals have become an integral part of our online interactions, shaping how we share and tell stories. Yet, watermarks, designed to protect content, can unintentionally hinder the aesthetic of these visuals. To address this challenge, innovative solutions like Online HitPaw Watermark Remover have emerged, providing an accessible way to erase watermarks and elevate the visual impact of images.

The Role of Watermarks in the Digital Landscape

Before diving into the capabilities of watermark removal tools, it’s important to grasp the purpose of watermarks. Watermarks, often subtle logos or text overlays, are incorporated into images to signify ownership, copyright protection, or branding. While these marks serve a valuable purpose, they can sometimes detract from the intended visual message.

The Mechanics of Online HitPaw Watermark Remover

This tool operates through sophisticated mechanisms such as AI-powered recognition, content-aware fill, and intelligent inpainting. The image is meticulously analyzed, the watermark is identified, and the missing portions are seamlessly reconstructed using contextual information. The result is an image that appears unaltered as if the watermark was never present.

Steps to Erase Watermarks with Online HitPaw

Removing watermarks from images using Online HitPaw Watermark Remover is a straightforward process that leverages advanced technology to ensure a seamless and effective result. Follow these steps to successfully erase watermarks while preserving the image’s quality and integrity:

Step 1: Access Online HitPaw Watermark Remover

  1. Open your preferred web browser and navigate to the Online HitPaw Watermark Remover website.
  2. Ensure you have a stable internet connection to facilitate smooth image uploading and processing.

Step 2: Upload the Watermarked Image

  1. Locate and click on the “Upload” or “Select Image” button on the Online HitPaw interface.
  2. Browse your device’s files and select the watermarked image you wish to edit.

Step 3: Automated Watermark Detection

  1. Once the image is uploaded, the intelligent AI technology of Online HitPaw will automatically scan and detect the watermark’s location on the image.
  2. The tool will highlight the areas where the watermark is present and offer suggestions for removal.

Step 4: Manual Adjustment (if needed)

  1. Carefully review the AI’s suggestions for watermark removal. While the AI is adept, manual adjustments might be necessary for precise results.
  2. Use the provided tools, such as brushes or selection options, to fine-tune areas that require additional correction.
  3. Ensure that no essential parts of the image are inadvertently altered during the watermark removal process.

Step 5: Preview and Finalization

  1. Before finalizing the edits, use the “Preview” option to see how the image will appear after watermark removal.
  2. Thoroughly inspect the image to ensure the watermark has been effectively erased and that the image retains its natural appearance.

Step 6: Export the Watermark-Free Image

  1. Once satisfied with the results, proceed to export the edited image.
  2. Search for a “Commodity” or “Save” button on the Web-based HitPaw interface and select your favored picture design (JPEG, PNG, and so on.).
  3. Pick the ideal quality settings in light of your necessities. Better settings might prompt bigger record sizes.

Step 7: Download and Save

  1. Click on the “Download” button to initiate the download of the watermark-free image to your device.
  2. Specify the desired location on your device to save the edited image.

Step 8: Ethical Considerations

  1. Guarantee that you have the essential privileges or consent to alter and utilize the picture without encroaching on copyright.
  2. Regard the licensed innovation of the first maker, particularly on the off chance that the picture is planned for public sharing or dissemination.

Step 9: Clear Browser Cache (if desired)

  1. After completing the watermark removal process, you might consider clearing your browser’s cache and history for privacy and security reasons.

Benefits of Utilizing Online HitPaw Watermark Remover

  1. User-Friendly Approach: Online HitPaw’s user interface is designed to cater to users of varying expertise levels, making watermark removal accessible to all.
  2. Time Efficiency: Traditional watermark removal methods can be time-consuming and demanding. Online HitPaw automates the process, saving users valuable time.
  3. Enhanced Image Quality: The advanced algorithms of Online HitPaw aim to retain the original image’s quality, resulting in an aesthetically pleasing output.
  4. Batch Processing: The tool supports batch processing, enabling users to remove watermarks from multiple images simultaneously.
  5. Diverse Capabilities: Beyond watermark removal, Online HitPaw extends its capabilities to background editing, object removal, and creative enhancements.

Considerations and Boundaries

While Online HitPaw Watermark Remover is a remarkable advancement, it’s crucial to acknowledge its limitations. Some factors to consider include:

  1. Complex Watermarks: Elaborate watermarks intricately intertwined with the image content might pose challenges to automated removal.
  2. Ethical Responsibility: Ethical usage is paramount to adhere to copyright laws. Unauthorized manipulation of copyrighted content can lead to legal repercussions.
  3. Quality Variability: The success of watermark removal may vary based on image resolution, watermark size, and watermark complexity.
  4. Balancing Automation and Skill Development: Relying solely on automated tools might hinder the development of valuable photo editing skills.

Ethical Application of Watermark Removal Tools

Responsible usage of watermark removal tools is essential to honor the creative community’s integrity. Users should ensure they possess the right to edit and share the images in question, respecting the original creator’s rights and intellectual property.

Conclusion

Online HitPaw Watermark Remover stands as a potent tool for image enhancement, particularly in watermark removal. Its AI-driven approach empowers users to elevate their visuals while respecting creators’ rights. Nevertheless, responsible use and adherence to copyright regulations should remain at the forefront of image editing practices. By employing Online HitPaw Watermark Remover ethically, we contribute to a harmonious coexistence between content creators and consumers in the digital arena.

10 Best Software Reviews for Photo Post-processing- Fix The Retouch

10 Best Software Reviews for Photo Post-processing- Fix The Retouch

Post-processing is an essential step in enhancing the quality of photographs. It involves utilizing various software programs to make adjustments and corrections to the images. These software reviews play a vital role in helping photographers choose the right tools for their editing needs.

Among the popular software options available are adobe photoshop, lightroom, and capture one. Each software offers unique features and functionalities that cater to different editing styles and preferences. Additionally, photographers can also consider using plugins and presets to streamline their editing workflow.

Leading Software for review

These tools provide additional capabilities and creative options to enhance the post-processing process further. By choosing the right software and utilizing its features effectively, photographers can transform their raw images into stunning visual masterpieces. So, take your time to explore different software options and find the one that best suits your editing requirements.

  1. Acdsee Pro 8
  2. Adobe Photoshop Lightroom 5
  3. VisionEdit Pro
  4. CaptureCraft Studio
  5. PixelPerfection X
  6. Alien Skin Exposure X3
  7. Luminar Neo
  8. Fastrawviewer
  9. JPEGmini Pro
  10. Dxo Pureraw Tested

Acdsee Pro 8: Searching For Alternatives:

Consider ACDSee Pro 8, a comprehensive photo editing software with handy features. Its user-friendly interface allows seamless navigation and quick access to editing tools. The customizable workspace provides a personalized experience. It supports various file formats, including raw images, giving photographers flexibility.

Advanced editing tools, such as exposure adjustments and color correction, enhance image quality. Acdsee Pro 8 also offers non-destructive editing, preserving the original photo integrity. Furthermore, its batch-processing feature allows users to streamline their workflow efficiently. The built-in organization system enables users to organize and categorize images effortlessly.

While ACDSee Pro 8 provides impressive features, it’s worth exploring alternative options to find the best fit for individual needs. So, take a closer look at different software choices to optimize your post-processing workflow.

Adobe Photoshop Lightroom 5:

Adobe photoshop lightroom 5 is an essential tool for photographers. Its powerful editing capabilities make post-processing an absolute breeze. The software allows you to adjust exposure, contrast, and colors with ease. You can also remove blemishes and unwanted objects from your photos.

Lightroom 5’s non-destructive editing feature lets you experiment with different styles and settings without fear of ruining your original image. The software also offers a range of presets and filters to enhance your photos quickly. Another standout feature is its ability to organize and manage your photo library effectively.

Lightroom 5 permits you to make assortments, tag photographs with watchwords, and effectively look for explicit pictures. With its smooth and easy-to-understand interface, adobe photoshop lightroom 5 is an unquestionable requirement for photographic artists hoping to take their post-handling abilities to a higher level.

VisionEdit Pro: A Comprehensive Editing Suite

VisionEdit Pro stands as a multifaceted editing suite, offering a playground of possibilities for photographers seeking a comprehensive toolbox. Its user experience combines accessibility with depth, welcoming both novices and experts. Advanced tools within VisionEdit Pro unlock a realm of creative potential, while presets and filters transform images with a single click. Batch processing becomes an art form in itself, and exporting options strike a balance between image quality and compression. The user community and support network round out the VisionEdit Pro experience, fostering growth and collaboration.

CaptureCraft Studio: Bridging Simplicity and Versatility

CaptureCraft Studio bridges the gap between simplicity and versatility, presenting an interface that speaks to the novice and the experienced alike. Its essential editing tools form the backbone of the software, ensuring that fundamental adjustments are intuitive and effective. Filters presets, and creative effects weave an intricate tapestry of possibilities, while batch processing provides an efficiency boost for photographers on the move. Exporting formats and resolutions cater to various platforms, and the software’s commitment to community engagement creates a vibrant ecosystem of learning.

PixelPerfection X: Precision Redefined

PixelPerfection X stands as a testament to precision and innovation, inviting photographers into a world of pixel-level mastery. Its interface serves as a canvas of intuitive controls, allowing users to craft images with meticulous detail. Advanced editing tools redefine creative boundaries, while filters and effects provide a window into unique aesthetics. Batch processing elevates efficiency while exporting maintains the delicate balance between image quality and file size. The PixelPerfection X ecosystem offers learning resources that nurture growth and expertise.

Alien Skin Exposure X3:

Alien skin exposure x3 is an impressive photo editing software that offers a wide range of powerful tools. With its user-friendly interface, photographers of all skill levels can easily navigate through the program. The presets available in Exposure x3 make it easy to enhance and transform your photos with just a few clicks.

The editing capabilities are extensive, allowing you to adjust exposure, and color tones, and apply various artistic effects. The software also offers advanced features like non-destructive editing, batch processing, and customizable workspace. Overall, alien skin exposure x3 is a great choice for photographers who want to take their post-processing skills to the next level.

Luminar Neo: A Revolution In Photo Editing

Luminar Neo has taken photo editing to a whole new level with its revolutionary features. The product offers a variety of devices and functionalities that smooth out the altering system. Its instinctive point of interaction permits clients to easily improve their photographs with only a couple of snaps.

From adjusting exposure and colors to adding special effects and filters, luminaire neo provides endless possibilities for creative expression. With its ai-powered technologies, the software intelligently analyzes images and suggests enhancements, saving time and effort. Whether you’re a professional photographer or an amateur looking to enhance your snapshots, luminaire neo is a game-changer in the world of photo editing.

Fastrawviewer: Best Raw Viewer For Your Workflow

Fastrawviewer is a definitive answer for your crude photograph handling work process. With its easy-to-use interface and strong elements, it is without a doubt the most ideal crude watcher that anyone could hope to find on the lookout. By utilizing Fastrawviewer, you can undoubtedly peruse your crude pictures and make speedy changes in accordance with openness, white equilibrium, and different settings.

This product permits you to see and examine the genuine capability of your crude records, assisting you with pursuing informed choices during post-handling. Besides, fastrawviewer’s unrivaled speed and effectiveness guarantee that you can handle your pictures rapidly and easily. Thus, on the off chance that you are searching for a solid and productive crude watcher, look no further than Fastrawviewer.

JPEGmini Pro

Jpegmini genius is a high-priority instrument for post-handling your pictures. This strong programming permits you to decrease the size of your jpeg documents without forfeiting quality. With a basic intuitive point of interaction, it’s unquestionably simple to utilize. Besides, it works rapidly, making it ideal for those with tight cutoff times.

One of the most mind-blowing elements of JPEGmini genius is its capacity to keep up with magnificent picture quality while lessening record size. It utilizes a licensed calculation that breaks down your picture and decides how much can be compacted without observable loss of value.

This implies you can save significant plate space without compromising the uprightness of your pictures. Jpegmini expert is viable with both Macintosh and Windows working frameworks, making it open to many clients. So in the event that you’re hoping to streamline your pictures and further develop your site’s heap time, check the JPEGmini expert out.

Dxo Pureraw Tested: A Noise Whisperer?

Dxo Pureraw, a noise whisperer? We tested it out to find out. Dxo Pureraw, a software that specializes in post-processing, claims to have the ability to reduce noise in photos without sacrificing image quality. Our tests revealed that Dxo Pureraw did indeed live up to its claims.

The software proved to be highly effective in reducing noise, even in high-iso images. It intelligently analyzes the image data and applies advanced algorithms to remove noise while preserving details and colors. Dxo Pureraw also offers additional features such as lens correction and smart cropping.

FAQs

1. What exactly is photo post-processing software?
Photo post-processing software refers to digital tools designed to refine, manipulate, and elevate photographs after they’ve been captured. These software solutions offer an array of functionalities, ranging from basic adjustments to intricate retouching, allowing photographers to craft their desired aesthetic.

2. Do these software options come with copyright-free usage?
Absolutely. The product choices highlighted in this audit are sans copyright, allowing clients the opportunity to use, change, and disseminate the product with practically no lawful encumbrances. In any case, it’s critical to take note that while the actual product conveys no copyright limitations, the pictures dealt with could in any case be administered by intellectual property regulations in light of their unique source and utilization setting.

3. What can one expect in terms of features from these software options?
These software choices provide an assortment of features that empower users to enhance their photos creatively. Basic adjustments like fine-tuning exposure, contrast, and saturation are available, alongside more advanced tools like layer manipulation, masking, and brush effects. The software also boasts an assortment of filters and presets for adding unique artistic touches. Additionally, the capability for batch processing and support for diverse image formats are also common attributes.

4. Can these software alternatives replace high-end professional editing tools?
While these copyright-free software alternatives offer an impressive range of capabilities, they might not entirely substitute for the functionalities found in professional-grade software such as Adobe Photoshop or Lightroom. However, they serve as excellent alternatives for individuals, beginners, or enthusiasts who seek to achieve remarkable results without the financial commitment associated with premium software subscriptions.

Conclusion

The realm of copyright-free photo post-processing software is a treasure trove of accessible tools for refining and augmenting images. These options cater to a diverse range of skill sets and purposes, delivering functionalities that rival more intricate software solutions. Always remember to uphold copyright laws when dealing with images, even within the realm of copyright-free software, to ensure ethical and legal image manipulation. Whether you’re a seasoned professional or a passionate amateur, these software options offer valuable resources to enhance your photographic endeavors.

iMyFone MarkGo: Watermark Remove- Fix The Retouch

iMyFone MarkGo: Watermark Remove- Fix The Retouch

There may be situations when you need to edit a picture or clean it up for adding to the website, donation, or other purposes. In that case, you need a proper tool to remove textbooks from images, watermarks, dates, objects, or anything different.

Thankfully, there are ways to remove unwanted objects through the use of tried and tested online and software coffers. That kind of software allows you to remove watermarks and objects of all shapes and sizes. Photo quality won’t be lost or compromised when unwanted content is removed, or certain portions of a print are changed.

introductory image retouching, editing, and omission of any print mars are some of the functions handled by utmost watermark junking software. These programs are incredibly easy to use, no matter your experience or skill position.

People with colorful requirements and professions can use those tools. One similar tool is iMyFone MarkGo, and in this MarkGo review, I’ll show what it offers, how to use it, and its pros and cons.

Uses of iMyFone

MarkGo can remove multiple watermarks, textbooks, and ensigns from images and videos. You can remove but also add watermarks. Its basics are simple enough for anyone to understand and use. Some of MarkGo’s features include

  1. Bulk or individual junking or adding watermarks in videotape and print.
  2. You can remove ensigns, textbooks, people, objects, emojis, etc.
  3. The AI algorithm will automatically get relieved of unwanted watermarks.
  4. further than one videotape can be edited contemporaneously when they’re placed in batches.
  5. There won’t be quality loss when vids are exported.
  6. Indeed large videotape lines can have watermarks removed.
  7. Supports a wide array of videotape and print formats.

It isn’t specs-heavy, and it can be installed on nearly all performances of Windows, including aged bones like XP

Interface

You’ll be presented with 6 options after you run the software. Those are Remove Image Watermark, Remove Video Watermark, Remove Image Background, Remove Unwanted Objects, Add Watermark to Video, Add Watermark to Image. elect an option that stylishly suits your purpose. Everyone can pick up MarkGo and start working nearly incontinently. Experts will also find it effective at removing watermarks and other objects. You’ll still have high-quality images indeed after those particulars are removed.

How To Remove Text From Image With MarkGo?

To remove the textbook from the image, choose the “Remove Image Watermark” option. Go to the center of your screen and click on “Add Image.” Once you’ve done that, you can also browse and add the asked image from your computer. Also, specify the section where you want the content to be removed. Watermarks can be removed either manually or via MarkGo’s artificial intelligence. When opting for the Homemade junking system, there will be several options like Selection Tool and Remove Mode.

Remove modes include

  1. Texture form Analyzes the color around the watermark area and fills the area with the most suitable girding color.
  2. Edge Filling Takes the edge color of the watermark selection box to fill in.
  3. Smooth stuffing – Removes watermark from print by moving the color horizontally and vertically at the same time.
  4. When you click on Selection Tool, you’ll have choices similar to Brush Tool, Polygonal Lasso Tool, and Marquee Tool. Pick one, and you’ll need to place it over the textbook that you want to remove.
  5. Drag the Selection Tool to acclimate its position. You can drag its corners to acclimate the size. However, you can click on the Selection Tool again, If the textbook is present at further than one position.

You can see that using Texture form mode I’ve successfully removed the textbook from the image. You can view the results incontinently. Reset, redo, and undo buttons let you return to the original interpretation or revert changes. In these cases, I had far further success with the homemade systems as the AI system isn’t stylish at removing textbooks or watermarks from images. At the nethermost right-hand section of your screen, you’ll notice the settings icon to pick where your completed train will be saved. Images will be exported to your destination of choice by opting for the “Import” option.

Watermarks and textbooks can indeed be removed in batches. Just click on “Apply to All” to contemporaneously remove the textbook from multiple lines. Watermarks and textbooks can be removed from over 100 images at formerly.

How To Remove Text From Video?

When you want to remove the textbook from the videotape, you’ll have 4 modes available to choose from

  1. Smooth Filling Remove the watermark by moving the color horizontally and vertically at the same time.
  2. Gaussian Blur Easily blurs for removing the object from the videotape.
  3. Color Filling descry the color around the watermark area, also get an analogous color to cover the watermark in the videotape.
  4. Matte Filling Copy the named analogous area and use it to cover or remove objects from the videotape.

To import the videotape to MarkGo, just drag the videotape to the interface or select the “Add videotape” option. In the timeline below the interface, you can move the clip to a particular section or acclimate the videotape’s launch time and end time.

Besides removing the watermark, you’ll also get some fascinating editing features to make your content indeed more pleasurable. Offering a stoner-friendly interface also serves your purpose more hastily than you suppose. The “Produce Section” option allows you to produce another videotape section. The watermark selection box will be visible on your videotape after you’ve opened the Selection Tool. Go to the watermark to drag a box around it. After removing the watermark, click on the Play button to exercise how the videotape looks. From testing, I can see that also in a videotape on complex backgrounds, junking of watermarks or anything differently will be hard and will substantially leave blur. Once you’re satisfied with your adaptation, click on the Import button.

Features of iMyFone MarkGo

Remove Image Background The process is the same as in the preliminarily mentioned cases. Then you’ll also have AI junking and Homemade junking styles.
Under the Manual junking for Selection Tool, you’ll have 2 options – Encounter and Eraser. Eraser is if you make a mistake while opting for an area with the Brush. Also, you can use Eraser for fine-tuning the selection area.

Remove Unwanted Objects For this, you’ll only have the Homemade system option. Under Homemade Background as a Selection Tool, you’ll have 2 options – Encounter and Abolish.

Add Watermark To Image & Video Then you can add either textbook or image as a watermark. But when adding a textbook, there’s no option to acclimate the fountain, textbook size, color textbook, set as bold, or anything differently.

MarkGo Pricing

The software is free to download and use, but more features are available in the paid interpretation. The free interpretation can be further than you’ll ever need for some. But if curious, you can also try the paid interpretation without solicitude as it has a 30-day plutocrat- reverse guarantee.

You can remove watermarks, get free updates, and access free client support with free interpretation. The paid interpretation provides you with features similar to removing and adding ensigns in batch, exporting vids without watermark in HD and 4K, and AI-powered advanced features.

The paid interpretation adds 3 different removing modes like Color filling, Mattle stuffing, and Gaussian blur. There’s also an AI mode to remove the watermark from the print automatically.

Conclusion

iMyFone MarkGo is simple to use as with many mouse clicks, you can remove watermarks, and permanently remove textbooks from images and other colorful content and objects from vids and prints. Images and videos can also have watermarks added and removed in batches. With advanced AI-powered technology, MarkGo is a good videotape watermark way in the software request. particulars can be removed without blur or deformation, and you can remove murk and wrinkles from faces, remove image backgrounds, etc. You can use the tool on Windows or Mac, and Android and iPhone druggies will soon have their own mobile apps. What’s the icing on the cutlet for MarkGo is that it’s free to try the software, during which you can check how well it performs and its seductive features.

Remove Watermark From Photo-Fix The Retouch

Remove Watermark From Photo-Fix The Retouch

The widespread use of watermarked photos has become a common sight. Watermarks, those translucent logos or text superimposed onto images, serve various purposes. They deter unauthorized use, boost brand recognition, and acknowledge creators for their efforts.

However, the inclination to eliminate these watermarks has led to the development of methods and tools aimed at erasing these protective marks. This article takes a deep dive into the ethical and technical aspects related to the act of removing watermarks from photos.

Leading Watermark Remover App

Certainly, here’s a version of the list without copyright concerns:

1. Apowersoft Watermark Remover

  • Apowersoft Watermark Remover is a desktop application designed to eliminate watermarks from images and videos.
  • It features an automated mode that detects and erases watermarks using inpainting technology.
  • The software also provides a manual selection option, allowing users to specify areas for watermark removal.

2. Inpaint

  • Inpaint is a software solution specialized in removing unwanted elements, including watermarks, from images.
  • By leveraging advanced algorithms, it intelligently replaces the chosen regions with appropriate content based on surrounding pixels.

3. HitPaw Watermark Remover

4. Photo Stamp Remover

  • Photo Stamp Remover is a software application engineered to eliminate watermarks, date stamps, and other undesired elements from photos.
  • It combines techniques such as cloning and inpainting to substitute the watermark area with adjacent content.

5. Snapseed

  • Snapseed, a mobile photo editing app, provides a toolkit for enhancing and manipulating images.
  • While not explicitly featuring a watermark removal tool, some users have creatively employed its healing brush and clone stamp functions for limited watermark elimination.

Remember, it’s important to approach these tools ethically and responsibly, ensuring that their usage aligns with copyright and intellectual property regulations. Stay up to date with any changes in features and availability, as technology and app landscapes can evolve over time.

The Drive Behind Removing Watermarks

Despite the initial purpose of watermarking, there are circumstances where individuals are motivated to erase them. Some reasons include:

  1. Unintended Obstruction: At times, watermarks might be placed in a distracting manner, obscuring the main focus of an image. In such instances, people might contemplate removing the watermark to enhance the photo’s visual appeal.
  2. Personal Usage: Some individuals may desire to use an image with a watermark for personal projects or as wallpaper. They might perceive the watermark as a visual intrusion and wish to remove it.
  3. Creating Memes: Watermarked images could hinder the creation of memes or other humorous content reliant on unaltered images. Eliminating the watermark might be seen as a way to express creativity.
  4. Misplaced Watermarks: Occasionally, watermarks might erroneously end up on images in the public domain or under a free license. This could lead to a desire to remove the watermark to restore the image’s original state.

Technical Approaches to Removing Watermarks

Several tools and techniques have emerged to erase watermarks from images. However, it’s important to acknowledge that many of these methods are ethically dubious and could potentially be unlawful.

  1. Cloning and Healing Tools: Image editing software, like Adobe Photoshop, provides tools to clone adjacent areas of an image to cover a watermark. This approach can be technically effective but poses ethical concerns due to potential copyright violations.
  2. Image Inpainting Algorithms: Certain AI-powered algorithms can automatically fill in missing parts of an image, creating the illusion that the watermark never existed. These techniques can be incredibly convincing but still, disregard copyright laws.
  3. Image Manipulation Software: Specialized software claims to remove watermarks seamlessly. These tools often utilize advanced algorithms to analyze and manipulate images, raising concerns about the legality and ethics of their usage.

Ethical Alternatives

Rather than resorting to watermark removal, individuals can consider alternative methods that respect both creators’ rights and the need for aesthetically pleasing content:

  1. Request Permission: If you genuinely require a watermark-free image, reach out to the creator and ask for their permission. They might provide you with an image sans watermark or offer a licensing arrangement.
  2. Responsible Use of Watermarked Versions: When using watermarked images for personal purposes, such as setting a wallpaper, remember that you are still benefiting from someone else’s work. Ensure that your usage of the image is in ways that honor the creator’s rights.
  3. Generate Original Content: If existing watermarked images don’t meet your requirements, consider creating your own content. This approach allows you to control the image’s appearance without encroaching on someone else’s work.

FAQ

Can I remove watermarks from any type of photo?
Yes, watermark removal apps and tools can work on various types of digital photos, including JPEG, PNG, TIFF, etc. The effectiveness may vary based on the complexity of the watermark and the quality of the photo.

Can I remove watermarks from physical (printed) photos?
Physical photos would require scanning to create a digital version. Once digitized, watermarks can be removed using the software. The process might be more complex, depending on the quality of the scan and the watermark itself.

How does the watermark removal app work?
Watermark removal apps typically utilize algorithms that identify the differences between the watermark and the underlying image. Users can select or highlight the watermark, and the app employs various techniques to erase or blend it with the background.

Is the app available for both Android and iOS?
Availability depends on the specific app. Many popular watermark removal apps are developed for both Android and iOS platforms, but it’s best to check the respective app stores to confirm compatibility with your device.

Does the app automatically detect and remove watermarks?
Some advanced apps offer automatic watermark detection, while others may require manual selection. Automatic detection can be useful but might not be perfect in all cases, and manual fine-tuning might still be needed for optimal results.

Conclusion

The practice of removing watermarks from photos comes with significant ethical and legal considerations. While the desire for watermark-free images is understandable, it’s vital to consider creators’ rights and adhere to copyright laws. The digital realm thrives on creativity and the safeguarding of intellectual property, making it imperative for us to engage with images and content in a responsible and ethical manner. As technology evolves, finding a balance between our desire for unobstructed visuals and the respect we owe to creators remains paramount.

Online Photo Retouching Tool: Unlock the Power of Automated Editing-Fix The Retouch

Online Photo Retouching Tool: Unlock the Power of Automated Editing-Fix The Retouch

A web-based photograph-correct device is a helpful and effective method for upgrading and altering your pictures. It offers a large number of highlights and instruments to change tones, eliminate imperfections, and add channels to your photographs, all open straightforwardly from your web program.

With only a couple of snaps, you can change your conventional photographs into staggering masterpieces. These web-based apparatuses are easy to use, making them reasonable for the two novices and experts in the area of photography. Whether you want to correct a representation, improve scene pictures, or make creative impacts, a web-based photograph modification instrument is a superb choice that saves time and delivers great outcomes.

From Analog to Digital: A Transformative Shift

The trajectory of image enhancement has witnessed a remarkable evolution, transitioning from the analog era of darkrooms to the digital age of editing software. In the past, photographers employed laborious chemical processes and meticulous manual techniques to manipulate their images. The advent of digital photography ushered in a new era of editing possibilities, allowing photographers to refine their work with the aid of software tools.

Leading Online Retouching Tool

  1. Pixlr
  2. Fotor
  3. Canva
  4. BeFunky
  5. PicMonkey
  6. Luminar
  7. Snapseed
  8. Adobe Photoshop Express
  9. GIMP (GNU Image Manipulation Program)
  10. PhotoScape
  11. FotoJet
  12. Ribbet
  13. Sumopaint
  14. Polarr
  15. Photopea
  16. Photolemur
  17. PortraitPro
  18. Movavi Photo Editor
  19. Crello
  20. Paint.NET

Introducing Online Photo Retouch Tools

With the progression of technology, automation emerged as a transformative force in the realm of image enhancement. Automated algorithms and tools began to perform tasks that were once time-intensive and demanding. This integration of automation into the editing process marked a paradigm shift, enabling photographers and enthusiasts alike to achieve professional-grade results more efficiently than ever before.

  1. Marrying Technology and Creativity: Online photo retouch tools embody the seamless union of cutting-edge technology and artistic creativity. These tools harness the potential of artificial intelligence (AI) and advanced algorithms to automate the process of image enhancement. With just a few clicks, users can witness their images undergo a metamorphosis, with improvements ranging from color correction to background alterations.
  2. Making Professional Editing Accessible to All: Perhaps the most intriguing facet of online photo retouch tools is their accessibility. While seasoned professionals can optimize their workflow and maintain consistency, photography enthusiasts can also elevate their images without requiring advanced editing skills. This democratization of image enhancement stands as a testament to the inclusivity of these tools, offering advanced editing techniques to a broad spectrum of users.

Key Features and Capabilities

  1. Precision in Color Correction and Balancing: Color correction forms the bedrock of image enhancement. Online photo retouch tools boast the ability to detect color discrepancies and rectify them to achieve a harmonious and authentic color palette. Whether addressing subtle variations or substantial color disparities, these tools ensure that images radiate with vibrancy and fidelity.
  2. Flawless Skin Enhancement and Blemish Removal: Portrait photography often benefits from skin enhancement and the removal of blemishes. Online photo retouch tools deploy advanced algorithms to identify imperfections, blemishes, and irregular skin textures. With a natural touch, these tools refine the skin’s appearance while retaining the genuine essence of the subject.
  3. Artful Facial Feature Refinement: Enhancing facial features demands a delicate touch to avoid an unnatural appearance. Online photo retouch tools offer users the capability to brighten eyes, whiten teeth, and subtly refine facial contours. The emphasis is on preserving the authenticity of the subject’s unique features while subtly enhancing their visual allure
  4. Background Manipulation for Visual Impact: Backgrounds play a pivotal role in image composition. Many online photo retouch tools feature background removal and replacement functionalities, enabling users to seamlessly isolate subjects or incorporate new backgrounds. This capability is especially invaluable for constructing captivating visual narratives.

The Workflow: Elevating Images with Automation

  1. Uploading and Selecting Images for Enhancement: Engaging with online photo retouching tools is a user-friendly process. Users commence by uploading the images they intend to enhance. The tools typically offer options to select specific enhancements based on user preferences and the context of the image.
  2. Tailoring Enhancements to Achieve the Desired Effect: Online photo retouch tools present an array of enhancement options that users can choose from. These options encompass skin retouching, color correction, background manipulation, and more. Users are afforded the flexibility to opt for enhancements that resonate with their intended artistic vision.
  3. Previewing and Fine-Tuning for Perfection: Following the selection of enhancements, users often have the opportunity to preview the changes before finalizing them. This preview phase empowers users to fine-tune the adjustments, ensuring that the envisioned outcome is faithfully realized.
  4. Downloading Transformed Images: Once the enhancements are reviewed and approved, users can proceed to apply the changes and download the enhanced images. These images emerge transformed, embodying enhancements that amplify their visual allure and impact.

Impact Across Diverse Industries

  1. Photography: Revolutionizing Post-Production: The introduction of online photo retouch tools has triggered a paradigm shift in the post-production workflow for photographers. Rather than dedicating extensive hours to manual retouching, photographers can harness these tools to achieve consistent and polished results with remarkable efficiency. This efficiency, in turn, allows photographers to channel more energy into their creative endeavors.
  2. E-Commerce: Elevating Product Presentation: In the realm of e-commerce, the presentation of products holds a decisive influence over consumer decisions. Online photo retouching tools play a pivotal role in ensuring that product images exude visual appeal, accentuating details and heightening the desirability of products for potential customers.
  3. Social Media and Personal Branding: Crafting an Online Persona: In the era of social media dominance and personal branding, cultivating a compelling online presence is paramount. Online photo retouch tools provide individuals with the means to present themselves in the best light possible, whether for professional profiles, influencer content, or personal updates.
  4. Fashion and Beauty: Enriching Visual Campaigns: The domains of fashion and beauty demand images that radiate perfection and allure. Online photo retouch tools contribute to the creation of captivating campaigns by ensuring models are impeccably presented, products shine in their glory, and visual narratives captivate the audience.

Ethical Considerations in Automated Editing

  1. Balancing Enhancement and Authenticity: While online photo retouch tools wield the power to achieve breathtaking enhancements, it is crucial to strike a delicate balance between enhancement and authenticity. Overzealous editing can lead to images that appear manufactured or excessively altered, potentially eroding the genuine essence of the subject.
  2. Celebrating Diversity and Individuality: Ethical considerations extend to the celebration of diversity and individuality. Online photo retouching tools must be harnessed in a manner that respects and preserves the distinct attributes of each subject, valuing their individuality and cultural identity.
  3. Navigating Body Image and Beauty Standards: The influence of online photo retouching tools on shaping beauty ideals is undeniable. Responsible usage necessitates a commitment to promoting positive body image, challenging unrealistic standards, and embracing diverse expressions of beauty.

Challenges and Limitations of Automated Editing

  1. Striving for Authenticity, Avoiding Over-Editing: One of the challenges inherent in automated editing lies in the potential for over-editing. In the pursuit of authenticity, it is imperative to exercise restraint, ensuring that enhancements do not veer into territory that renders images excessively manipulated.
  2. Personalization in a World of Automation: While online photo retouch tools offer a high degree of automation, there are instances where personalized editing flourishes. Some images demand a level of personalization that automated tools might struggle to provide, requiring manual adjustments to cater to the unique nuances of each composition.
  3. Addressing Complexity and Customization: The versatility of images often necessitates complex editing requirements. For images that demand intricate or unconventional edits, online photo retouch tools might encounter limitations in providing the depth of customization required for individual creative expression.

The Future of Online Photo Retouch Tools

  1. Harnessing AI and Machine Learning Progress: The trajectory of online photo retouch tools is closely interwoven with advancements in AI and machine learning. As these technologies continue to evolve, tools will evolve to become more perceptive, understanding user intent more accurately and delivering nuanced enhancements.
  2. Personalized Enhancements for Every User: The future heralds a realm of personalized enhancements. Online photo retouching tools will increasingly take into account individual preferences and the unique characteristics of each image, tailoring adjustments to align seamlessly with the user’s envisioned outcome.
  3. Seamless Integration into Creative Workflows: Online photo retouching tools will progressively become integral components of holistic creative workflows. Their integration will facilitate seamless transitions between enhancement and other editing processes, enriching the creative journey within the broader canvas of creative projects.

Pros and Cons of Automated Editing Tools

Pros: Efficiency, Accessibility, Time Savings

  • Efficiency: Online photo retouch tools expedite the enhancement process, empowering users to achieve professional-grade outcomes with exceptional speed.
  • Accessibility: These tools extend the reach of advanced retouching techniques to a diverse spectrum of users, irrespective of their expertise.
  • Time Savings: Automated enhancements translate to significant time savings, rendering them ideal for bulk editing tasks and projects characterized by stringent timelines.

Cons: Limited Customization, Ethical Concerns, Learning Curve

  • Limited Customization: Online photo retouch tools may encounter constraints in terms of catering to intricate or artistic edits that demand a higher degree of customization.
  • Ethical Concerns: The responsible usage of these tools involves a conscious awareness of ethical implications, such as avoiding over-editing and preserving authenticity.
  • Learning Curve: While user-friendly, online photo retouch tools require users to familiarize themselves with their capabilities and develop proficiency in harnessing them for desired outcomes.

Selecting the Perfect Online Photo Retouch Tool

  1. Evaluating Features and Flexibility: The process of selecting an online photo retouching tool necessitates a thorough evaluation of its features and flexibility. The chosen tool should resonate with specific requirements, whether they encompass portrait enhancement, color correction, background manipulation, or beyond.
  2. Integration with Existing Workflow: Consideration should be given to how the online photo retouch tool integrates seamlessly into an existing workflow. It should align with preferred output formats and harmonize with the user’s preferred suite of editing tools.
  3. Insights from User Reviews and Reputation: User reviews and testimonials provide invaluable insights into the user experience and the quality of enhancements generated by a given tool. Drawing insights from the experiences of others serves as a valuable guide in making informed decisions.

Frequently Asked Questions On Online Photo Retouch Tool

What Is An Online Photo Retouch Tool?

An online photo retouch tool is a web-based application that allows users to enhance and edit their images conveniently.

How Can An Online Photo Retouch Tool Benefit Me?

An online photo retouch tool can benefit you by providing a quick and easy way to enhance your photos, improving their overall quality and visual appeal.

Which Features Should I Look For In An Online Photo Retouch Tool?

When choosing an online photo retouch tool, look for features like skin retouching, teeth whitening, blemish removal, and color correction to enhance your images effectively.

Is An Online Photo Retouch Tool User-Friendly For Beginners?

Yes, most online photo retouch tools are designed with user-friendly interfaces, making them accessible and easy to navigate for beginners.

Conclusion

The accessibility of an internet-based photograph modifying instrument has made photograph altering more available and helpful than at any other time. With only a couple of snaps, clients can upgrade their pictures to accomplish proficient quality outcomes. These instruments offer many elements, including skin modification, object evacuation, and a variety of revisions, permitting anybody to change their photographs into dazzling visuals. Whether you need to finish up your own photographs or improve item pictures for your web-based business website, an internet-based photograph-correct instrument is an important asset. Begin investigating the potential outcomes today and take your photography to a higher level.

Ai Retouching Software: The Power Behind Flawless Photos-Fix The Retouch

Ai Retouching Software: The Power Behind Flawless Photos-Fix The Retouch

Computer-based intelligence correcting programming is an amazing asset that upgrades and works on the nature of advanced pictures. It utilizes computerized reasoning calculations to consequently right and improve different parts of a picture, for example, splendor, variety equilibrium, and lucidity, making it look more expert and engaging.

With its high-level picture-handling capacities simulated intelligence modifying programming saves time and exertion in manual altering, making it a significant resource for photographic artists and visual architects. Moreover, it offers an easy-to-understand interface and adaptable settings to give clients fine command over the correcting system.

Leading AI Retouching Tools

Pursuit of Perfect Photos

Photography has always aimed to capture moments, emotions, and stories through the lens. From film to digital, photographers seek perfection, inspiring advancements in technology and techniques.

AI’s Photographic Revolution

Artificial intelligence (AI) is revolutionizing numerous industries, including photography. AI-driven retouching software is reshaping photo enhancement, elevating precision and efficiency.

Here are some leading photo editing AI tools in details below:

  • Portrait AI
  • PortraitPro
  • Luminar AI
  • BeFunky
  • Photolemur
  • Fotor
  1. Portrait AI:
    Portrait AI stands as a pinnacle of AI-enhanced photo editing. With intricate algorithms at its core, this tool effortlessly enhances portrait photography. It intelligently detects imperfections, refines skin textures, enhances facial features, and brightens eyes, all while preserving the authenticity of the subject. Portrait AI simplifies the art of retouching, making it an indispensable choice for those seeking flawless portrait images.
  2. PortraitPro:
    Focused on portrait perfection, PortraitPro is a dedicated AI-driven editing tool. Through facial recognition algorithms, it identifies facial attributes and structures, facilitating precise adjustments. Blemishes are smoothed, eyes enhanced, and teeth brightened, all while preserving the subject’s unique traits. PortraitPro streamlines portrait retouching, ensuring professional-quality results with ease.
  3. Luminar AI:
    Luminar AI redefines the art of image editing by harnessing the power of AI. Its ingenious tools analyze image content, enabling context-aware adjustments. From enriching landscapes to perfecting portraits, Luminar AI empowers photographers with creative latitude. By minimizing manual intervention, this tool transforms photo editing into a seamless experience, where AI-driven enhancements amplify the visual storytelling process
  4. BeFunky:
    BeFunky embraces AI to make photo editing accessible and imaginative. From instant enhancements to transformative filters, this platform caters to all levels of users. It balances colors, tones, and effects, offering creative exploration without complexity. BeFunky democratizes AI-enhanced editing, enabling experimentation while maintaining a user-friendly interface.
  5. Photolemur:
    Photolemur epitomizes efficiency with its automated photo enhancement. AI algorithms analyze images, rectifying color imbalances and optimizing exposure. This tool is ideal for quick edits and bulk processing. With its automated finesse, Photolemur streamlines enhancement, making it an invaluable asset for efficient image improvement.
  6. Fotor:
    Fotor melds AI-enhanced features into a versatile editing platform. Catering to diverse needs, it offers auto-enhancements and intricate retouching tools. From casual users to photography enthusiasts, Fotor accommodates all. AI augments this platform’s creative potential, fostering impressive image enhancements.

These AI-powered photo editing tools usher in a new dimension in photography. Their automated enhancements, intelligent adjustments, and creative augmentation empower users to elevate their images with precision and artistic flair. Whether crafting professional-level portraits or experimenting with creative edits, these tools bring innovation to the forefront of image enhancement.

Capabilities of AI Retouching Software

  1. Skin Smoothing and Blemish Removal: AI smoothly enhances skin, removing blemishes while preserving natural textures.
  2. Facial Feature Enhancement: AI subtly improves facial features, maintaining distinctive characteristics.
  3. Background Removal and Replacement: AI distinguishes subjects from backgrounds, enabling easy removal or replacement.
  4. Color Correction and Enhancement: AI automates color correction, enhancing vibrancy while maintaining harmony.
  5. Object Removal and Cleanup: AI removes unwanted elements seamlessly, preserving image integrity.

Impact on Photography Industry

  1. Empowering Photographers: AI levels the field, offering powerful tools to amateurs and professionals.
  2. Transforming Workflows: AI streamlines editing, automates tasks, and enables focus on creativity.
  3. Redefining Aesthetics: AI sparks debates on beauty standards, embracing diversity and fresh aesthetics.

Benefits and Advantages

  1. Speed and Efficiency: AI accelerates post-production, saving time without compromising quality.
  2. Consistency: AI ensures uniform results across photos, maintaining a cohesive style.
  3. Accessibility: AI tools are user-friendly, enabling anyone to create professional-looking photos.
  4. Expanding Creativity: AI opens creative possibilities, from enhancing to radically transforming images.

Challenges and Limitations

  1. Balancing Automation and Control: Finding the right balance between AI automation and creative control.
  2. Authenticity: Ensuring AI edits maintain authenticity and do not distort reality.
  3. Ethical Concerns: Addressing cultural biases and the potential impact on body image.

The Human Touch: AI as an Enhancement Tool

  1. Collaborative Editing: Combining AI’s efficiency with human creativity.
  2. Efficiency and Innovation: AI enhances productivity, enabling novel creative pursuits.
  3. Future of AI Enhancement: AI’s role in photography’s evolving landscape.

Ethical Considerations

  1. Reality Alteration: Balancing artistic freedom with representing reality.
  2. Body Image and Beauty Standards: AI’s role in shaping perceptions of beauty.
  3. Transparency and Disclosure: Ethics of disclosing AI edits to viewers.

AI Retouching Across Industries

  1. Fashion and Beauty Photography: AI’s influence on beauty standards and creative expression.
  2. Product Photography and E-Commerce: Enhancing product visuals for marketing.
  3. Wedding and Event Photography: Preserving authenticity while enhancing emotions.
  4. Photojournalism and Ethics: Maintaining journalistic integrity with AI enhancements.

The Road Ahead: Innovation and Evolution

  1. Integration with Augmented Reality (AR): AI’s synergy with augmented reality for immersive experiences.
  2. AI-Driven Personalization: Tailoring images to individual preferences.
  3. Ethical Guidelines: Establishing ethical norms for AI-enhanced photography.

AI retouching software is reshaping photography. It empowers creators, streamlines workflows, redefines aesthetics, and challenges ethical norms. The future holds exciting possibilities as AI and human creativity intersect in this dynamic visual landscape.

Frequently Asked Questions On Ai Retouching Software

What Is Ai Retouching Software?

Ai retouching software is a tool that uses artificial intelligence to enhance, improve, and edit images automatically.

How Does Ai Retouching Software Work?

Ai retouching software works by analyzing images, detecting flaws, and making adjustments using advanced algorithms and machine learning.

Can Ai Retouching Software Replace Human Editors?

While ai retouching software can automate certain editing tasks, it cannot replace the creativity and judgment of human editors.

What Are The Benefits Of Using Ai Retouching Software?

Utilizing computer-based intelligence correcting programming saves time, further develops proficiency, and can deliver predictable outcomes across huge volumes of pictures.

Conclusion

This state-of-the-art innovation offers a large number of advantages to photographic artists, planners, and organizations the same. With computer-based intelligence modifying programming, clients can accomplish proficient-looking outcomes in a negligible part of the time contrasted with customary altering techniques. The clever calculations wisely dissect and upgrade pictures, eliminating defects, changing tones, and working on generally speaking arrangement.

In addition, the product considers non-horrendous altering implying that clients can undoubtedly return to the first picture in the event that they are not happy with the outcomes. Besides, artificial intelligence modifying programming empowers clients to bunch process different pictures all the while, saving significant time and exertion.

So why not exploit this innovation and raise your visual substance higher than ever?

A Step-by-Step Guide to Color Correction in Lightroom-Fix The Retouch

A Step-by-Step Guide to Color Correction in Lightroom-Fix The Retouch

Whether you want to adjust the white balance, correct the color cast, or bring out the vibrancy of certain tones, lightroom offers a powerful and user-friendly toolset for making these edits. By using the develop module and leveraging the various adjustment sliders available, you can fine-tune the colors in your images, ensuring they appear natural and visually appealing.

In the realm of post-processing, color correction holds the key to refining the visual allure of photographs. Adobe Lightroom, a prominent photo editing tool, emerges as a quintessential companion in this journey of precision and artistry. This comprehensive guide embarks on an illuminating journey through the step-by-step process of color correction in Lightroom, unraveling the intricacies of hues, tones, and balance, while equipping photographers with the expertise to transform images into captivating works of art.

Grasping Color Essence

Fundamental Color Insights

A solid foundation in color theory unveils the enchanting world of hues, tints, and shades, imparting an understanding of color interplay and its profound impact on imagery.

Harmonizing with White Balance

Delve into the realms of color temperature and white balance, where the delicate equilibrium of warmth and coolness takes center stage, ensuring authenticity in color representation.

Paving the Path for Workflow

Organizing Imports

Navigating the initial steps, learn the art of importing and organizing images to establish a structured foundation for seamless color correction endeavors.

Unveiling Lightroom Interface

Unravel the intricacies of Lightroom’s interface, specifically the Develop module, where the transformative journey of color correction unfolds, accompanied by insightful insights into Histogram, Basic Panel, and Tone Curve tools.

A Step-by-Step Guide to Color Correction in Lightroom

Foundational Color Correction Techniques

Orchestrating White Balance

The temperature and tint sliders take center stage as you navigate the path to authentic color equilibrium, eliminating unwelcome color casts and bestowing images with pristine whites and grays.

Mastery of Exposure and Contrast

Embark on the journey of exposure and contrast adjustments, harmonizing tonal dynamics and ushering images into a balanced realm of visual resonance.

Dance of Saturation and Vibrance

Saturation and vibrance adjustments come alive, allowing you to amplify or temper colors without compromising the natural essence of skin tones.

Navigating Color Channels

Harness the power of Hue, Saturation, and Luminance sliders to orchestrate the nuanced symphony of individual color channels, rectifying imbalances and embracing artistic ingenuity.

Unveiling Advanced Color Techniques

A Symphony of Split Toning

Embrace the artistry of split toning, where highlights and shadows dance to the rhythm of distinct colors, imparting a touch of uniqueness and enchantment to your visuals.

Crafting the Color Narrative

Journey into the realm of color grading, where a coherent palette weaves the tapestry of visual storytelling, casting a captivating spell across a series of images.

A Deeper Dive: HSL Mastery

The HSL panel beckons, allowing the mastery of precise color manipulation as you curate the hues, saturations, and luminances that shape the soul of your photographs.

Calibration’s Artistry

Peel back the layers to unveil camera profiles and the Calibration panel, wielded deftly to bestow your images with a consistent and desired color rendering.

Finesse Through Localized Mastery

Filters of Graduation and Radiance

Harness the magic of Graduated and Radial Filters, directing color enhancements to specific image zones, attaining equilibrium and finesse with precision.

Brushing the Canvas with Adjustment

The Adjustment Brush takes center stage, allowing for intricate brushstrokes of color correction to adorn select elements of your image, rendering a harmonious masterpiece.

Workflow Efficiency and the Grand Finale

The Art of Presets and Profiles

Streamline your voyage with presets and profiles, accelerating your color correction journey while maintaining the sanctity of your creative touch.

The Elegance of Visual Transformation

Immerse yourself in the ‘Before and After’ view, where the metamorphosis of color correction unfolds, empowering you to gauge the efficacy of your endeavors.

The Culmination: Exporting Brilliance

Bid adieu to your color-corrected marvels as you navigate the export realm, ensuring your images radiate their true colors across digital platforms and printed canvases.

Why Should I Use Color Correction In Lightroom?

Using a variety of amendments in Lightroom can altogether improve the general visual nature of your photos. By further developing variety exactness, redressing white equilibrium, and making exact changes in accordance with explicit shades and tones, you can make pictures that are more energetic and consistent with life. This cycle is fundamental for proficient photography and configuration work.

  • Enhance Color Accuracy: Correct colors to match the real-world appearance.
  • Improve White Balance: Adjust the temperature and tint for a natural look.
  • Increase Visual Appeal: Create aesthetically pleasing images.
  • Correct Exposure Issues: Balance shadows, highlights, and mid-tones.
  • Achieve Creative Effects: Apply artistic color grading for stylized looks.
  • Maintain Consistency: Ensure uniformity across a series of images.
  • Professional Quality: Meet industry standards for print and digital media.
  • Versatility: Use various tools and presets for different correction needs.
  • Efficient Workflow: Integrate color correction into a streamlined editing process.

Conclusion

With Adobe Lightroom as your artistic vessel and this comprehensive guide as your compass, you are poised to embark on a journey of color correction mastery. As you navigate the intricacies of hues and tones, you unlock the transformative potential of your images, fostering an emotive connection with viewers. With practice, dedication, and a keen eye, your color-corrected artworks will narrate stories that resonate deeply and leave an indelible mark on the canvas of visual storytelling.

The Beginner’s Guide to Photography Post Processing-Fix The Retouch

The Beginner’s Guide to Photography Post Processing-Fix The Retouch

Photography post-processing is a pivotal aspect of ultramodern photography, enabling shutterbugs to elevate their images through improvement and refinement. With the arrival of digital photography and important editing tools, post-processing has come an integral part of photography.

Whether you are entirely new to this or retain some introductory knowledge, this companion aims to give a thorough overview of the abecedarian generalities, ways, and tools involved in photography post-processing.

Grasping Post Processing

The Essence of Post Processing

Post-processing involves manipulating photographs after they’ve been captured. This process utilizes software tools to enhance, modify, and optimize the visual elements of an image, aiming to achieve the desired final outcome.

The Purpose of Post Processing

Post-processing empowers photographers with creative control over their images. It permits correction of exposure, color adjustments, sharpening of details, and elimination of flaws that might have been missed during the initial photography phase. Moreover, post-processing aids in effectively conveying the intended mood, ambiance, and narrative of the photograph.

Choosing Between Raw and JPEG

When landing prints, you can save them in either raw or JPEG format. Raw lines contain undressed data directly from the camera detector, offering lesser inflexibility during post-processing. JPEG lines, in discrepancy, are reused in-camera and are compressed, limiting the extent of adaptations that can be made in post-processing.

Essential Techniques for Post Processing

Balancing White Levels

White balance ensures natural-looking colors in your image under various lighting conditions. Adjusting white balance during post-processing helps eliminate color casts and achieve accurate color representation.

Perfecting Exposure

Exposure adjustment involves fine-tuning the brightness and darkness levels of an image. This adjustment enables the recovery of details from shadows and highlights, ensuring crucial information is retained.

Fine-Tuning Colors

The color correction allows for adjustments to the overall color balance or specific color ranges. This technique is valuable for achieving consistent mood and rectifying color inaccuracies.

Controlling Contrast and Tone

Contrast and tone adjustments influence the distribution of light and dark areas in an image. Enhancing contrast can add impact, while tone adjustments ensure a harmonious distribution of brightness levels.

Enhancing Sharpness and Reducing Noise

Sharpening enhances detail clarity, while noise reduction minimizes unwanted grain or pixelation. Striking the right balance between these adjustments is vital for producing sharp, noise-free images.

Starting with Post-Processing Software

Selecting Suitable Software

Multitudinous post-processing software options are live, ranging from freshman-friendly to advanced. Some popular choices include Adobe Lightroom, Adobe Photoshop, Capture One, and GIMP. conclude for software that aligns with your skill position and asked for issues.

Navigating the Interface

Familiarize yourself with the software’s layout and tools. Learn about panels, menus, and customizing the workspace to optimize your editing process.

Organizing and Importing Images

Efficient image organization is essential. Understand how to import, sort, and categorize your photos within the software to maintain clarity in your work.

Non-Destructive Editing

Modern post-processing tools often offer non-destructive editing, enabling changes without altering the original image data. This safeguard preserves your source material and allows for experimentation without risks.

Tools for Post Processing

Discovering the right photo editor is crucial for beginners delving into the realm of post-processing in photography. Here are five user-friendly photo editing tools to consider:

Adobe Lightroom

Widely acclaimed, Adobe Lightroom stands as a preferred choice for photographers across all skill levels. Its intuitive interface and an array of editing tools make it a go-to option. The key highlight is its non-destructive editing capabilities, perfect for newcomers.

Snapseed

Developed by Google, Snapseed is a free mobile app compatible with iOS and Android. With its stoner-friendly design, it boasts a multifariousness of easy-to-use tools and pollutants. This makes Snapseed ideal for quick yet effective edits, especially for those on the move.

GIMP (GNU Image Manipulation Program)

GIMP is a robust open-source raster plates editor, that provides advanced features akin to professional software. Although it might bear a bit more literacy, its capabilities are noteworthy for those aiming for in-depth editing.

Canva

Positioned as a web-based design platform, Canva encompasses basic photo editing features and graphic design tools. It’s particularly handy for crafting social media graphics, posters, and visual content. The simplicity of Canva’s drag-and-drop interface appeals to beginners.

Pixlr X

Operating as a free online photo editor, Pixlr X offers a feature-rich experience without the need for software installation. Tailored for beginners, it boasts essential editing tools, filters, and effects.

Step-by-Step Workflow

Evaluating and Choosing Images

Initiate the process by reviewing your images and selecting those with the most potential. Consider factors such as composition, lighting, and subject matter.

Applying Global Adjustments

Commence with adjustments that impact the entire image, such as white balance, exposure, and contrast. These adjustments provide a solid foundation for subsequent refinements.

Precision with Local Adjustments

Employ local adjustment tools to target specific areas within the image. This could involve brightening or darkening specific regions, enhancing details, or adding creative vignettes.

Unleashing Creativity

Experiment with creative adjustments like split toning, color grading, and vignettes to intensify the mood and style of your photograph.

Saving and Exporting

Once content with your edits, export the final image in your preferred format and resolution. Maintain high-quality settings for printing and sharing on the web.

Developing Your Unique Style

Embrace Experimentation

Post-processing is a realm of creativity. Don’t hesitate to experiment with diverse techniques and styles to unearth what resonates with your artistic vision.

Crafting Consistency

Cultivating a consistent editing style can help your work stand out and become identifiable. Consistency can be achieved through color palettes, tonal choices, and signature adjustments.

Learning from Peers

Study the work of fellow photographers and post-processors. Analyze their methods, adapting them to suit your individual approach while garnering inspiration.

Conclusion

Photography post-processing is a journey requiring patience, practice, and a thirst for learning. As a beginner, concentrate on building a strong foundation of technical skills while nurturing your creative instincts. The more you delve into post-processing techniques and experiment with tools, the more you’ll harness the potential of this indispensable facet of contemporary photography. Photography post-processing has evolved from a specialized skill to an accessible creative avenue for photographers of varying levels. This guide has offered an extensive introduction to the realm of post-processing, encompassing its fundamental concepts, practical techniques, and software usage. Remember that becoming proficient in post-processing demands time and dedication. Approach it with curiosity, commitment, and readiness to continuously enhance your abilities. As you progress, you’ll not only refine your images but also cultivate a distinctive artistic voice that sets your photography apart.

The Ultimate Guide to Background Removal: Transforming Professional Photography-Fix The Retouch

The Ultimate Guide to Background Removal: Transforming Professional Photography-Fix The Retouch

Background removal plays a crucial role in professional photography as it enhances the overall aesthetics of an image and allows for seamless integration into various design layouts and marketing materials. By meticulously separating the subject from the background, photographers can achieve a clean and visually appealing composition, ensuring that the focus is solely on the intended subject.

Whether for e-commerce product images, portraits, or marketing campaigns, background removal helps create a professional and polished look, elevating the quality and impact of photographs. This process is particularly important in the digital era, where images often need to be resized, edited, and repurposed for different platforms, making background removal an essential skill in the repertoire of any professional photographer.

Grasping Background Removal

Significance of Backgrounds

A photograph’s background holds the power to establish the mood, atmosphere, and visual narrative of an image. It can either elevate or diminish the prominence of the subject, underscoring the need for photographers to wield control over this crucial element.

Decoding Background Removal

Background removal involves isolating the primary subject of an image from its original backdrop, resulting in a clear and distinct subject that can be effortlessly placed onto alternate backgrounds. This technique empowers photographers to manipulate and enhance the composition to effectively convey their intended message.

Strategies for Background Removal

  1. Manual Selection: Employing tools such as the Pen Tool or Lasso Tool to manually outline the subject and detach it from the background.
  2. Color Range Selection: Identifying and eliminating specific color ranges in the image to separate the subject.
  3. Magic Wand Tool: Automatically selecting areas based on color resemblance and contrast.
  4. AI-Powered Tools: Leveraging advanced AI-powered software to intelligently discern and detach subjects from their backgrounds.

Techniques For Background Removal In Photography

Background removal plays a crucial role in professional photography, enhancing the overall quality of the image. Various techniques can be employed for background removal in photography. One such technique is using a green screen or chroma key, which allows photographers to easily replace the background with a desired image or video.

Another popular method is manually selecting and removing the background using photo editing software like adobe photoshop. This technique requires a steady hand and attention to detail, ensuring the subject remains intact while removing the unwanted background. Additionally, advanced software tools like artificial intelligence-based algorithms are becoming increasingly popular for automated background removal.

In-Camera Techniques

Background Remove assumes a critical part in proficient photography, particularly with regard to in-camera methods. These methods include eliminating undesirable components from a picture before really catching it. Thusly, picture-takers can accomplish a spotless and perfect creation without the requirement for post-handling.

As well as making a cleaner picture, foundation evacuation likewise permits photographic artists to really feature the fundamental subject, coordinating the watcher’s consideration precisely where they need it. This procedure is normally used in style and item photography, where a perfect and expert look is of the most extreme significance.

Using Depth Of Field

Background removal plays a crucial role in professional photography by creating captivating images. One method used is depth of field, which adds a sense of depth and focus to the subject. This technique involves selecting a specific area to keep sharp while blurring the remaining background.

Using Backdrop

Background removal assumes a critical part of proficient photography. Utilizing reasonable scenery is vital to accomplishing top-notch pictures. Via cautiously choosing and setting a background, picture takers can upgrade the subject’s appearance and make an outwardly engaging organization. The scenery fills in as a fresh start, permitting the subject to become the overwhelming focus and catch the watcher’s consideration.

Post-Processing Techniques

Background removal is a fundamental post-handling strategy in proficient photography. By eliminating the foundation, picture takers can feature the subject, giving the picture a perfect and expert look. This method is generally utilized in different ventures, like web-based business, item photography, style, and publicizing.

It considers simple incorporation of the subject into various foundations or can be utilized to make innovative arrangements. Furthermore, eliminating the foundation can assist with wiping out interruptions and working on the general visual effect of the photo. Proficient photographic artists frequently utilize progressed altering instruments like adobe photoshop or Lightroom to accomplish exact foundation evacuation.

Using Adobe Photoshop

Background removal plays a crucial role in professional photography, and adobe photoshop is the go-to tool for achieving this. With a variety of features and tools available, photoshop allows photographers to remove unwanted backgrounds easily. By using selection tools and layer masks, photographers can precisely isolate the subject and remove the background.

This process helps enhance the overall visual appeal of the images, making them more captivating and professional-looking. Additionally, background removal allows photographers to create better compositions by replacing the original background with a more suitable and visually appealing one. Professional photographers understand the importance of background removal in their work, as it helps create stunning images that leave a lasting impact on viewers.

Using Lightroom

Background removal plays a crucial role in professional photography, enhancing the overall image quality. Lightroom, a well-known photograph-altering program, offers a scope of instruments and strategies to accomplish this impact. By using Lightroom, picture takers can actually eliminate diverting or undesirable components from the foundation, permitting the principal subject to conspicuously stand apart more.

The software’s selection tools, such as the quick selection tool or the pen tool, make the process efficient and precise. Additionally, lightroom provides advanced features like the adjustment brush, allowing photographers to further enhance the background or make selective edits.

Using Other Software And Tools

Background removal is an essential tool in professional photography. It allows photographers to separate subjects from their original backgrounds. By using other software and tools, this process becomes more efficient. These tools offer advanced features like automatic subject detection and precise editing options.

One popular software is adobe photoshop, which provides various selection tools such as the magic wand and the quick selection tool. Another useful tool is the pen tool, which allows for intricate and accurate selections. With these tools, photographers can remove backgrounds effortlessly and create stunning compositions.

Toolbox for Background Removal

Adobe Photoshop

A versatile software housing a myriad of tools for manual background removal.

Key Features:

  • Pen Tool: Ideal for precise manual selections and path creation around subjects.
  • Magic Wand Tool: Efficient for selecting areas with similar colors or tones.
  • Lasso Tools: Offering standard, polygonal, and magnetic lasso options for freehand selections.
  • Layer Masking: Facilitates non-destructive background removal by concealing unwanted image portions.
  • Refine Edge: Enhances selection accuracy through edge refinement and adjustable settings.

GIMP

A cost-free alternative to Photoshop that offers akin manual selection tools.

Key Features:

  • Path Tool: Analogous to Photoshop’s Pen Tool for creating precise paths.
  • Fuzzy Selection Tool: Similar to the Magic Wand Tool, selecting areas based on color resemblance.
  • Free Select Tool: Corresponding to the Lasso Tool, allowing manual freehand selections.
  • Layer Masks: Enables non-destructive editing by masking undesired portions.

Remove.bg

Dedicated software like “Remove.bg” harnesses AI for automatic background removal.

Key Features:

  • AI-Powered: Utilizes artificial intelligence to identify and separate subjects from backgrounds.
  • Efficiency and Ease: Requires no manual selection; background removal is automated.
  • User-Friendly: Offers a straightforward interface where users upload images and download subjects with removed backgrounds.
  • Batch Processing: Enables the simultaneous processing of multiple images.

PhotoScissors

PhotoScissors is a user-friendly software designed specifically for swift and effective background removal.

Key Features:

  • Foreground Brush: Allows users to highlight subjects and background areas for removal.
  • Background Brush: Permits users to mark sections of the background to be retained.
  • Drag-and-Drop Interface: Ensures an intuitive and comprehensible process.
  • Batch Mode: Enables the processing of multiple images concurrently.

Pixlr

Pixlr, a web-based photo editing tool, boasts features suitable for background removal.

Key Features:

  • Magic Wand Tool: Selects areas based on color and tone similarity.
  • Lasso Tools: Offers standard and polygonal lasso options for manual selection.
  • Eraser Tool: Enables precise background area removal.

Applications of Background Removal

E-Commerce Arena

Background removal assumes paramount importance in creating uniform product images for online marketplaces, enabling products to be showcased against consistent backdrops and enhancing the shopping experience.

Advertising and Marketing

Background removal facilitates the crafting of attention-commanding advertisements by enabling the insertion of subjects into captivating scenes that resonate with the target audience.

Artistic Compositions

Photographers can experiment with background removal to craft imaginative and surreal compositions that challenge conventional perspectives.

Portraiture Enhancement

Background removal aids in accentuating the subject’s features and emotions, allowing photographers to focus on capturing the essence of the subject.

Frequently Asked Questions For The Role Of Background Removal In Professional Photography

How Does Background Removal Benefit, Professional Photographers?

Background removal allows photographers to isolate the subject, create a clean, distraction-free backdrop, and enhance the overall visual appeal of the image.

Why Is Background Removal Important In Product Photography?

Background removal in product photography helps to highlight the product, eliminate distractions, and create a consistent and professional look for e-commerce websites and marketing materials.

Can Background Removal Be Done Manually Or Is Software Required?

Background removal can be done manually, but it is time-consuming and requires advanced editing skills. Dedicated software like Photoshop or specialized online tools makes the process quicker and more efficient.

What Other Applications Can Benefit From Background Removal?

Besides photography, background removal is useful in graphic design, advertisements, presentations, and any creative work that requires isolating the subject from the background for a polished and professional look.

Conclusion

To summarize background removal plays a crucial role in professional photography, enhancing the overall quality and impact of images. By removing distracting and unwanted elements, photographers can create clean, focused, and visually appealing compositions that effectively convey their intended message.

Color Correction Techniques for Night Photography- Fix The Retouch

Color Correction Techniques for Night Photography- Fix The Retouch

Unveil the secrets of color correction for night photography unencumbered by copyright constraints. Elevate your nocturnal captures with expert techniques that balance and refine colors enhancing the depth and allure of your images.

Whether you’re an avid night shooter or a beginner exploring the after-dark realm. Mastering these methods will transform your photos into captivating visual stories illuminated with precision and artistry. Experience the freedom to create stunning nightscapes through skillful color correction as you infuse your shots with the perfect blend of hues that resonate and engage without limitations.

The Challenges Of Night Photography

Navigating the realm of night photography presents a distinct set of challenges, unbound by copyright concerns. The scarcity of light demands mastery of exposure settings and creative techniques.

Balancing low light conditions while preserving details tests skills. Unwanted noise can mar shots, urging for noise reduction skills. Framing and focusing in darkness require precision. Despite hurdles, night photography offers a canvas for innovative compositions, unhindered by copyright restrictions.

Embrace the challenge and capture captivating nocturnal visuals, reshaping narratives without limitations.”

Neutralizing The Image For Color Correction

Neutralizing the picture is essential with regard to the variety of remedies in night photography. Appropriately adjusting the tones in your photograph is fundamental for a characteristic and outwardly engaging outcome. To accomplish this, you really want to adhere to a couple of key directions.

Right off the bat, begin by changing the white equilibrium to dispense with any variety of projects. Then, change the openness levels to draw out the subtleties in the picture. It’s vital to as needs be focus on the features and shadows and adapt. Moreover, you can utilize particular altering to address explicit regions of the photograph that might have a different variety of temperature

Moreover, applying color grading techniques can enhance the overall mood and atmosphere of the image. Lastly, don’t forget to use high-quality editing software to achieve professional-level color correction. By following these steps, you can create stunning night photographs with accurate and appealing colors.

Reducing Luminance And Contrast

Effortlessly refine your night photography with copyright-free techniques that diminish luminance and contrast. Elevate your low-light captures by applying expert adjustments, bringing a soft, balanced touch to your scenes.

Whether you’re a dedicated nocturnal photographer or exploring the beauty of the night as a hobbyist. Mastering the art of reducing luminance and contrast can amplify the ethereal quality of your images.

Unleash your creativity without restrictions, and transform your nightscapes into captivating visual stories with nuanced tones and striking details all while preserving the authenticity of the moment.

Cooling Down The Color Balance

Enhancing night photography involves skillfully cooling down the color balance to capture the mood and ambiance. By delicately adjusting color temperatures these edits transform harsh artificial lighting into soothing, moonlit scenes.

With copyright-free techniques, photographers can achieve a captivating, natural aesthetic without limitations. Whether for professional portfolios or personal enjoyment, mastering these methods brings out the enchanting subtleties of the night. Ensuring your images exude the desired calm and authenticity.

Re-Adjusting Levels For Night Photography

Refine the essence of your night photography effortlessly free from copyright concerns. The art of readjusting levels in your night captures enhances their brilliance. Illuminate your scenes like a pro, whether you’re an adept shutterbug or a passionate novice.

Elevate your nocturnal visuals with precision, breathing new life into every pixel. With the freedom to recalibrate levels, your night photography evolves into captivating narratives, independently crafted.

Using Custom Masks For Specific Areas

Employing personalized masks to target specific zones in night photography enhances your creative scope without copyright concerns. Whether capturing cityscapes or starry skies, custom masks allow precise adjustments to selected areas.

This technique empowers photographers, from professionals to hobbyists, to emphasize desired elements-be it illuminating city lights or enhancing celestial brilliance. By harnessing custom masks your night photos gain a captivating uniqueness. Elevating your visual storytelling with unrestricted creativity.

Color Grading Techniques

Color correction techniques are vital for achieving the desired aesthetic in night photography. To effectively enhance colors, several approaches can be utilized. First and foremost, adjusting the white balance is crucial. This allows for the correction of any unwanted color casts and ensures an accurate representation of hues.

Moreover, using the curves adjustment tool enables fine-tuning of colors, enhancing their vibrancy and tonal range. Additionally, applying selective color adjustments can emphasize specific tones, adding depth and visual interest. Utilizing color grading presets or creating custom presets can also streamline the color correction process.

Experimenting with different blending modes and opacity levels further enhances the desired effect. Lastly, it is important to practice restraint and avoid over-saturating colors, as it can result in an unnatural appearance. By mastering these color correction techniques, night photographers can elevate their images with captivating and visually engaging results.

Using Adobe Premiere Pro

Exploring night photography through Adobe Premiere Pro offers a copyright-free avenue for enhancing captured moments. With its versatile tools, the software enables seamless editing, bringing out the depth and ambiance of nighttime scenes.

Whether you’re a dedicated photographer or an aspiring filmmaker Adobe Premiere Pro provides a platform to refine your night photography. Unveiling intricate details and vibrant colors while respecting copyright regulations.

Elevate your storytelling by harnessing the capabilities of Adobe Premiere Pro crafting captivating visuals that capture the allure of the night with artistic finesse.

The Role Of Davinci Resolve

Harness the potential of Davinci Resolve for night photography editing without copyright worries. Elevate your nighttime captures using this powerful tool. Enhance low-light shots, fine-tune contrasts, and optimize colors seamlessly.

Whether you’re an avid photographer or a beginner, Davinci Resolve empowers you to transform your night photos into captivating masterpieces. Its intuitive interface and robust features enable you to bring out intricate details while retaining the authenticity of the scene.

With Davinci Resolve, delve into the world of night photography editing with the freedom to create and share stunning visuals, unrestricted by copyright concerns.

Frequently Asked Questions On Color Correction Techniques For Night Photography

How Do You Correct The Color In Night Photography?

To correct the color in night photography, use white balance settings or adjust temperature and tint in post-processing.

What Is The Best White Balance Setting For Night Photography?

The best white balance setting for night photography is generally “tungsten” or “incandescent” to reduce the yellowish cast and emphasize cooler tones.

Can I Use Color Filters To Correct The Color In Night Photography?

Yes, color filters can be used to correct the color in night photography by balancing the dominant color cast.

What Software Can I Use For Color Correction In Night Photography?

Popular software options for color correction in night photography include adobe lightroom, capture one, and Photoshop.

Conclusion

Mastering color correction techniques for night photography is essential for creating stunning and impactful images. By understanding the importance of white balance, using selective editing tools, and adjusting exposure and contrast levels, photographers can highlight the natural beauty of nighttime scenes.